How to repair a PowerPoint file: recover your MS presentation!
Repairing lost or corrupt ppt files can be made fast. In this article, you will find out:
- signs of ppt file corruption
- methods, how to recover ppt file
- how Office Recovery can help you
Are you ready? Let's read!
Signs that PowerPoint file is corrupted
There are a number of symptoms that indicate a corrupt PowerPoint presentation. Here they are:
- When you try to open PowerPoint, you may encounter a message on the screen like “PowerPoint cannot open the file type”
- You open the presentation and see that some slides are missing
- You receive error messages similar to these: Out of Memory, General Protection Error, Bad Page Error, Low System Resources, etc.
Naturally, the first question is: How do you repair PowerPoint files? This article tells you about all the methods to repair a damaged PowerPoint presentation.
Method 1. Move the PowerPoint file
If the PowerPoint file is on an external storage device (memory card, SD card, USB drive, etc.), try to remove it from your computer and check that the opening is OK. Conversely, if the PowerPoint file is on the computer, move it to an external drive and try to open it.
If this method helps to repair PowerPoint files, then there were problems with the original file location.
Method 2. Reinstall Microsoft Office
Did the previous method not help? Try the following: If you recently installed MS Office, and after that you cannot open the PowerPoint file or it is displayed incorrectly, there is a possibility that MS Office is not properly configured. Try reinstalling it.
You can download MS Office from the official Microsoft website or, if you have a CD/DVD with MS Office, you can use it for installation (Customize — select MS Office).
To begin, delete the previous MS Office installation by following this series of actions: Start -> Control Panel -> Uninstall a program -> Programs. Select MS Office, then click Remove -> Continue -> OK. Then restart your computer and start installing MS Office.
With the re-installation of the software you will be helped by the Setup Wizard, which is present in the version of the program on the disk and from the official site.
If, after this method, you have not repaired your PowerPoint files, all is not lost; proceed to the next method.
Method 3. Reuse slides
This method is best done in several steps.
First, you need to create a new presentation with an empty slide, which, after repairing your PowerPoint files, can be deleted.
Go to the application, and on the taskbar select “File” -> “New” -> “Blank Presentation” -> “Create”.
Now it is time to insert the damaged slides.
On the taskbar, select the Home button with the left mouse button. Then select the Create Slide tab. At the end of the dropdown bar, you will see the button “Reuse slides” - click on it. Then select “Browse”, and a list of available presentations will appear. You simply need to select the damaged one. Click Open. Now, right-click on one of the slides and left-click on "Insert All."
If you still cannot repair PowerPoint files, proceed to the next method.
Method 4. Open a temporary PowerPoint file
Typically, PowerPoint creates a temporary version of the presentation with the file extension .tmp. You can try to rename this temporary file, as it often helps to repair PowerPoint files. Now go to the temporary folder with the files and right-click on the file, then select Rename. You need to change the file name from .tmp to .pptx. Now try to open this renamed file.
If you did not succeed this way, do not be afraid; go on and read the following method.
Method 5. Open file in PowerPoint Viewer
You can download the free PowerPoint Viewer application to help you repair a corrupt PowerPoint presentation. To do this, download and install the software, following the instructions. Now launch PowerPoint Viewer and try to open your inaccessible presentation.
Did it work? Fine! And if not? Do not worry; the next method is a magic wand that will always help you, even if the above methods have not repaired a corrupt PowerPoint file.
Method 6. Repair PowerPoint files with Office Recovery
Specialized software is what you need for repairing PowerPoint files.
DiskInternals Office Recovery will help you, no matter what the reason was for the damage to the file. The program works with all versions of Windows, including 7, 8, 10, etc. DiskInternals Office Recovery works with hard drives, solid-state drives, flash drives and memory cards (including SD cards, SDHC, SDXC, etc.).
The application has a nice interface with a built-in Recovery Wizard. Therefore, if you are new to this problem, it does not matter, as you will be assisted at all stages of repairing PowerPoint files. Be sure to use the free Preview function before restoring your presentation, so you will see that files can be recovered correctly. In addition, you can download a free trial version of DiskInternals Office Recovery and try it in action without any expense.
To prevent data overwriting, repair your damaged PowerPoint presentation as early as possible to avoid overwriting data. To do this, use the detailed instructions for DiskInternals Office Recovery, which are described below.
Recover PowerPoint presentations with DiskInternals Office Recovery!
Step-by-step instructions:
Step 1. Download DiskInternals Office Recovery software and launch it.

Step 2. Open DiskInternals Office Recovery.
A new window will ask you: "what data do you want to recover?" Select the "Word, Excel, PowerPoint" data recovery.
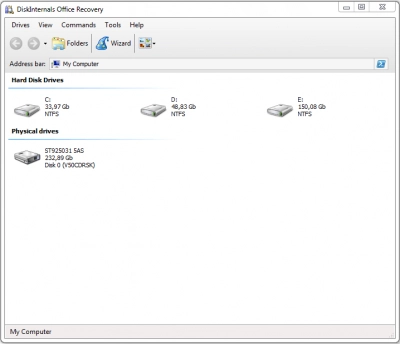
Step 3. Left-click on the disk containing the damaged presentation. Press Next.

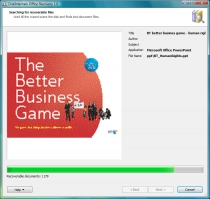
Step 4. Scan the disk. Wait a moment, as it will take some time.
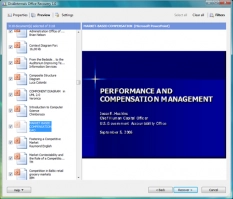
Step 5. Preview and restore. Files that can be restored will be marked with a red cross in the upper left-hand corner. Right-click on the PowerPoint presentation and select “Preview in New Window”.
Step 7. To save the recovered files, you just need to purchase a license for this product and enter the license key in the appropriate window. It is best to save the recovered data in another safe place.


