How to remove duplicate emails in Outlook fast? Learn it here!
In this article, you will find out:
- why duplication of messages has happened
- how to deal with this issue
- how DiskInternals Outlook Recovery can help you
Are you ready? Let's read!
About the Outlook duplicate emails issue
Are you a user of the Outlook application and receive several dozen identical emails every day? Unfortunately, this is a widespread issue and practically everyone who uses Outlook for a long time has to deal with it.
But as messages accumulate, you start to become afraid to erase them, fearing the loss of important data. This can drive you crazy and you may wish to delete the Outlook app, but there’s no need to rush! This problem has several explanations and can be fixed. Just read below.
6 reasons for duplicate emails in Outlook
- 1. Incorrect settings in your account or mailbox. Perhaps you have several identical accounts and each of them receives the same message. As a result, you’ll get some duplicate data.
- 2. The sending or receiving intervals are too short. Here we are talking about a low update rate for received messages. As a result, the program places messages in the Inbox, but cannot define them as Synced.
- 3. Sending rules are not correct. Because of this, conflicting rules can operate simultaneously and, as a result, you get duplicate messages, calendar dates, records, etc.
- 4. Synchronization is broken. This also leads to duplicate mail until this problem is fixed.
- 5. Human factors. For example, if the user independently copies and inserts appointments in the calendar, he may accidentally duplicate them.
- 6. Conflict with your antivirus program. It can intercept sending or receiving an email, thereby duplicating messages.
These are the main and most frequent causes of duplication of emails in Outlook.
Now, let’s understand what to do with them and see whether you can clean up duplicate emails in Outlook 2019/365/2016/2013/2007 (etc.) safely.
Why you need to get rid of duplicates in Outlook
Removing duplicate emails is very important because if you ignore this problem, you will later encounter much more serious consequences.
The simplest consequence is an inconvenience for the user. Indeed, in a set of duplicate emails, it is very difficult to find anything. Moreover, you might skip important notices on which your career or personal plans may depend.
Another consequence is the performance of your computer. Very large PST files and the application itself will significantly diminish it, and this will surely happen because computer resources are not unlimited.
The PST file will gradually grow and may be damaged, and it will take time to restore it.
In addition, no one knows how the computer behaves with this problem, and you may encounter a system error. Therefore, be careful; it is better to delete duplicate emails in Outlook, so as not to have such problems.
How to remove duplicate emails in Outlook
In order to correctly remove duplicate emails in Outlook and not lose important data, you first need to find the reason for the duplicate emails. Knowing it, you can use the necessary method for removing duplicate emails, which you can find below in this article.
Step 1. Check your account
This should be done in order to make sure that you are using only one account, and if not, to delete unwanted accounts and thereby get rid of the duplicate email problem.
So, go to the Outlook application and on the Taskbar, with the left mouse button, select File. Then click the Information tab, and then click Account Settings. Here click on the Email tab; you should see the name of your account. If it appears several times, you need to delete the unwanted account (right-click on it and select Delete).
With this method, you will erase the double account and it will prevent the error in the future. Though, this method may not work, when you having only one account. Continue reading further.
Step 2. Run Clean Up to erase duplicates
Time to get rid of the duplicate messages.
This possible with a built-in free tool for deleting duplicate items in Outlook. To do this, go to the app, move your cursor to the Home tab and select “Clean Up” from the ribbon.
Next, from the list of actions, you can select "Clean folders and subfolders", “Clean up a conversation”, or “Clean up folder”.
- If you choose "Clean folders", you will let the tool delete the folder and all doubled messages will be moved to the “Deleted Item” folder.
- If you choose "Clean folders and subfolders", you will let the Clean Up tool erase not only folders but subfolders too.
- If you choose "Clean up a conversation", all the duplicate mails will be erased and moved to the “Deleted Item” folder.
Which one should you select? That’s your choice. But after every one of these actions, you need to open the “Deleted Item” folder, right-click and select “Empty”.
When the process of removing duplicate emails in Outlook ends, reload the app and check if all duplicates are deleted.
Step 3. Fix your antivirus
As mentioned above, antivirus programs can intercept emails due to email protection features being enabled. All you need to do for removing duplicate emails in Outlook is to go to the antivirus program settings and disable this feature. Then check whether duplicates are still being created or not.
If the problem is not resolved and you still need to eliminate duplicate contacts in Outlook, do not panic; proceed to step 4.
Step 4. Prevent duplicate EMAILS in the future
Don’t forget to check the setting rules: you need to be sure that they are configured correctly and do not work simultaneously.
In addition, in the future, increase the frequency of email updates to prevent duplicates. This will save you from having to eliminate duplicate emails in Outlook.
Here's how to increase the frequency of updating mail: go to the application and select “Send / Receive”, then left-click on “Define Send / Receive Groups”. Then you need to select the update time (for example, every 15-30 minutes) and click OK.
Restart the application for its proper operation.
What to do if Outlook files were lost
If for whatever reason, you've lost some of your important emails, you can recover them with the help of a professional software application — DiskInternals Outlook Recovery.
This application recovers corrupted PST and OST databases, any messages from the Deleted folder, as well as attachments, contacts, tasks, and calendars. This simple and affordable recovery software tool will make the whole process as automated as possible. This is very important for beginners. Before recovery starts, there is a useful Preview function, which is completely free.
When you can see your recoverable files, you can restore them with the same level of quality. If you are satisfied with the result, you will need to purchase a license; enter the license key and save the search result.
With DiskInternals Outlook Recovery, you can export your messages to any other format convenient for you!
For complete confidence, use the step-by-step instructions below, which will facilitate your work.
- 1. Download and run DiskInternals Outlook Recovery (you can use the free trial version of the program).
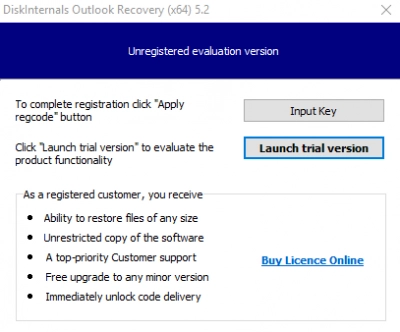
- 2. Select recovery mode:
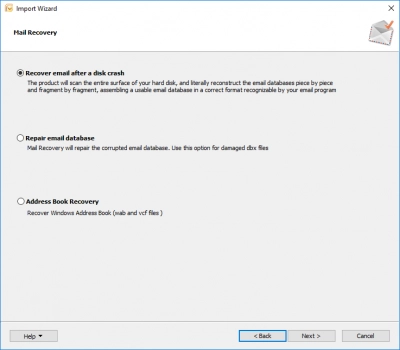
- Email recovery after a disk failure
- Email recovery database
- Recovery address book recovery
- 3. Then select the disk where the deleted data was located.
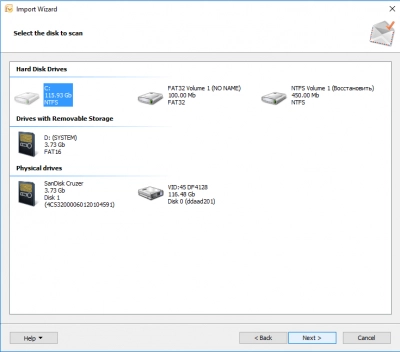
- 4. Scan. This will take some time; wait for the process to complete.
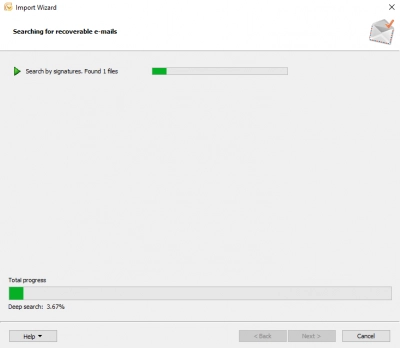
- 5. Preview and restore. Right-click on the file and select “Preview in a new window”. Recovery will occur automatically.
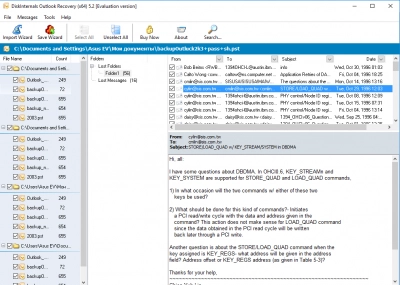
- 6. Saving. Buy a license and enter the license key in the appropriate window. Next, click on the Save button and select a storage location.