How to Fix Error Code 0x80070057

The update error code 0x80070057 in Windows 10 naturally occurs when installing the latest version of Windows 10 on your computer.
If you want to correct this error, you can carefully follow the steps below. You will need Windows 10 administrator rights to accomplish your goal. So let's get down to fixing Windows update error 0x80070057.
In this article you will find out:
- how to get rid of 0x80070057 issue
- how to protect your data
Are you ready? Let's read!
How Error Code 0x80070057 Appears
Windows encountered a storage problem, as indicated by the error number 0x80070057. It's possible that you ran out of space on your hard disk or SSD before attempting to download or copy items. A faulty hard drive, an incompatible file system, or any other storage-related problem might potentially be indicated by this message.
Service Not Running; Unknown Error; Unspecified Parameters
Depending on where in the update service the issue is located, the message that is delivered with error 0x80070057 might change, but it typically contains some variation of "Unknown error," "Unspecified parameters encountered," or just the statement that the "Required services are not functioning."
When the update service or the activity you were participating in stops, you are abruptly returned to the beginning.
Numerous instances of the problem have been made in relation to a certain Windows Update, particularly the 2016 Windows 10 Anniversary Update, or Windows 10 Build 1607. Many people found this problem to be frustrating because it frequently has to do with the Windows Update procedure.
The machine was either momentarily "broken" by the incomplete upgrade process or was simply pushed back to Windows 10 Build 1507. (aka Threshold 1). Unfortunately, the issue hasn't been fixed.
Causes of Error Code 0x80070057
Error 0x80070057 usually occurs when:
- There is corruption while you try to backup your files.
- The System Reserved Partition is damaged and you are attempting to install Windows.
- Corrupt registry or policy entries are preventing Windows Update from working properly.
- The system will attempt to try again later since there were some issues with installing updates.
How to Fix “The parameter is incorrect 0x80070057” on Windows 10
1. Clear Drive Space

Windows Update frequently produces Error 0x80070057 due to the possibility for extremely large update files. The previous version of Windows is likewise housed in a folder called Windows. When the whole system is upgraded, it quickly becomes obsolete and takes up more disk space than it should.
Usually, this happens when Windows Update fails. But it's not the only situation in which this mistake might occur.
By hitting Win + E to launch the File Explorer and selecting This PC, you can see how much space is still available on your system disk. Right-click the disk and choose Properties > Disk Cleanup > System Files if it seems to fit snugly.
Check the Recycle Bin and Windows Update Cleanup in particular before choosing OK and then deleting files to confirm. You can skip the System Files step and start with Disk Cleanup if you want to save Windows Update files for recovery.
2. Sync the Windows Date and Time

Error code 0x80070057 is one of the problems that might develop as a result of your Windows clock being out of sync. Even though this is a less frequent reason, it is usually simple to address.
You may examine the time and date right now by clicking the time in the Windows Taskbar's upper-right corner. If it appears to be accurate, we can go to the following step. In this situation, select Adjust date/time from the right-click context menu on the Taskbar.
3. Check Windows Update

Try setting up automatic updates as follows:
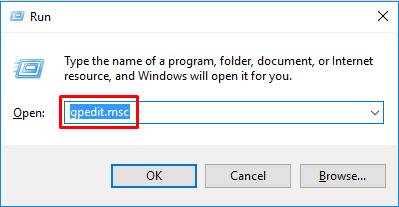
Press and hold Windows and R to open the Run window.
Next, open the local group policy editor. For this, in the Run dialog box, you will need to type “gpedit.msc” and press the Enter button on your keyboard.

Next, open the computer configurations and go to the "Administrative Templates" folder.
Next, open the Windows Components folder, then go to the Windows Update folder. Then locate the "Configure Automatic Updates" file and click the Start button.
You can also open Command Prompt to configure the automatic updating of the Group Policy Editor. Open Command Prompt with administrator rights and enter gpupdate /force.
Then press Enter on your keyboard, wait for the process to complete and restart Windows 10. Now, check if you can use the update function in Windows 10.
4. Run Chkdsk
The quickest method for locating and repairing damaged files is Chkdsk. This Windows program may search your whole hard drive for any broken devices.
Press Win + E to open File Explorer, navigate to This PC, right-click the system disk, and choose Properties to start Chkdsk.
Select Check and Scan Drive from the Tools menu at this stage. The background check will take place. If any problems are discovered, you have a choice in how to react. After repairing them, restart your computer.
5. Use the System File Checker

Using the System File Checker program that comes with Windows, we can examine the system for any potentially damaged files. Any unanticipated corruptions will be found by this tool, and it could even be able to fix them, returning the system to its original state.
To open an elevated Command Prompt, right-click the Start Menu and select Command Prompt (Admin) or Windows PowerShell (Admin). Take the following immediate action:
sfc /scannow
You should probably check the System File Check log if you receive one of these two notifications:
- Windows Resource Protection found corrupt files and successfully repaired them
- Windows Resource Protection found corrupt files but was unable to fix some of them
By first selecting Command Prompt (Admin) or Windows PowerShell from the context menu of the Start button, you may launch an elevated Command Prompt (Admin). Do the following action right away:
findstr /c:"[SR]" %windir%\Logs\CBS\CBS.log >"%userprofile%\Desktopfcdetails.txt"
This will copy the information from the log to a standard notepad file on your desktop.
We may now replace the corrupted file with a known-good copy using the Command Prompt once more. By first selecting Command Prompt (Admin) or Windows PowerShell from the context menu of the Start button, you may launch an elevated Command Prompt (Admin).
We need to take administrative control of the damaged file right now. Please be mindful that in each case where it is given, you must replace pathandfilename with the information from the sfcdetails.txt created in the previous step.
Use the command as indicated below:
takeown /f em pathandfilenameem>
To provide administrators full access to the damaged file system, use the following command:
icacls em pathandfilenameem>/grant administrators:F
To replace the faulty system file with a known-good copy, issue the following command.
copy em sourcefile destinationfileem
The following command could be used to copy a known-good system file to a USB from a device running the same operating system (and the same version, same build, etc.):
copy f:\usbstick\jscript.dll c:\windows
ystem32\jscript.dll
6. Run the DISM Command
If the manual replacement described above is proving to be too difficult or if there are too many files to replace, we may use the DISM command.
The system's file health may be attempted to be recovered and restored using the Deployment Image & Serving Management (DISM) command. At the elevated Command Prompt or Windows PowerShell prompt, enter the following command:
DISM /Online /Cleanup-Image /RestoreHealth
This command may take some time to execute, depending on the state of your system and the degree of corruption. It is reported that this procedure takes around 20% longer than anticipated.
If that occurs, simply give it a little more time to proceed on its own. Check to see if any files have changed when it is done. Upon restarting your computer, do the sfc /scannow command once again if they have. This time, the damaged file ought to be replaced.
7. Fix Group Policy Interference
Although it hasn't always been the case, when Windows 10 was originally released, many users (understandably) took issue at Microsoft's outmoded Windows Update procedure.
Users of Windows 10 Home were often restricted by this system, however users of Windows 10 Pro may modify their Group Policy settings to totally turn off the updating method.
Pressing Win + R will bring up the Run dialog. Once you've used the gpedit.msc command, choose this course. Select Windows Update > Configure Automatic Updates > Not Configured under Computer Configuration > Administrative Templates > Windows Components.
Your computer should restart now that the update is finished.
8. Reset Windows Update Repository
In an effort to fix problems, the Windows Update repository can occasionally be reset. I won't go into great detail about this procedure here because it takes so long.
You may attempt this solution by following the directions on the Microsoft Support page, which I'll call your attention to in order to do so.
9. Windows Update Troubleshooter
Another quick and reliable way to fix a Windows update error is to run the built-in Windows Update troubleshooter.

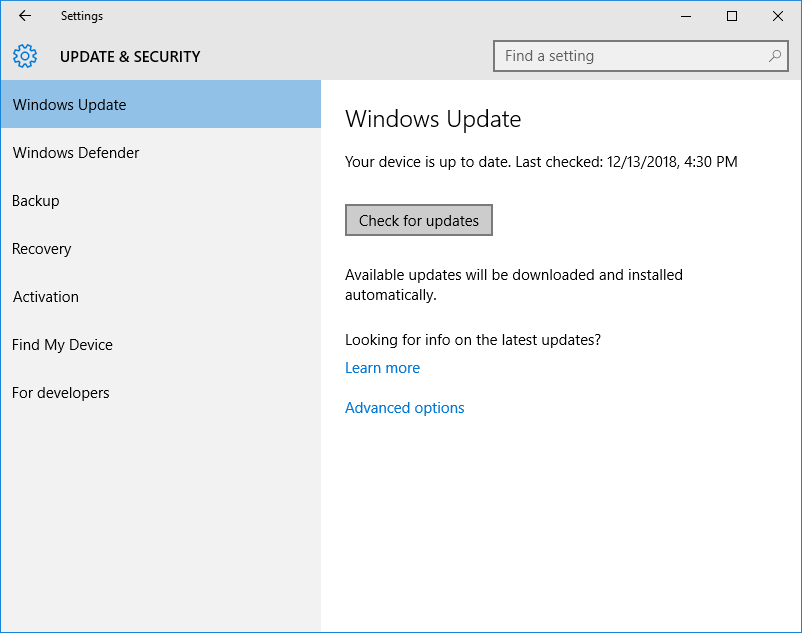
To run it, you need to open the Start menu and select "Settings". Next, go to Update & Security, expand the Troubleshoot section and select Windows Update. Run a Windows Update component scan and wait for it to complete. Of course, it is recommended to reboot the system after that and then try to update the system again.
Maybe, you need Servicing Stack Update
To properly download the latest Servicing Stack Update (SSU), first find out which OS version you are using. This can be done as follows: open Computer Settings, and go to the System section. Next, open “About the program”, and at the bottom of the page, in the “System type” line, you will see your OS version: 32-bit or 64-bit Windows.
The next step is simple: go to the Microsoft Update Catalog website and download the latest SSU.
10. Do a Windows System Restore, Reset, or Format Your Drive
Since you'll lose any modifications made since the last system restore point was created or you'll have to start over after a reset or disk formatting, this is truly your final option. It will, however, resolve any Windows or software problems.
11. Invest in a New Drive
In the worst instance, a hardware issue may be present. The only other option you currently have is to switch out your system drive for a new SSD.
Conclusion
Windows Update Error 0x80070057 is Now Handled, and your system ought to be fully updated at this time. Additionally, you now understand how to resolve any future Windows Update issues that could occur. As long as Microsoft keeps enforcing upgrades, the system will face intense criticism when normal users are adversely affected.
