What should you do in case of 0xa00f4244 error

Error Code 0xa00f4244 occurs on most laptops with built-in cameras in Windows 10. In this case, the error code is accompanied by the message "The camera can not be found". After that, you lose access to the camera and cannot use it to view, edit videos, etc. Of course, this situation should be addressed as soon as possible if you use your camera a lot.
Therefore, especially for you, the fastest and simplest methods of solving the problem "error code 0xa00f4244 (0xc00d36d5)" have been found and described.
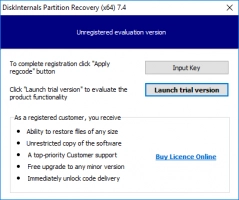
When you're ready to recover corrupted and inaccessible videos and other file, download DiskInternals Partition Recovery
This professional software has been used for many years to quickly and accurately retrieve your corrupted data. The question of how to recover old but very important videos and other data in Windows will disappear from your life forever. DiskInternals Partition Recovery supports the following file systems: UFS, FAT32, Ext 3/4, ReFS, Reiser4, HFS, NTFS, XFS and ReiserFS. You can also use the free trial version of the application, by downloading it you will make sure that the recommended software is easy to use.
Your Possibilities are practically endless! At the same time, the Preview of the files being recovered is provided free of charge for all users of the application. Use step-by-step instructions to help you extract and recover inaccessible data of any format:
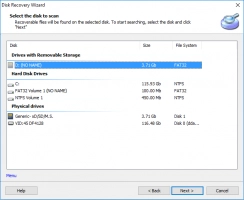
Step 1. Install and run DiskInternals Partition Recovery on a laptop with a problem camera.
Step 2. The recovery wizard will start automatically and ask you to select the type of videos you want to recover, and the location where the videos were allegedly lost.
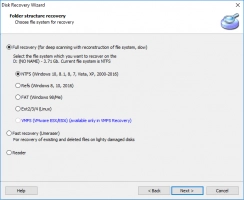
Step 3. Scan. It may take some time, in this case it is better to select the "Full Recovery" scan mode.
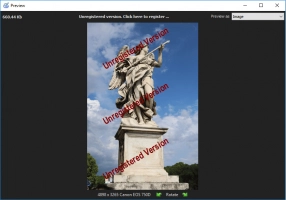
Step 4. Preview the deleted videos by right-clicking them and choosing Preview in New Window.
Step 5. Recovery of videos - this process is fully automated.
Step 6. Save the video files using the purchased license, which you can issue right on the Internet without leaving your home.
Note: To avoid data overwriting, please save the recovered video to another secure source.
Xa00f4244 issue fix
1. Update camera drivers
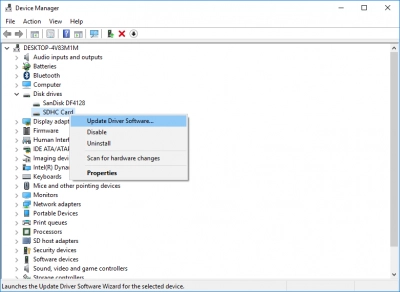
Check and update your camera drivers as this is the root cause of video playback problems.
Right-click the start menu and select the Device Manager application, then go to imaging devices and find your camera. Right-click it and select "Update Driver" and wait for the update to complete.
You can also find the latest updates for the corresponding driver on the Internet, and then simply download and install it on your computer.
If you recently updated your camera driver, the latest driver update may have broken your camera - on the contrary, you should try to roll back the camera driver.
In Device Manager and go to Imaging Devices, right-click your camera and click Properties.
Next, click the Driver tab and click the Roll Back Driver button.
2. Troubleshooting
The troubleshooter can be found along the following path: open the Settings app (press Windows Key + I at the same time) and select Update Security in a new window. Next, go to the "Troubleshoot" section in the left pane and click "Run the troubleshooter".
After finishing this utility, restart your computer and check if your camera works without errors.
3. Use system defender
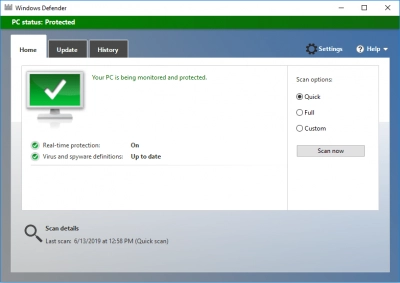
This method allows you to scan your system for viruses, malware using the built-in application - Windows Defender. In the notification area, select Virus & threat protection and click Offline scan. The scanning procedure will take some time, after which your computer will restart.
You can now reopen Windows Defender and select Virus threat protection and start cloud protection.
After the next restart of the computer, check the camera again for errors.
4. Abuse registry
You Will be working with the registry, which means that you need to be extremely careful and focused on this process.
It is recommended that you first back up the registry or create a restore point in order to restore the system if necessary.
So, in the Windows search bar, type regedit and run the utility as administrator.
Go to the following path to 64-bit system:
HKEY_LOCAL_MACHINESOFTWAREWOW6432NodeMicrosoftWindows media foundationPlatform
Click the right mouse button in the right pane and select "New" and select "Value DWORD (64)" - call it value EnableFrameServerMode.
Again, right-click and select "Modify the newly created registry value" and set the value to 0 (zero) for him. Restart your computer and your camera should be fine.
5. Experiment with camera apps
You Can also try switching to a different camera application. These are almost always not Metro style apps. Therefore, they have their formatting software and drivers.
In addition, you can reset the camera settings, it will return to its original state:
Click "Settings", then select "Applications" and click the "Applications and functions" tab.
After that, click "Camera" and then "Advanced settings", click the "Reset" button and wait for the process to complete.
Keep in mind that this will completely reset all changes made to your camera settings.

