0xc000012f error occurs: your actions?
In this article you will find out:
- how to deal with 0xc000012f error
- how to protect your data
Are you ready? Let's read!
1. Use system file check & scannow
You can try to fix the problem with error code 0xc000012f by running the SFC command. This way, you can perform an automatic system recovery. Follow these steps:
Click on the Windows search icon and type "Command Prompt" in the search bar.
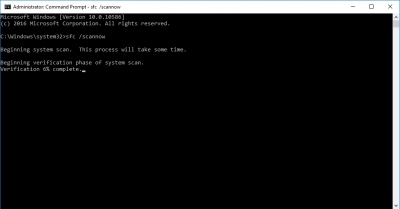
Next, in the search results, right-click on Command Prompt and select "As Administrator". In the command line that appears, enter "sfc /scannow" and press Enter, and wait for the scan to reach 100%. Then restart your computer and check if this solution helped.
2. Rollback updates
If you recently had any updates, you should roll them back. This will tell you if the problem is with one of these updates. So, press the Windows key and enter "Update" in the search bar, then select and open the result "Update and Security". Next, select the Windows Update section and click Advanced options. In the Update History, you will get a list of all updates that were installed successfully and those that failed to install. Then click "Uninstall Update", confirm your decision, and follow the on-screen instructions to complete the process.
If that didn't fix your problem, repeat the steps for each installed update in the list until the problem is resolved.
3. Try third-party software
You can find the latest version of Microsoft Visual Studio Redistributable on Microsoft's official website. Its installation will eliminate the error code 0xc000012f: select the appropriate version (32-bit or 64-bit) and complete the download.
Then open the installer and follow the on-screen instructions to complete the installation of the latest version of Microsoft Visual Studio Redistributable.
4. Look for OS updates
Microsoft often releases updates for Windows 10 that fix errors, such as error code 0xc000012f. Perhaps you also have such an available and not installed update; you need to check it.
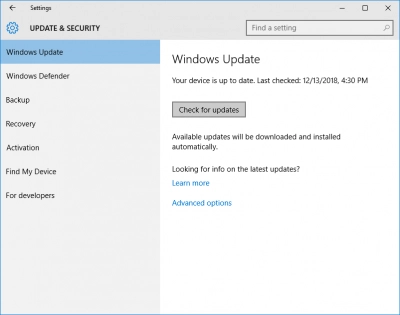
To do this, press the Windows key and type "Update" in the search bar. Select the result "Windows Update" and click Check for Updates. Updates will be installed automatically, and after that, error code 0xc000012f will most likely be eliminated.
5. Clean boot
Performing a clean boot will let you know if the problem is due to some third-party application or startup processes or not.
That is, you first disable all startup processes and then re-enable each service, one at a time. This will determine the source of the error. So, in the search bar, enter "msconfig" and select "System Configuration" in the search results. Next, open the "Services" tab and select the "Hide all Microsoft services" checkbox and click the "Disable all" button. Then you will need to tab the Startup in Task Manager (Ctrl + Shift + Esc). Here, right-click on all startup items and click Disable and close Task Manager.
Now, try to enable one service at a time and watch for windows bad image error Windows 10.
Protect your data
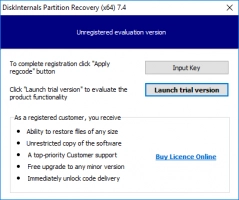
Use DiskInternals Partition Recovery software to protect your data and recover it efficiently as soon as possible. This is the best professional application, which is hard to find analogs.
You can safely download a free trial version of DiskInternals Partition Recovery right now, try it in action and only then buy a license and license key to export data to another medium.
DiskInternals Partition Recovery supports the following file systems: FAT16, FAT32, NTFS, NTFS 5, ExFAT, HFS, HFS +, etc. Recovery Wizard makes working with the application a pleasure: no effort is needed even if you use such data protection for the first time.
Well, for even more convenience, you can use the detailed algorithm, which is described below.
- 1. Download and run a trial version of DiskInternals Partition Recovery or a licensed version of the program.
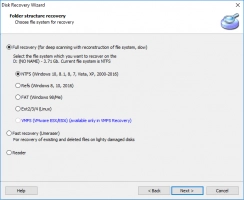
- 2. The Disk Recovery Wizard will start automatically or activate it yourself.
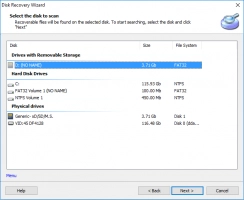
- 3. Select the required drive for scanning from the list of drives and then select the recovery mode: Reader, Fast Recovery (Uneraser), or Full Recovery (the latter is recommended).
- 4. Scanning may take some time.
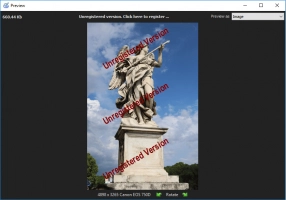
- 5. Preview. For this action, right-click on the desired file and select "Preview in a new window"; the recovery will happen automatically.
- 6. Export. Buy a license and enter your license key. Choose a new location to save the recovered files, and it shouldn't be this B drive. This is necessary to prevent data overwriting.

