When Boot Manager failed to find OS loader: step-by-step guide
In this article you will find out:
- what is that error
- why does this kind of error appear
- how to protect your data
Are you ready? Let's read!
Boot Manager failed to find the OS loader: what is that?
This error is displayed when Startup Repair fails to fix problems on a non-bootable PC. In this case, Boot Manager cannot find the OS loader when the computer boots, and the boot repair tool starts with the message “missing OS loader”.
Why does this kind of error appear?
Let's try to sort all the reasons for the “Boot Manager failed to find OS loader” into several categories:
1: Damaged boot partition (both NTFS and FAT32) on Windows PC due to improper shutdown of the computer, sudden power outage, physical damage to your computer's hard drive, etc.
2: The bootloader has been removed, especially in Windows 7 and later. Boot Manager is usually located on a separate NTFS partition created at the beginning of the disk during installation. This file can be deleted due to a failed installation of Windows Automatic Updates, incorrect OS updates, etc.
3: One of several hard drives was removed. In such a case, if the remote disk was the first boot device in the BIOS, the boot files were installed on that disk, even if Windows was on a different physical disk. Therefore, before replacing the boot disk on your PC, you need to know for sure that the boot files have been moved to another disk.
3 hints on how to deal with issue
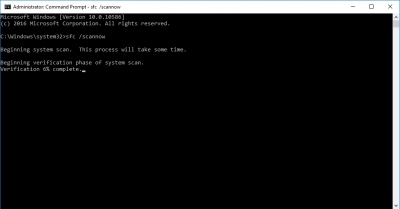
1. System File Checker
First, create a recovery disk. Download the Windows Media Creation Tool from the official Microsoft website, run it on another computer and create a recovery disk.
Now connect this recovery disk to the problem computer, select the language, time and keyboard input and only then click the "Repair your computer" button.
Then select "System Recovery Options", click on the "у Prompt" option to continue and enter the command:
sfc / scannow / offbootdir = C: \ / offwindir = C: \ Windows

Then press Enter.
When all steps are completed, restart your computer and make sure that the error is fixed.
2. Use CHKDSK wisely
This utility checks bad sectors and fixes them at the highest level.
Boot your computer from the Windows installation media, select the language, time and keyboard, and in the next window, click “Repair your computer”.
Next, go to Command Prompt and enter the command:
chkdsk E: / f / r and press Enter. (“E” refers to the system partition).
You should remember that CHKDSK is not a harmless utility. It can cause irreparable damage to your deleted data (that still can be recovered) by cutting it all into small parts without the possibility of recovery. Therefore, you need to take care of your data in advance!
To do this, download DiskInternals Partition Recovery and use the free disk imaging option. This will help you save not only data, but also system configurations. Also, this utility allows you to recover files by deep scanning each disk partition and, if necessary, converting the file system. Here you can use the Recovery Wizard, choose one of three recovery mode and painlessly restore the necessary information. Using the preview function, you will see for free at what level the recovery is taking place. Then you will have no hesitation about buying a license and saving the data on another storage device. Technical support will be with you 24/7!
3. Check Master Boot Record
To do this, you need to start the system using the Windows installation media and open the "Repair your computer" section.
Then click the Command Prompt option to continue, and in the pop-up window, enter the following commands (press Enter after each command):
- bootrec / fixmbr

- bootrec / fixboot

- bootrec / rebuildbcd

If that doesn't work, you can export and remove the BCD and then run this option again. This is how it works (remember to press Enter after each command):
bcdedit / export C: \ BCD_Backup
(c:
cd boot
attrib bcd -s -h -r
ren c: \ boot \ bcd bcd.old
bootrec / RebuildBcd
Remember: before using this method, back up all your important files with DiskInternals Partition Recovery, because these commands will destroy the original data on your hard drive.
