
The issue: We couldn't update the system reserved partition
Here you will find out:
- about "Windows couldn't be installed. We couldn't update the system reserved partition"
- methods that may help you
- how DiskInternals can help you
Are you ready? Let's read!

About "Windows couldn't be installed. We couldn't update the system reserved partition"
This ominous message can display on your monitor if you use Windows. Also, there are a variety of reasons why this may have happened, but the most prevalent one is a lack of available disk space.
Of course, any system failure can also lead to such consequences, but getting rid of this malicious error is still worth it. Let's talk about this right now.
General recommendation

In order for all updates to be installed without problems on a computer and then function normally, you must always make sure you have sufficient free space on the disk. Therefore, it is recommended to systematically remove unnecessary garbage (have at least 15 MB of memory).
To do this, you need the appropriate permissions and capabilities.
File system check and how to use it
Before talking about this method, you should take care of all the data on the disk. If you do not have a backup of them, then first use DiskInternals Partition Recovery, and then proceed to check the storage.

Windows update deleted files? Download a free trial version of the Partition Recovery. After installing and running the program, you will deal with the Wizard, which in essence will do all the work for you. You will only need to choose the appropriate options for action. For example, select the desired file system (there is support for almost all popular file systems), select a specific scanning mode (scanning goes deep into each section of the disk and checks the most inaccessible places for data), etc. You can view any file after scanning; this action will automatically lead to its restoration. Further, all results will be saved and available for export to any medium after buying a license.
Now proceed to the verification itself; this can be done using sfc or chkdsk. Both options are good, so let’s learn more about each.
Open Command Prompt as an administrator (pressing Win and X at the same time will be the fastest way). Enter the command  . After pressing Enter, a study and correction will be launched, if possible.
The chkdsk utility also works through the command line. There may be several commands applicable to your situation:
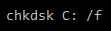 where /F - Correction of errors on the disk, C - this is the disk.
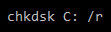 where /R - Search for bad sectors and restore surviving content (requires /F).
After each command, you need to press Enter and patiently wait for the end of these actions. As you know, all changes on the computer, including any corrections, will be effective only when the computer restarts. This may take some time, but be patient.
Windows MBR & GPT instruction
For GPT: open Command Prompt with permissions. Type mountvol B: /s, where B is the drive. After pressing Enter, examine all available documents. Next, type B; this will allow you to go to the disk. The next command is cd EFI\Microsoft\Boot\Fonts and then del*.*; this will remove all fonts and thereby free up space. Naturally, after any command, press the Enter key to make sure it takes effect.
For MBR: open Disk Management and click on System Reserve. Here, find "Change drive name" and rename to drive B.
After that, you need to open a privileged command line. To go to disk, type b and then type cd Boot\Fonts; here will be all the fonts that you need to delete. Then enter the following commands:

icacls 
whoami - this command will prompt the name you need.

del *.*
 - return all posts.
Thus, the fonts are removed, but there is more to be done. Restart your computer and go back to Disk Management and delete the drive letter.
Then restart the computer; the error could not update the system reserved partition should disappear.