External hard drive: “Access is denied” error on Windows 10? Here’s how to fix it!
Any disk can become inaccessible and the external is not an exception. Here you will find out:
- why external hard drive become inaccessible
- how to get permission to access the external hard drive
- how Partition Recovery can help you
Are you ready? Let's read!
Reasons for “Access is denied” error
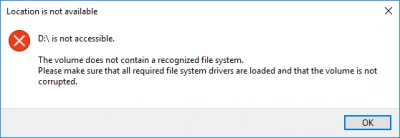
As you surely know, an inaccessible external hard drive doesn't just happen. It is preceded by a number of factors. Here are the main ones:
- A damaged cable or improper connection to an external hard drive
- Damaged file system
- Virus damage to an external hard drive
- Lack of permission to use the disk
- BitLocker external hard disk encryption
These factors are clear, but how do you get permission to access an external hard drive?
This article will help you find the answer to this question.
Step 0. Don’t waste your time on...
- 1. Unfortunately, it is useless to try to start a disk check. Basically, you cannot start an external hard disk at all. In rare cases, you can run it, but the effect of the disk check will be temporary and you will again have to deal with an external hard drive with access denied in Windows 10/11.
- 2. It makes no sense to change the drive letter if you do not have a letter conflict. For example: if the hard disk partition is named D and the external disk name is also named D, there is no need to change the letter of the external disk. It is useless and fixing an inaccessible hard drive will not work this way.
Step 1. Try another OS or older Windows version
Check whether it is possible to access an external disk from another OS. For example, if you are using Windows, try connecting an external hard disk to a computer with a Linux or Mac operating system. You can also try a previous version of Windows (7 or 8). Perhaps your external hard drive is simply not compatible with the OS.
If this method did not help to fix an inaccessible hard drive, proceed to the next method.
Step 2. Get the necessary permissions
As mentioned above, one of the reasons for an external hard drive having access denied in Windows 10/11 may be the lack of necessary permissions to use the disk. So the obvious step is to get those permissions.
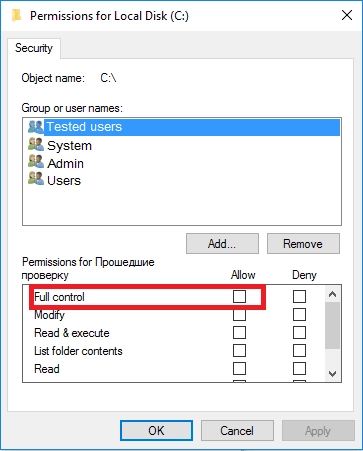
Go to My Computer / This Computer. Select and right-click on the inaccessible disk. From the list provided, left-click "Properties" > "Security" > "Change."
Then a new window “Permissions for a new volume (E :)” will appear, where you should click on the “Add” tab. Now you need to add a new user (“Authenticated User”). Click OK.
Go to the Permissions section. Check the box on the "full control" tab. Click OK.
If for any reason you cannot save these changes or cannot check full control (or any other resolution), you need to try this method in an older version of Windows. Restart the computer and check if the disk is available. If it’s not? And you still don't know how to get access to an external hard drive? Then proceed to the next step.
Step 3. If the problem “hard drive not accessible” is still on
Sometimes the problem has not completely disappeared and you need to completely update the file system of the external hard drive. But before you do this, you need to first restore your files.
If the inaccessible external hard drive is currently available, use Partition Recovery tool. With it, you can open and read files (read mode) or recover data (recovery mode). This application works with the following file systems: NTFS, NTFS5, FAT ReiserFS; Reiser4, XFS, Ext2, Ext3, and Ext4, etc.
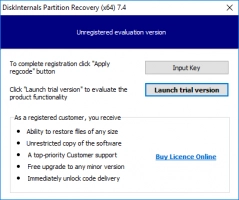
You can use the trial version of DiskInternals Partition Recovery to make sure that all your data can be recovered correctly. Partition Recovery restores damaged documents, photos, videos, music and other files of any type. This best data recovery and reading software has a built-in recovery wizard, so even if you are not technically savvy, you have nothing to worry about; the wizard will do everything for you.
Once your data is in a safe place, you can begin to correct the error inaccessible external hard drive, even the most unsafe methods.
First, download Partition Recovery and install it on your computer (this will not take much time).
A friendly Recovery Wizard will meet you in the welcome window and offer to take the first steps:
Select the hard drive from the list.
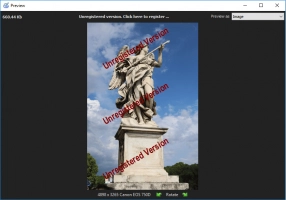
Next comes to select the scan mode (full or fast). In the case of inaccessible external HDD, it is better to use full recovery scanning mode. Then, after the scanning is done, you are offered a completely free preview of found files.
Everything that you have viewed, you can save to any medium after purchasing a license for this application. It does not cost a lot of money, but you will have an indispensable assistant on your desktop for searching and returning deleted and corrupted data of any type. As a bonus, you get an annual DiskInternals technical support.
Tip: recover data partition with ease!Step 4. Use formatting as a last resort
Inaccessible external hard drives are treatable with formatting. Data will be deleted, but the disk will be fully functional. To do this, right-click on the external hard drive and select Format -> NTFS. Click Enter. After formatting, restart the computer. You can also use formatting with Disk Management and reset an unavailable external hard drive.
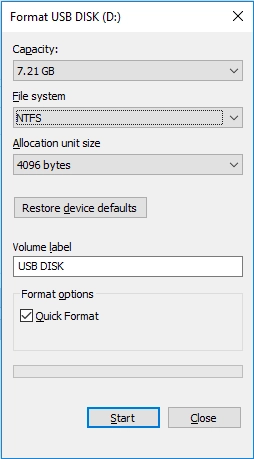
To do this, open Disk Management by right-clicking Start and choosing Disk Management. Next, right-click on the inaccessible disk and click Select Volume Format -> NTFS. Click OK.
Then, restart the computer.
Step 5. Use Command Prompt to prevent this error from happening again
If you try this method at the beginning, you may get this: “There is no support for ACLs.” The same message you will get if you try to take ownership of the fat32 disk.
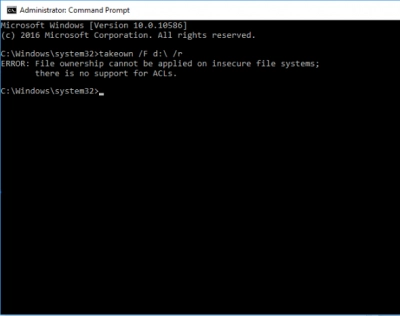
Thus, the best option is to take ownership of the external hard drive immediately after formatting and prevent a “hard drive not accessible” error in the future.
Do the following: Press Win + X.
Then enter “cmd” in the search field and press Enter.
You will see a new window titled “cmd.exe”. Click on it. Then a new line will appear:

Type TAKEOWN with parameter f [here goes path to your HDD] and parameter r” and press Enter.

Finally, you will get something like this:
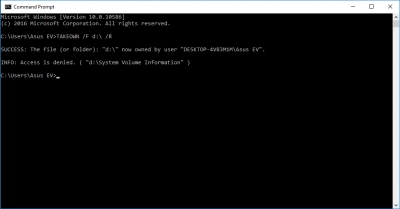
That's all! We hope that the problem of a hard drive not being accessible will never disturb you again.


