Fix the ‘Please insert a disk into USB drive’ error today!
If you wondering what should you do, to fix 'please insert a disk into USB drive' issue on Windows 10, you are in the right place!
Here you will find out:
- symptoms of the “please insert a disk into removable disk” issue
- reasons why you are facing the error
- methods on how to fix the issue
- how Partition Recovery can help you
Are you ready? Let's read!
Signs of the “please insert a disk into removable disk” error
The error is characterized by the following signs:
- When you connect the USB drive to the laptop/PC, it appears in the This Computer folder. Everything seems to be fine, but as soon as you try to open the USB drive, a ‘please insert disk into removable disk’ issue is displayed.
- If you right-click on the USB drive icon and select Properties, you will see something incomprehensible: it shows 0 used bytes and 0 available bytes.
- No user’s action can be performed with the drive (like a copy, send to disk or format).
Why this error has happened
Here are the main reasons for the ‘please insert a disk into USB drive’ issue:
- USB incompatibility and drive letter partition. This is quite a frequent problem.
- Damaged USB drive. This can occur due to mechanical problems and logical errors.
- Incompatibility between the USB drive and the computer’s operating system.
- Damaged disk reader (or card reader, in the case of an SD card).
As you can see, the reasons can range from the simple to the complex. In any case, you need to fix the error ‘please insert a disk into USB drive’ when it appears on Windows 10. And how exactly to do this is described in detail below. The main thing is not to lose heart!
Before you start:
The first time you see the “please insert a disk into USB drive” error, the first thing to try is inserting the USB drive in another laptop/PC. Ideally, a computer with a different operating system than the one on your own.
If your USB drive works fine on it, then make a backup of files from the USB drive and try to format it. If there is no luck with formatting, go back to your computer and use one of the methods below (since you have a backup, you can start with them).
Method 1. Change incompatible USB drive letter
It is likely that this error can be corrected by replacing the drive letter. Basically, this problem occurs if there is an incompatibility with the USB drive and the drive letter of the partition.
For example one of the laptop/PC’s partitions’ name is D and USB drive name is also D.
So, let’s change it!
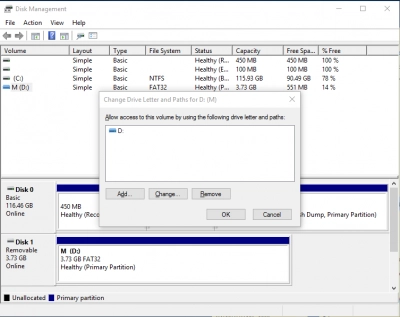
Right-click on Start and select Disk Management from the list. Select the USB disk with the right mouse button. Now click on the “Change drive letter and path” tab. Rename the drive letter to any letter that does not exist already on the computer.
After that, restart the computer and check if the error ‘please insert disk into removable disk’ disappeared.
Method 2. Recover all your files from the USB drive
You can use special professional software to open the USB disk or restore all data on the drive, because if you correct the ‘please insert disk into removable disk’ error, anything can happen to your information (it can be damaged, fragmented or, in general, deleted).
DiskInternals Partition Recovery is what you need at this moment.
The software supports the following file systems: UFS, NTFS, HFS, XFS, Ext2/3/4, ReiserFS, FAT12, Reiser4 ReFS, and others. It also recovers all types of files, including documents, pictures, email, videos, etc. of any size, which matters a lot.
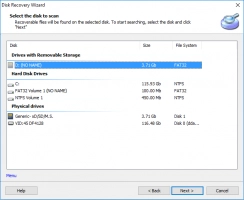
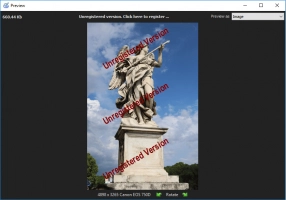
This application is equipped with a simple and convenient built-in Wizard that will accompany you at all stages of data recovery. You can download the free trial version of DiskInternals Partition Recovery right now and try all the functions of the application in action. Before recovery, it is possible to preview the found files and make sure that the quality of the recovery is excellent.
Method 3. Run CHKDSK
CHKDSK perfectly fixes errors on disks, including the error ‘please insert a disk into USB drive’. But, the process cuts all recoverable data into 512 KB pieces. Therefore, be careful with the data and restore your data first, using the previous method. After that, you have nothing to worry about.
So, right-click on the disk and select Properties from the list, then Tools. Now click on the Check tab. Wait until the process is completed and restart the computer.
You can also use CHKDSK in Command Prompt.
Did not help? Proceed to method 4.
Method 4. Delete partition and create a new one
Another helpful method is to delete the existing partition. As you may guess, that will lead to data loss, so make sure you have a backup or create it with Partition Recovery.
To delete a partition, you need to right-click on the Start button and choose Disk Management. Here, find your drive and right-click on it. Click the Delete Volume tab. After that, you need to create a new volume. Right-click your drive. From the list, select "New Simple Volume."
Next, you need to set up the basic parameters (size, drive letter, etc.). Click OK. Now restart the computer and reconnect the USB drive. The problem should disappear.
Alternative Method 4 to solve “please insert a disk into USB drive” error
If you prefer to work with Command Prompt, here is an alternative way to remove the error. Another Windows utility that can help you is Diskpart.
In order to use it, you need to click Start and type “cmd” in the search bar, then press Enter. In the command line window that appears, type the following commands, after each of which press the Enter button.
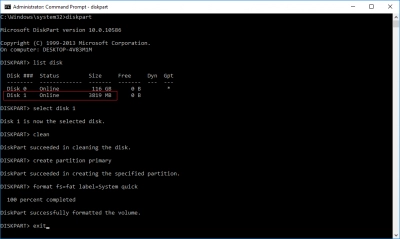
diskpart [with this command you will enter the utility]
list disk [with this command you will see all disks that exist on your computer]
select disk 1 [ 1 is an example as a number of your USB drive]
clean [with this command you will erase all information from the USB drive]
You will see: “Diskpart succeeded in cleaning the disk”.
create partition primary
Now, it time to give a file system to the new partition. For the USB drive, fat32/fat is mostly used, but it could be ntfs too.
format fs=fat label=System quick
When you will see: “Diskpart successfully formatted the volume”, type exit and press Enter.

