Here is how to fix the ‘Folder keeps reverting to read only’ issue

In order to protect data from changes, some categories of folders or files are read-only. Often, removing a read-only status can be easily removed.
However, it happens that the operating system automatically returns read-only mode to folders or files. And this naturally causes you certain difficulties, since you do not have the opportunity to change or supplement the documents you need.
But you also need to know that often the latest updates to the Windows 10 operating system can be the main cause of this problem.
Let's try to solve the ‘Folder keeps reverting to read only’ problem in the simplest and most effective way!
In this article you will find out:
- how to get rid of this issue
- how to protect your data
Are you ready? Let's read!
Configure access options
With access control, the operating system protects files or folders from being edited by additional applications. In order to remove the function of controlled access to folders, follow the instructions below.
To get started, hold down the Windows + S hotkey combination and type "Windows Security" in the search bar. Click on "Windows Security" in the window that appears. Find the Home Icon and select the Virus & Threat Protection subsection.
Scroll down the Windows Security window and you'll find the antivirus and threat protection settings section. Select the Manage Settings option. In a new window, the line "Controlled access to folders" will be displayed and the section "Controlling access to controlled folders" is located right there.
Disable the above option with the right mouse button. Then close all windows and restart your operating system. In the event that nothing has changed after loading the OS, go to the next item.
Change folder preferences
Another solution to the problem may be to change the properties of a folder or file that is read-only.
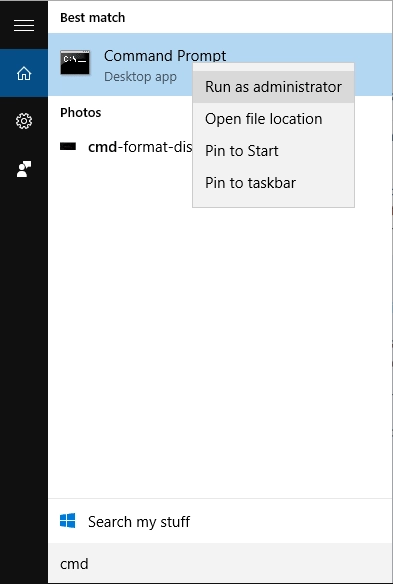
Press the hotkeys Windows + S and enter "cmd". Do not forget to log in as an administrator. To do this, right-click on the line and confirm the "Run as administrator" item.
The Command Prompt will appear on the screen. Enter this code there and change it to the required one. For example, you have a read-only file “Document.doc”. Change the path where this file is located in your operating system by typing attrib -r + s C: \ Users \ Documents \ New folder \ Document.doc.
This means that you have removed the read-only property values for your file and set a new property as default. Open the file and make sure the file is editable. But be careful. If suddenly you find that the file is not only available in read-only mode, but also damaged, you can undo the property changes.
Repeat the actions with Command Prompt and undo the actions in the CMD section; at the end, press Enter. This procedure will override the system attribute that was assigned by the previous steps.
Work with drive options
Another solution would be to enable disk permission and check it.
In Explorer, right-click on the hard drive in the directory which contains your read-only file or folder. At the bottom, find the "Properties" tab. Find and click here the "Security" section and enter the "Advanced" menu.
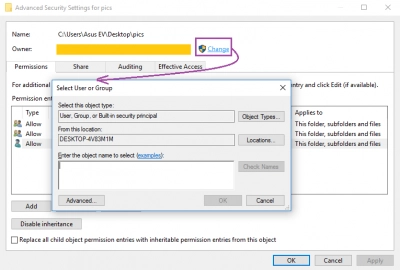
The security settings in the advanced mode should appear here and here they need to be changed. To do this, find and click on the "Permission Entries:" account. Here you can change the properties "This folder, subfolders and files" to "Full Control".
Finally, click on "Apply" for the changes to take effect. If you have several accounts on your personal computer in addition to the administrator, you need to extend the permissions to all accounts. Open Command Prompt with the keys Windows + R. Type the address "C: \ Users" and press Enter.
Here in a separate window a list of folders will open, you need to find "Users". Right click on the folder and click on "Properties". Find the "Security" and "Advanced" section. Here you will find the "Enable inheritance" tab; enable it.
Close all windows, and be sure to save the changes. Try to check if the required folder or file can be edited.
Try DISM/SFC
If the above method did not help you, you can use the System File Checker tool to try to repair the corrupted files on your operating system.
Open the line with Windows + R keys and write the code cmd. To scan in SFC mode, enter the sfc /scannow command at the line.
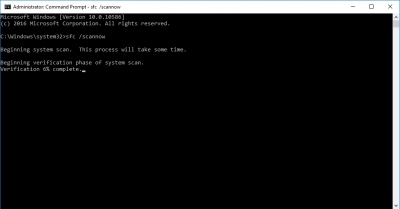
A simple scan will be performed. Scanning in DISM mode will not be difficult for you, just enter the following commands one by one: DISM.exe / Online / Clean image / Scanhealth; DISM.exe / Online / Cleanup-image / Restorehealth; Dism.exe / online / cleanup-image / startcomponentcleanup.
Once you are done with these steps, close Command Prompt and restart your operating system.
Work with drive options
In order not to lose the files or folders you need, you should always have an excellent tool for recovering files and folders at hand. One of the best tools out there is DiskInternals Partition Recovery.
An easily accessible and intuitive interface will help you recover data of any size and type. DiskInternals Partition Recovery easily works with absolutely all storage media, for example, with an external hard drive, with memory cards, HDD, USB flash drive, SSD, IDE disk, SATA disk, SCSI disk, etc.
However, you should always remember that as soon as the files you need are damaged or deleted, do not perform any of the actions. For example, do not create or add new files or folders at this location on the disk. This will overwrite the disk and permanently erase everything on it. The trial version of DiskInternals Partition Recovery contains the ability to preview the recovered files after searching for damaged files. You can make sure that the program has the ability to recover a seemingly permanently deleted file.
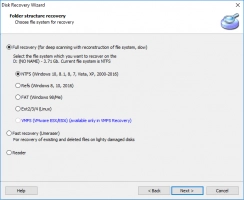
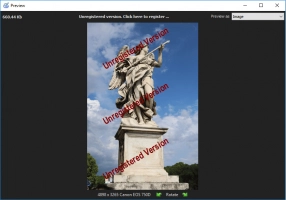
To complete the recovery, you only need to purchase a license, enter a license key and select a location on your hard drive where the files will be saved. With DiskInternals Partition Recovery, you can always get the file you need back without too much trouble.
