Guide on how to deal with Windows 10, 11 Explorer.exe Errors
Here you will find out:
- how to deal with errors
- how DiskInternals Partition Recovery can help you
Most Common Issues
Explorer.exe application errors on Windows 10, 11 are a fairly common problem and can occur in several cases:
- When the system is shutdown, in which case the message will look like this: Explorer.exe application Error Shutting down Windows 10, 11.
- Immediately after rebooting the system, in this case, the message looks like this:: Explorer.exe Application Error Unable to Read the Instruction from the Specified Memory.
- Immediately after booting the computer and it looks like this: Explorer.exe Error When Starting Windows 10, 11.
- Immediately after restarting the message looks like this: Unable to Write to Explorer.exe Windows 10, 11 memory.
To fix this problem, no matter what circumstances caused it to appear, carefully study this article and apply it to solve the problem.
Need to Update or Restore OS? Make Sure Your Data is Protected
Your system may need updating, so do it right now. Click Start, go to Settings and click on the Update & Security section. Next, click on the option Windows Update and download the latest updates.
Note: do this regularly and your system will be stable.
In addition, a system restore using a disk image can help you. After all, many Windows 10, 11 errors are associated with corrupted files that prevent the computer from working at full capacity.
In this case, you can use a professional tool that will not only restore all damaged files, but also recreate the system configuration using a disk image.
Meet DiskInternals Partition Recovery - a unique utility that can recover any data. You can download a free trial version of Partition Recovery right now, try it out and see the search results, and create a disk image. Based on your own findings, you can then buy a license and export the data (you don't have to go through the entire recovery process again, the results will be saved). This utility works with all versions of Windows, including Vista, 8, 10, 11.
In addition, you can recover files of absolutely any size, while the file system can be very different: FAT16, FAT32, NTFS, NTFS 5, ExFAT, HFS, HFS + etc. The Recovery Wizard makes working with the application a pleasure: no effort is required, even if you are recovering files for the first time. You can use the detailed algorithm below:
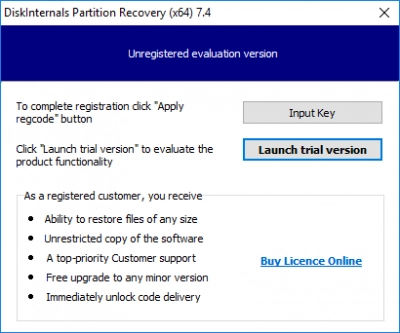
1. Download and run a trial or licensed version of DiskInternals Partition Recovery on your computer.

2. The Disk Recovery Wizard will start automatically and will not leave you for a minute until the end of the recovery process.
3. Select the drive, then select the recovery mode: Reader, Quick Recovery (Uneraser) or Full recovery (recommended in case of recovering large and long-lost data).
4. Scanning may take some time, so be patient.


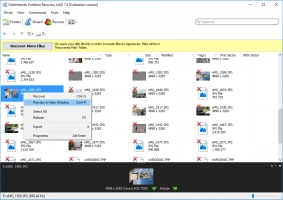
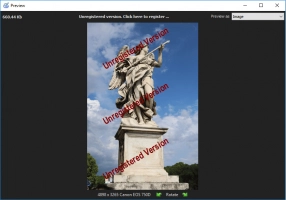
5. To access the next option - Preview, right-click on the desired file and select Preview in New Window" - this feature is completely free for you.
6. Buy a license and enter a license key to access the export of data recovered thanks to DiskInternals Partition Recovery. Choose a new location to save the recovered files, and it is better that it is not the same disk (to prevent data overwriting).
Adjust Memory Preferences
In addition, for Windows 10, 11 Restart Explorer problems, you can also change the size of the virtual memory.
To do this, open File Explorer, right-click on This PC. Next, open Properties, click Advanced System Settings, and open the Advanced tab. Then you will need the Performance section where you will click the Settings button. On the tab Performance Options, find and select the Virtual Memory section, click the Change button. Deactivate the Automatically Manage Paging File Size for All Drives and Options, select the Custom Size option.
Enter the maximum size in MB and click Install. Save your changes and check if there are any problems with the explorer.
Examine Disk
Be sure to check your hard drive if the error still bothers you.
To do this, go to My Computer, right-click on your system drive (C :) and select Properties.
Next, click on Tools, then click on the Error Checking button. Select Scan Disk and wait for the process to complete.
If, after restarting your computer, your hard drive is still causing the Explorer.exe system error, you can check the drive in another way:
Go to the command prompt as administrator, enter the following line and press Enter on your keyboard:
chkdsk / f C:
Wait for the process to complete and reboot your computer as soon as possible.
SFC & DISM
Run an SFC scan, which will check your disk for all system errors and fix them as soon as possible.
This is easy to do, just go to the command line from the administrator and enter: sfc / scannow. Then press Enter and wait for the process to complete.
If this powerful tool didn't work for you, don't worry, as you can run an even more powerful tool: DISM.
To do this, you also need to open a command prompt and type the following:
DISM.exe / Online / Clear image / Restore Health, press Enter and wait for the process to complete.
If internet access is difficult, try using the installation USB and enter the following command:
DISM.exe / Online / Cleanup-Image / RestoreHealth / Source: C: RepairSourceWindows / LimitAccess, press Enter.
Where C: Repair Source Windows is the path on your USB.
Next, you should follow the instructions provided on the screen and complete this verification process.
Hopefully, one of these troubleshooting tools helped you.
Change Taskbar Viewing Options
Disabling automatic hiding of the taskbar, sometimes helps to solve the problem with the Explorer.exe application.
Go to Settings and go to Personalization. Then click Taskbar and turn off the options:
- Automatically Hide the Taskbar in Desktop Mode,
- Automatically Hide the Taskbar in Tablet Mode.
Next, just reboot your computer and check if that resolves your problem.
Look for Memory Issues
If none of the above helped you, we suggest using another tool - the Memory Diagnostics Tool. The utility will scan your system memory for any problems and give you the appropriate recommended solutions. This allows you to take further corrective action.
To start a scan, click on the search bar and enter Memory Diagnostics. In the results, open the Memory Diagnostic Tool and click Restart Now in the new window. During the system reboot, a memory scan will occur and then a report on the monitor screen. This should help you!
