Issue: Host Process for Windows Services high disk usage
In this article you will find out:
- what is Host processes
- reasons behind high or even 100% disk usage
- solutions to the high disk usage problem
Are you ready? Let's read!
What is the Host Processes for Windows?
The Host Process for Windows is required for most system services to load correctly and thus is an essential component in all versions of Windows. These services are necessary for the normal operation of the operating system. When they are loaded from executable (.exe) files, they can run as full-fledged processes in the system, while in the Task Manager they are listed under their names.
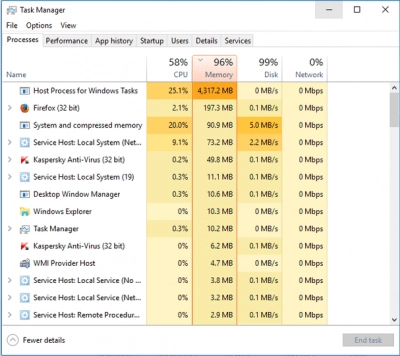
When services are loaded from dynamically linked library (.dll) files, however, they are not considered separate processes. The Host Process for Windows Tasks acts as the host for this service. Task Manager is unable to determine exactly which services are connected to each Host Process for Windows Tasks entry. For these purposes, Microsoft has developed the free tool Sysinternals, which you can use to clarify which services are causing the problem.
Reasons for the “High or even 100% disk usage in Host Process for Windows” issue
The Host Process for Windows is responsible for starting a huge number of processes that load in the central processor. However, when the CPU load is high, the computer may start to boot slowly or freeze. Thus, this problem needs to be addressed immediately. This useful article will tell you how to do this.
Method 1: Restart System
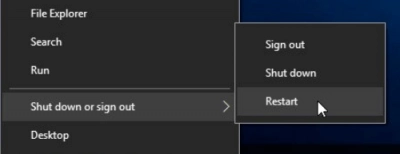
Restarting the computer may help you reduce high disk usage for the Host Process for Windows. When the system is rebooted, system errors are automatically corrected and unnecessary system services are turned off.
Method 2: Check Antivirus Software
You may be dealing with a virus that is using up all your disk space. Thus, scanning your disk for viruses is a smart idea. Use only tested and up-to-date antivirus software to ensure the scan results are as accurate as possible.
Method 3: Update Windows
You may have missed the latest Windows update, and this may result in 100% disk usage for Host Process for Windows. Therefore, check if you have any updates available and install them as soon as possible.
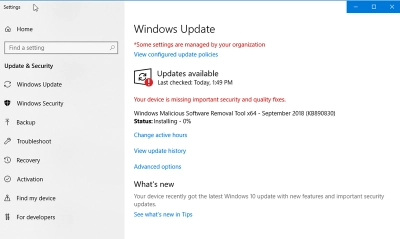
To do this, go to Settings and in the Windows Update section, look for available updates.
Method 4: Use CHKDSK, but Be Careful!
You can also repair the disk using the CHKDSK utility. To do this, you will need installation media to boot from. In the main menu, select the “Repair your computer” section, then select the “Troubleshooting” option. In “Advanced Options”, click on the “Command Prompt” option.
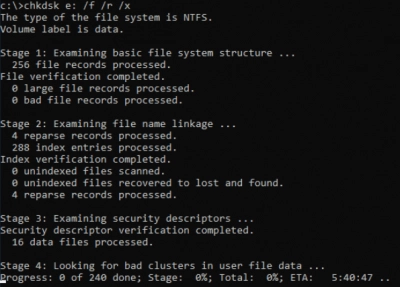
Then press Enter and wait patiently for the verification results. You must understand that this utility is not harmless: the process will damage all your files, cutting them into small parts.
How to make CHKDSK totally safe for your data
Before running CHKDSK, download DiskInternals Partition Recovery, and recover any lost data. You can also create a disk image and have a copy of your disk on hand. It will contain all configurations and saved data.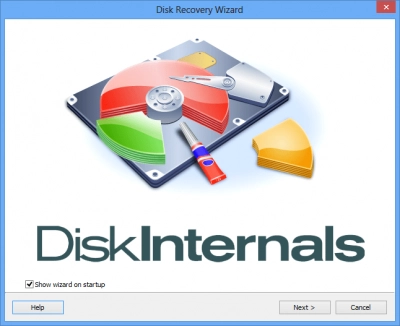
Method 5: Stop the Superfetch Service
If you are not using any new equipment, then you can simply disable this service without much harm to you.
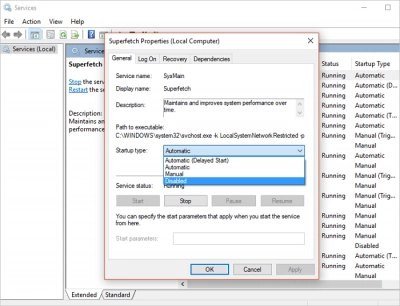
Press the Windows Key + R and enter “services.msc” into the pop-up window. Then click "OK". Right-click on "Superfetch" and select "Properties". Click “Stop” and then click “Disabled”.
Method 6: Increase RAM or Reset Virtual Memory
Here you can be guided by the following principle: if you can install more RAM, then you should add more RAM; but if not, reset the virtual memory.
If you choose to reset virtual memory, do the following:
- Press Windows Key + Pause/Break at the same time and select “System Settings”.
- Go to the “Advanced” tab, then click "Settings".
- In the “Advanced” tab, select the “Virtual Memory” section and click the “Change” button.
- Select the disk and set the parameters for the initial and maximum size of the virtual memory; then click "Install".
- Afterward, you should clean up temporary files.
Method 7: Perform a Clean Boot on Windows
A clean boot will help you determine if a background program is affecting your system's performance since Windows starts with a minimal set of drivers and programs.
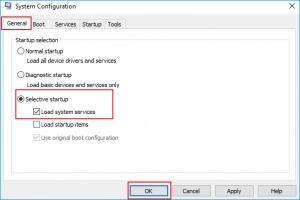
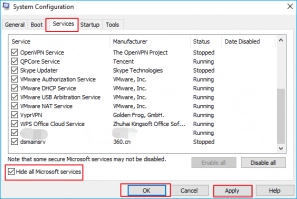
Open the Start menu and type “msconfig”. From the results shown, select “System Configuration”. In the “General” tab, select “Selective Startup”. Deactivate the “Load Launcher Items” feature, then click the “Services” tab and activate “Hide All Microsoft Services”. Then disable all items and click “OK”. Now check the disk load.
Method 8: Upgrade the SSD or HDD
If you have used your SSD or HDD for a long time, then most likely there are already many bad sectors, which can affect disk utilization. You can simply upgrade the disk to a larger size or change its type and thereby reduce the number of bad sectors.
Method 9: Turn to Remote Assistance
Download Remote Assistance and try its recommendations for resolving your issue.
What You Shouldn't Do
There is no sense in doing any of these things:
- Disabling basic Windows services. It will cause the system to malfunction as a whole.
- Changing the paging file. Windows management will become questionable.
- Disabling Windows Defender. It would be dangerous for your computer.

