Intel Optane Memory Pinning Error: Fix it Now!
In this article you will find out:
- how to deal with this issue
- how to protect your data
Are you ready? Let's read!
About This Issue
Intel Optane Memory is an advanced intelligent technology that keeps track of your frequently used applications, images, videos, and more. This technology remembers them after shutdown and thus improves the responsiveness of the computer and significantly reduces the latency in Windows 10. However, Intel Optane memory does not always work perfectly. Sometimes certain errors appear that can be very annoying and interfere with normal computer work.
An Intel Optane Pinning service extension that does not have access to the iaStor Of Service Api.dll can be the cause of the memory pin error. The Dynamic Link Library, in turn, has important information, functions, and code that help processes or programs run smoothly.
During a system update, system devices with drivers are reinstalled. However, if you receive an “intel memory pinning” error, the device will remain half-installed. This will of course lead to system crashes and loss of important data.
This technology is useful if you are using an old slow mechanical disc. You get the impression that the disc is still young and fast enough. However, this is just an illusion, if you want to quickly fix this problem, you should purchase a new hard drive.
If this does not suit you, try the following methods to fix the situation less drastically.
Intel Optane Memory Pinning Error fix
1. Repair Extension Through Appwiz.cpl
First, try to automatically repair the Intel Optane Explorer extension.
So, first you need to open the launch dialog box (win + R) and enter Appwiz.cpl, then click the OK button. Find Intel Optane Pinning Explorer Extensions in the list of programs, right-click it and select Repair.
After completing the program repair process, restart your computer and check if this resolves the problem.
2. Work with Drivers
Since the device drivers were most likely not fully installed, uninstall them.
So, start Device Manager (enter devmgmt.msc in the text box and then click the OK button) and select the option Software Components. In the new window, right-click the Intel Pinning Shell Extensions field and select Remove Device. Select the Uninstall the driver software for this device checkbox and click the Uninstall button.
Once the process is complete, restart your computer and the driver will be automatically installed.
3. Remove the Extension
If none of the above helps, remove the Intel Optane Explorer extension. First you need to open the launch dialog (win + R) and enter Appwiz.cpl, then click the OK button. Find Intel Optane Pinning Explorer Extensions in the list of programs, right-click it and select the Uninstall option.
Now the error “intel optane memory pinning unable to load dll iastorafsserviceapi.dll” will no longer bother you.
If you want to never face this error again, you can disable the Intel Optane module in the BIOS settings of your computer before updating Windows next time.
The best way to recover any file format is to use dedicated software such as DiskInternals Partition Recovery
Data loss can occur not only during fixing “intel optane memory pinning unable to load dll” error, but also as a result of system errors, virus attacks, hardware problems, etc. This professional software tool will help you recover files quickly and automatically (in including dll), even if you are new to the business.
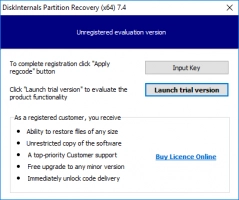
Try a free trial of DiskInternals Partition Recovery before purchasing a license for this software. Thus, before purchasing, you will see all the benefits of this application and make sure that this is exactly what you need in a given situation.
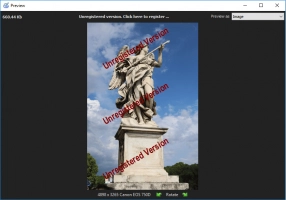
You can use the preview function and preview the file before recovery; You will also notice the amazing quality of the recovery.
For clarity, use the instructions below to make the application simpler and more intuitive.
Step 1. Download and run DiskInternals Partition Recovery (you can use the free version).
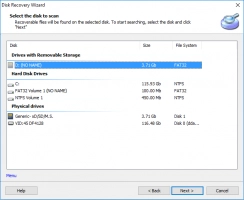
Step 2. In a new window, you will see all storage devices that are present and connected to your computer. Select the drive containing your lost or deleted files and click Next.
Step 2a. Select the type of files you want to recover and click Next.
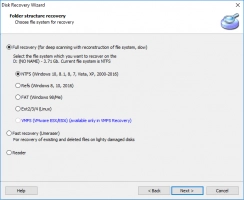
Step 3. Scan. Select the scanning method: fast or full (recommended) and wait for the process to complete. You can also select read-only mode for viewing data.
Step 4. Preview and recover lost files. Right-click the file and select "View in new window" or press the keyboard shortcut Ctrl + P.


Step 5. Saving. You just need to purchase a license and choose a location to save the recovered folders and files. It is best to store information in a safe place to prevent data overwriting.


