What should you do in case of MACHINE_CHECK_EXCEPTION error?

Windows 10 machine_check_exception error is a blue screen of death error that often causes various severe errors in the system. The most common cause of this problem is related to hardware or corrupted drivers. You may encounter a stop code machine check exception when the system boots, immediately after installing Windows 10 due to incompatible hardware, after updating your PC, etc.
If you encounter this problem, you should correct the situation as soon as possible since you can lose both the system configuration and all the accumulated data.
Here you will find out:
- about Windows 10 machine_check_exception error
- methods of how to fix it
- when DiskInternals can help you
Are you ready? Let's read!
MACHINE_CHECK_EXCEPTION fix
Here are few methods that can be helpful and any of them can be your solution.
1. Check drivers
Incompatible or outdated drivers are the most common cause of Blue Screen of Death errors, so it is critical to keep an eye on new driver updates and keep them updated. You can go to the hardware manufacturer's website for all available and latest official device updates. Download and install the correct driver update and restart your computer. Now, machine exception error Windows 10 won't bother you anymore.
2. Troubleshooting
Check your system using this preinstalled application. Go to the start menu and open the Settings app. Next, go to the "Update and Security" section, and on the left, select the Troubleshoot utility. Next, click on BSOD in the right pane. Finally, click Run the troubleshooter and follow the onscreen instructions to complete this check.
3. SFC /scannow
To run this system file checker, right-click the "Start" menu button and open a command prompt with administrator rights.
Type sfc /scannow and press Enter in the Command Prompt window. This process may take some time, and if both the problem and solution are found, it will be applied automatically. Be sure to, after checking, restart your computer for the changes to take effect.
4. Another command
Here, you also need to open the command line (administrator) and enter the following command: DISM / Online / Cleanup-Image / RestoreHealth, and press Enter.
After scanning is complete, restart your computer and try updating the system again.
You can also use installation Windows Media to run the DISM command:
Insert Windows installation media, open Command Prompt (administrator), where you enter the following commands:
DISM/online/cleanup-image/scanhealth, press Enter,
DISM/online/cleanup-image/restore health, press Enter,
DISM/Online/Cleanup-Image/RestoreHealth/source:WIM:F:SourcesInstall.wim:1/LimitAccess, press Enter
Note: F is the letter of the connected drive with Windows 10.
After completing the system check, restart the computer.
4. Examine hardware
It is imperative to check the hard drive thoroughly. Perhaps there are bad sectors there, which are causing the blue screen error.
Restart your computer while holding down the Shift key so you will enter the Advanced Startup. Next, go to the Troubleshoot section and open Advanced options.
In the list of options, select Command Prompt, where you enter the following lines:
provided, bootrec.exe / rebuildbcd, press Enter

bootrec.exe/fixmbr, press Enter

bootrec.exe/fixboot, press Enter

You can also run additional chkdsk commands for a more detailed analysis of the hard drive. But pay attention the CHKDSK can be harmful for recoverable files (the one that where deleted but still can be recovered):
chkdsk/r c :, where c is the letter of the corresponding disk partition.
Repeat this procedure with each disk partition, and then restart your computer.
In addition, it is recommended that you check your RAM, motherboard, processor, and major hardware components.
5. Rollback graphic drivers
Oddly enough, the latest drivers sometimes cause problems with Windows 10. Then it is highly recommended to uninstall them and replace with an older version of the drivers.
So, download the display driver uninstaller and follow the instructions to complete the job successfully.
Next, restart your computer and visit the website of the graphics card manufacturer. Here, download the old version of the drivers for your graphics card, and the “machine_check_exception” error should be gone.
6. Configure BIOS
You may have an outdated BIOS version, and you will need to update your BIOS to fix the Blue Screen of Death error.
In general, updating the BIOS is not an easy procedure, so be extra careful and read your motherboard instructions carefully for detailed instructions.
You can also disable Fast Boot and CSM in the BIOS, or disable Intel SpeedStep Technology in BIOS. These steps have repeatedly resolved the MACHINE CHECK EXCEPTION Blue Screen of Death error in Windows 10.
7. Turn off the LAN, DVD, and other devices
Also, try disabling your network adapter to get rid of the blue screen error:
Open the Power User Menu and select Device Manager from the list.
Next, find the network adapter and select it with the right mouse button, then click Disable. If this method worked for you, you can try updating your network adapter driver and re-enabling the adapter. Otherwise, you will need to buy a new network adapter.
You can also try setting SATA fast boot for all devices in the BIOS or unplugging the DVD drive, along with any additional hard drives you have installed.
Recovering data from a hard drive (or an external, second internal drive) is a difficult task, and retrieving data using DiskInternals Partition Recovery is not only easy, but also interesting
This application works with all known file systems; even if they are damaged, do not worry about it. You can recover up to 1 PB of data in various formats at no additional cost. The recovery wizard chooses the order of actions for each client individually, analyzing the specified search criteria. The program is available free of charge with all options except data export and technical support. These two functions are available after purchasing a license.
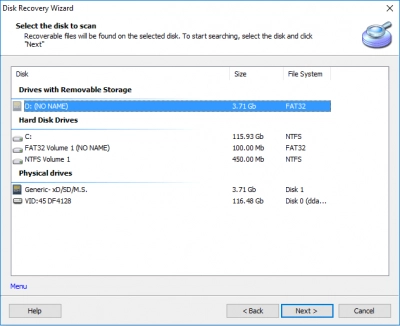
So, start downloading the DiskInternals Partition Recovery program, after which the wizard will automatically start working. Further instructions are included:
- Select the disk and the type of file you want to find; if it is not so important, click the "Skip" button; in this case, the data search range will be as wide as possible.
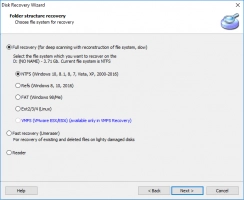
- Click the Next button. You can choose from several modes - fast, full, or reader mode.
- Now, you can see the found files marked with a red cross. This feature is free for everyone.
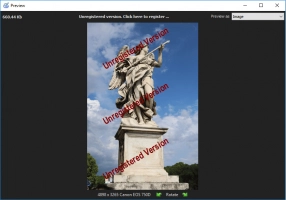
- License is required to export recovered files; then, the export wizard will help you end the session.

