[Solved!] Mouse scroll wheel jumps

In this article you will find out:
- why does this issue occur
- how to fix the problem
- how to protect your data
Are you ready? Let's read!
A computer mouse wheel helps speed up the scrolling process and thus makes it easier to find the information you want. However, there are situations when the mouse, namely its wheel, starts to work incorrectly: the smoothness of rotation disappears and the mouse starts scrolling randomly. For example, it jumps up and down or the mouse continues to scroll down. To deal with the “mouse wheel scrolling wrong way” problem, this article will show you some suggested ways to fix the mouse.
Fixing the mouse issue
Quite often, the simplest way to fix the problem of a mouse wheel scrolling erratically is best. For example, a simple reboot deals with single system crashes and issues where you can't "wake up" your mouse.
Also, if you have been using a mouse for a long time, clean off any dirt on it, since this may be what interferes with its normal operation.
If you have a wireless mouse, try different batteries and check the USB connection.
If these methods do not help, try more serious methods:
1. Go to Microsoft Mouse and Keyboard Center and try to disable some functions:
In the Control Panel, select the "Mouse" link and go to the "Change mouse wheel settings" section. Next, open the Microsoft Mouse and Keyboard Center.
Next, go to the tab "Basic Settings" and disable fast vertical scrolling and reverse scrolling direction, then click OK.
2. You can also change other mouse settings:
In the Control Panel, select the Mouse section and open the subsection “Wheel and decrease the scrolling speed”.
In the tab “Pointer Options”, clear the “Hide Pointer While Typing” checkbox and click Apply.
3. If you are using a laptop, turn off the touchpad, as the touchpad can be too sensitive and may cause the mouse wheel problem.
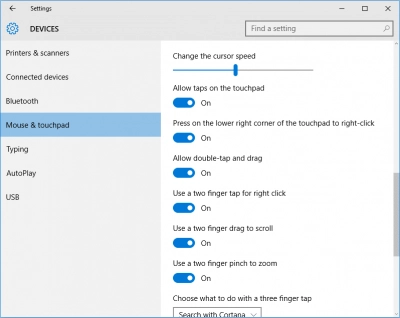
To do this, press Win + I to go to the Windows settings page and click on "Devices". Next, select "Touchpad" and uncheck "Swipe with two fingers to scroll".
4. Alternatively, reinstalling the mouse driver may fix the problem (your driver may be outdated or incompatible with the mouse).
In Device Manager, expand “Mice and Other Pointing Devices”. Next, right-click the mouse driver and select "Uninstall device". After uninstalling, restart your computer and the driver will be installed automatically.
You can also download and install the latest update on the mouse manufacturer's website.
Protect your data!
Undoubtedly, there are a lot of data protection applications on the Internet. But how to choose the most suitable option, so that later you will not regret your choice? DiskInternals Partition Recovery will not let you down: it is an excellent software tool for deep recovery of every disk partition and data recovery of any type and any size. The tool supports the following file systems: FAT12, FAT16, FAT32, VFAT, NTFS, NTFS 4, NTFS 5, etc., and converts them as needed.
DiskInternals Partition Recovery has three built-in Wizards that will make the whole process of recovering a damaged hard drive seem easy and simple to you. Take advantage of the free trial version of the software: as soon as you see the results, you will be pleasantly surprised and will undoubtedly wish to purchase a license to export data. In addition, you can recover a hard disk or its partitions remotely over the network, and all recovered files can be saved on any disks visible to the operating system. This utility has a free disk imaging function, which is also available in the trial version of the program. You can use it to protect your data from sudden disappearance or damage. Detailed instructions for DiskInternals Partition Recovery will help you avoid mistakes and be more confident when recovering data.
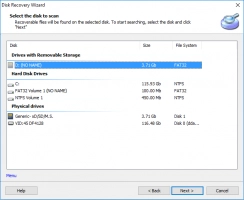
1. Download and run DiskInternals Partition Recovery.
2. The Disk Repair Wizard will automatically start.
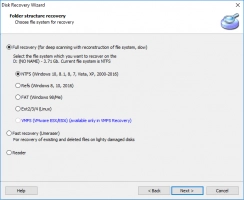
3. Select the Recovery Wizard mode: "reader", "uneraser", or "recovery". Since you want to get your files back, it is recommended that you select recovery mode. Click "Next".
4. Select the type of files you want to recover, or skip this step. You can do this later.
5. Scanning will take some time. Don't worry if this process takes too long. It depends on the size of the external hard drive.
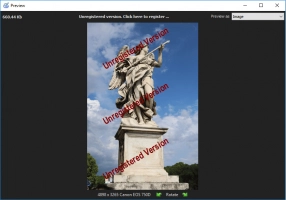
6. Preview. To preview the required recoverable file, right-click and select “Preview in New Window”.
7. Data export. To do this, simply purchase a license and enter a license key. The software will ask you to select a new location where you want to save the recovered documents. Next, click Save.

