What to do if the network drive is not showing
Some Windows users map their folders, server, or drive. However, mapping a drive may be completed successfully, but you would still notice that the network drive is not showing. Mapping simply creates a shortcut for a drive or folder on another computer that's on the same network.
Here you will find out:
- what if the network drive is not showing
- 3 methods on how to fix this issue
- how DiskInternals Partition Recovery can help you
Are you ready? Let's read!
When the network drive is not showing
It can be annoying when, after successfully mapping a drive, the mapped network drives are not showing. If you couldn’t find the mapped drive on File Explorer, obviously, there’s no possible way to share files between computers on the same network. There are quite a bunch of ways to fix this issue on Windows 10, 8, or 7.
Also, if you're looking for a solution to network drives not connecting on Windows 7, this guide will help you out.
Method 1: Use the subkey in the Registry Editor
When dealing with the network drive not showing, you should first check the registry entries and modify some values.
- Press Windows Key + R to open the “Run” dialogue box.
- Type “Regedit” and press Enter on the keyboard.
- Double-click on the HKEY_LOCAL_MACHINE folder and then select SOFTWARE >>> Microsoft >>> Windows >>> CurrentVersion >>> Policies >>> System path
- Now, right-click on the free whitespace or subkey.
- Select “New,” and then “DWORD”.
- You have created a new entry in your registry.
- Now, type “EnableLinkedConnections” as the name of DWORD and press Enter.
- Right-click on the DWORD file, select “modify,” and set the value to 1.
- Hit the Enter key and restart your computer.
Method 2: Unhide files and folders you can’t see
So the mapped drive may show, but what if the files and folders didn't appear? Sometimes, this may be as a result of file/folder settings on Windows 10, 8, and 7. There's a possibility that the files/folders are hidden; to unhide files or folders on Windows 10, here's how to do that.
- Open File Explorer and click on the “View” menu.
- Tick the checkbox beside "Hidden items."
- This will unhide all files and folders, and you may just see what you’re looking for.

Windows 7 users should go to Organize >>> Folder and Search Options. Navigate to the View tab, then enable "Show hidden files, folders, and drives."
Method 3: Recover your hidden files
Another way to get around network drives not showing on Windows 10 is by using DiskInternals Partition Recovery. The software helps you recover files and folders that were saved on the mapped network drive but were lost/hidden for one reason or another. Windows has a built-in tool that helps you run recovery scans, but it is not as comprehensive and effective as DiskInternals Partition Recovery.
How to use DiskInternals Partition Recovery
Install DiskInternals Partition Recovery and run it on the computer. This software is capable of recovering deleted, missing, or hidden files from any hard disk drive.
Launch DiskInternals Partition Recovery
The recovery wizard starts automatically

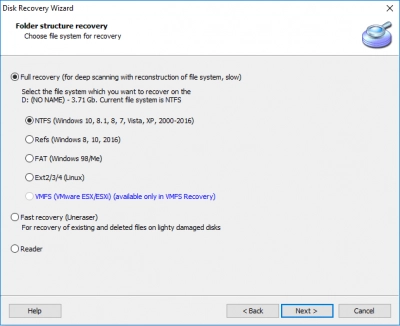
Select the network drive and choose between "reader," "uneraser," or "full recovery."

DiskInternals Partition Recovery will scan the drive and display all the deleted files previously saved on the drive.
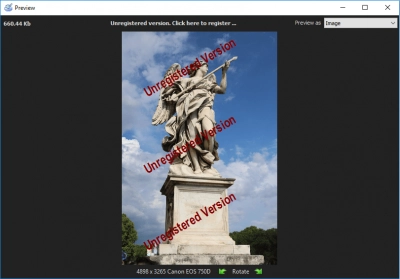
You can preview the files and recover them all if they are all important.

