How to deal with Nvlddmkm.sys error with no harm to your data?
In this article you will find out:
- what should you know about this error
- how to deal with this issue
- how to protect your data
Are you ready? Let's read!
About the nvlddmkm.sys error
The Video_TDR failure “nvlddmkm.sys” is better known to the user as a “blue screen” error. You may encounter this issue if your computer is running Windows or an Nvidia GPU. But don't get discouraged ahead of time. There are several ways to solve this problem! First, let's look at the TDR acronym. T means timeout, D means detection, and R means recovery.
Video_TDR helps you prevent the “blue screen of death” (BSOD) error. Video_TDR, when the above error occurs, recovers the system by resetting the drivers or the GPU. Hence, if there is Video_TDR failure, the BSOD screen will appear on your display. “Nvlddmkm.sys” is most likely caused by a bug in the display driver of the Nvidia graphics card. Let's list the possible solutions to this problem. However, if none of the methods works for you, you will be 100% able to recover the inaccessible data.
1. Search for OS updates
Most often, personal computers running Windows 10 are automatically updated when a newer version is released. However, you still need to check if you downloaded and installed the latest Windows update. You have to remember that regular Windows updates are essential for Nvidia GPU drivers to work without errors. Service packs usually contain add-ons to fix OS errors.
If you are unsure of what to do, follow our step-by-step instructions.
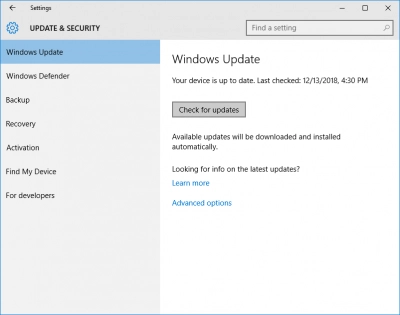
Click on the Windows logo in the lower left corner of the screen to open the Start menu. Find the Settings section and right-click on it. Then search for Windows Update. There is also a "Check for Updates" setting; update the operating system if necessary.
2. Search for driver updates
If the previous tip didn't work for you, try another option. Check if the drivers on your PC have been updated for a long time. In fact, outdated drivers are the most common cause of “nvlddmkm.sys” errors. Don't worry, updating your drivers won't be too difficult for you. This can be done both independently and automatically. Let's try it, follow the step by step instructions below. Initially, you need to find out the model of your video card. In this case, refer to the instructions for your PC.
Another way to find out is to press the Windows key and R key combination at the same time. Now, in the command line that appears, type dxdiag and press Enter. In the new dialog box, select the Display tab. The necessary information about your video card is displayed here. There are two types of OS in modern PCs: 64-bit and 32-bit. Therefore, on the "System" tab, find this information as well.
Congratulations! Now you know the name of your video card and the OS category. Open your browser and go to Nvidia's official website. Find and download the most recent driver for your graphics card. Make sure you install certified updates, not beta versions. The driver you need will be the first in the list that opens. Now update the system driver for your video card.
After the installation is complete, be sure to restart your computer for the updates to take effect. Now check if the problem is resolved.
Protect your data
DiskInternals Partition Recovery is sure to help you protect your data. DiskInternals Partition Recovery is a versatile tool that will allow all users, regardless of their skills and abilities, to recover lost data. You can also use this application if you accidentally delete the files you want, there was an unexpected power outage, malware damaged an important document, etc. Stay calm first, because in a rush, you could lose your data forever.
DiskInternals Partition Recovery works with various file systems, including: FAT, ReFS, UFS; HFS, NTFS, ReiserFS, APFS (reader mode), RomFS (reader mode); Reiser4, XFS, Ext2, Ext3 and Ext4. Download a free trial and enjoy the ease of recovering deleted, damaged files by following the Recovery Wizard's prompts. So take your time and follow the step-by-step instructions.
- First, download and open DiskInternals Partition Recovery. The Recovery Wizard will start automatically along with the program. Just select a specific drive and drive recovery mode: Reader, Anti-Racer or Full Recovery and click Next. We recommend choosing the Full Recovery mode.
- Scanning. Just rest and wait while the program does everything for you. Now you can preview the recovered partition files and make sure that your important files can be recovered.
- In order to save the necessary files, you just need to purchase a license and select a place on your hard disk to save the data.
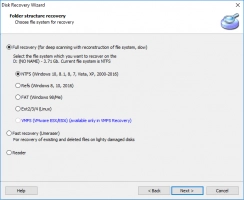
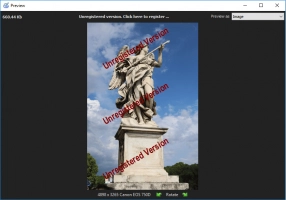
As you can see, DiskInternals Partition Recovery is an irreplaceable assistant in recovering lost or damaged information and data. A simple and intuitive recovery process will help you recover your data in case of any problems.

