OEM Partition and how to delete it safely
You have found on your Dell or Lenovo computer a free space, occupied with OEM partition and think, that you want these Mb for personal needs. Delete it or not?
In this article, you will find out:
- what is OEM partition
- should you or shouldn't delete it
- how DiskInternals Partition Recovery can help you
Are you ready? Let's read!
OEM Partition Introduction
If your PC/laptop has an OEM partition, it means you are using a device from HP, Dell or Lenovo.
Alternatively, an OEM partition is called the factory default recovery section. You can use it in case of any system failure in the computer without using the OS installation disk. If you have little experience in reinstalling the OS, an OEM partition can be a great solution for you. Until your computer has failed; then your OEM partition is “useless”.
How big are OEM partitions on the computer?
When you go to the "Disk Management" partition, you can see one OEM partition or a lot of them, if you are running Windows 10.
If there is only one OEM partition, there is nothing special. But if there are a few of them, you will see that all OEM partitions have a "Healthy" status; this is normal. This is due to a Windows update (a new OEM partition is created each time a Windows build is updated). Therefore, do not worry if you have more than one OEM partition.
OEM partition: delete it or not?
Deleting an OEM partition is possible and here are some reasons to do it:
- An OEM partition occupies a lot of space on the computer (especially, if there is more than one). So when you need to free up unallocated space on your disk, you will not find anything better than removing an OEM partition.
- The OEM partition is listed as inactive and you cannot use it. If you have a Windows installation disk and can use it instead of an OEM recovery partition (in case of a system crash, for example), then probably it is not needed.
- You may not want to restore the factory settings under any circumstance. For example, if you prefer to restore the system in other ways, then the OEM partition can be deleted.
The reasons you shouldn’t delete an OEM partition are the opposite of those listed above.
For example, if the OEM section is damaged, do not delete it. This can bring even more problems. In addition, it is better to have the Windows installation CD (in case you need to restore the OS) or to have a backup/image of the system, so your computer will be safe.
How to delete an OEM partition on the computer
Using the Diskpart tool, you can delete an OEM partition quickly. All you have to do is follow the instructions below.
The first thing to do is open the command line in any way that is convenient for you. For example, you can right-click on the Start button and select "Command Prompt (administrator)". In the new window, in place of the space, enter the command:
"diskpart.exe". Press the Enter key.
Then enter several commands one by one, which are displayed below; after each command, you need to press on Enter.
Commands:
list disk
type
disk
list partition
select partition 1
(number 1 is an example; you should select the number of the OEM partition that you want to delete)
delete partition override
(this last command will allow you to remove the OEM partition)
After you finish deleting the OEM partition, restart the computer for the system to work properly.
How to bring back any deleted partitions or files
And what if, some time after deleting an OEM partition, you need the information on this partition?
Unfortunately, such situations can happen. But not all users know what to do in this case. This article recommends using special software to restore deleted files, volumes or removed OEM partitions. It is recommended to use DiskInternals Partition Recovery, the best application for such purposes.
This application works with the following popular file systems: FAT12/16/32, VFAT, NTFS 4/5, ReFS, UFS, HFS, NTFS, ReiserFS, etc.
You can use the trial version of Partition Recovery to make sure that all your data can be restored correctly. In addition, this version of the application is completely free. The preview function is also completely free, so you have no reason to worry. DiskInternals Partition Recovery has a built-in recovery wizard, so if you are not technically savvy or are doing it for the first time, you have nothing to worry about; the wizard will do everything for you.
Use the step-by-step instructions for DiskInternals Partition Recovery described below and very soon the partition will be restored.
Step 1. Download and install the trial version of Partition Recovery.
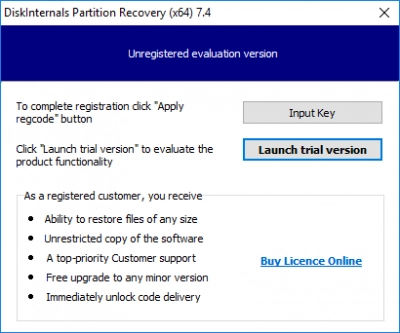
Step 2. Select the disk and the wizard mode: “reader”, “uneraser” or “recovery”. To restore the OEM partition, it is recommended to select the “recovery” mode.
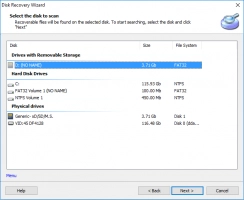
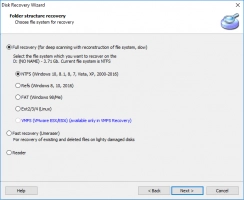
Step 3. Select the type of files you want to recover. If you wish, you can skip this step.
Step 4. Scan. Wait for the process to complete; it will take some time.
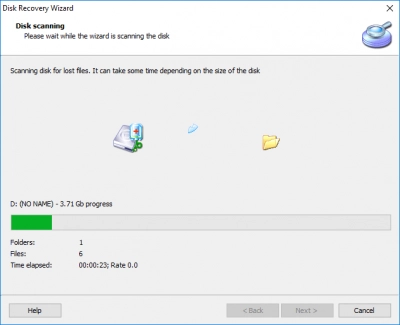
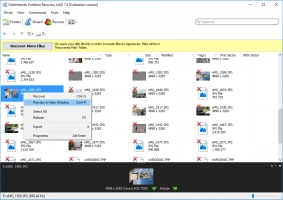
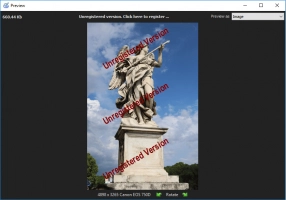
Step 5. Preview and restore. Right-click on the file and select "Preview in New Window." This way, you will be convinced of the quality of the recovered data.
Step 7. Saving. Purchase a license and enter the license key in the required window. The restored partition is best saved in a new place.
You can use this method to recover any information from the sections. DiskInternals Partition Recovery and its developers will help you in all difficult situations.
Good luck!
