How to get rid of 'Page fault in nonpaged area Windows 10' issue and keep your data safe?

In this article you will find out:
- what is page fault in nonpaged area Windows 10 error
- how to deal with this issue
- 8 methods to deal with blue screen page_fault_in_nonpaged_area trouble
- how to save your data
Are you ready? Let's read!
About page fault in nonpaged area Windows 10 issue
The “page fault in nonpaged area Windows 10” error is one of the “blue screens of death” errors; this area contains important data for the operation of the system. You can encounter it in the following situations:
- When Windows cannot find data that should be stored in the non-paged area
- When the wrong system service or the wrong driver code is installed on the computer
- When the computer has faulty hardware or hardware problems (damaged RAM, bad sectors)
- When there are damaged NTFS volumes
- If the antivirus software and the system are incompatible
If you do not know how to fix the “page error in nonpaged area Windows 10” issue, then you should carefully study this article
Here are 8 methods of how you can fix this issue. Choose the most suitable for you!
1. Check your RAM
First, deal with the computer's RAM. The RAM chip may not be connected properly, or the RAM card is damaged, the slot is dusty, etc.
Therefore, first, shut down the computer completely (unplug all power cords) and remove the side panel. Next, take out the battery and remove the RAM chip. Check the cleanliness of the RAM: if you find dust, remove it. If there is no dust, put it in new RAM and plug the RAM card back in and restart your computer.
If your computer has multiple RAM modules, find out which one is not working and then check if the error still occurs or not.
2. Turn off antivirus
If you have recently installed antivirus software, turn it off to fix this error. You can find out how to do this on the official website of the third-party antivirus manufacturer.
To turn off the built-in Windows Defender, follow these steps: under Settings, select Updates & Security. Next, click Windows Security and select the Virus & Threat Protection tab. Then click on the Virus & Threat Protection Settings section and select Manage Settings. Turn off Real-Time Protection on the Virus & Threat Protection Settings page.
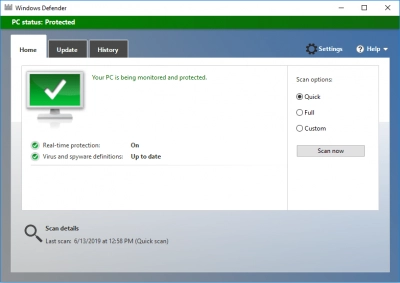
If this method does not help, you should reactivate the built-in Windows Defender to avoid exposing your computer to unnecessary threats.
3. Make sure your drivers are up to date
Sometimes, you may not notice that your driver is outdated or the driver on the computer is incompatible with the operating system, or it is completely damaged. In this case, you can update the driver or remove the device. Here's how to do it:
Open File Explorer and right-click "This PC" and then select "Manage". Next, select the "System Tools" section, where click on "Device Manager". In the new window, under Disk Devices, right-click the disk device and select option Update Driver or option Uninstall Device.
After completing the procedure, restart your computer to check if the “page fault in nonpaged area Windows 8.1” error has been resolved.
4. Turn off automatic management
Try turning off virtual memory in the system properties of your operating system, for this you need to turn off automatic paging file size management for all disks.
So, right-click on This PC and click Properties. Next, expand Advanced System Settings in the left menu and click Settings to make changes in the Performance section. Now click on the "Change ..." option and uncheck "Automatically manage paging file size for all drives first", then click "OK" or press Enter.
After making this change, restart your computer and check if the PAGE FAULT IN NONPAGED AREA error persists.
5. Examine system memory
If the previous methods were not very effective, you can try to run the Windows Memory Diagnostic tool. To do this, enter “memory diagnostics” in the search field and click the most appropriate search option.
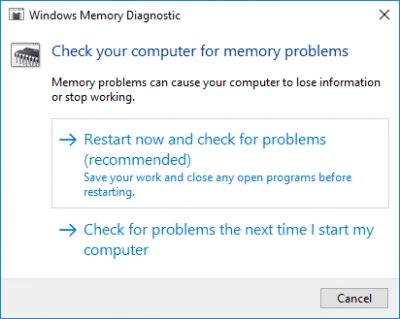
Next, click on the "Restart now" option and check for problems (recommended).
Then you just need to wait for the computer to detect problems within a certain period of time and display the scan results on the screen.
6. CHKDSK
For disk error checking and correction, run the built-in tool CHKDSK:
Type “cmd” in the search box next to Cortana, then right-click “Command Prompt” and select “Run as administrator”.
Next, press Enter after typing “chkdsk T: /f /r” (T is the letter of the OS drive).
If you would like to schedule this volume to be checked on the next system restart, then type “Y” on your keyboard.
7. Check hardware
To get rid of hardware errors, run the hardware troubleshooter:
In the Settings section of the Start menu, click on “Update & Security”. Next, click on "Troubleshoot" and select "Hardware and Devices''. Now click “Run the troubleshooter” and just wait for the computer to detect problems. After resolving the problem, restart your computer.
8. Reset system
In order to use this method, go to Settings and open the "Update and Security" section.
Next, click "Recovery" and click "Start" on the right to continue. Next, choose whether to keep your files or erase everything when restarting your computer and follow the instructions of the Wizard to complete the process.
If all else fails, you can also reinstall the operating system (you should back up your data first).
What to do if some files or even data of the entire disk are lost?
There is a solution! Use DiskInternals Partition Recovery to solve this problem. The program is simple and at the same time powerful; even a beginner will not find it difficult to understand.
You can easily recover videos, photos, documents, audio files, etc. The volume of recoverable data is up to 1 PB; it's incredible!
Using DiskInternals Partition Recovery is elementary and intuitive: you set parameters for searching for files, then a scan occurs, then a list of files that can be restored appears.
The free preview feature will save you unnecessary costs if (and this is extremely unlikely) you dislike something while using the application.
Follow the step-by-step instructions below, and you will learn how to recover files quickly and unimpeded.
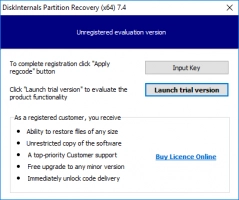
- Step 1. Download and install DiskInternals Partition Recovery.
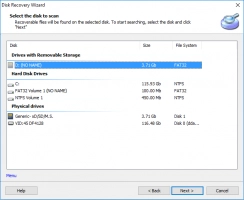
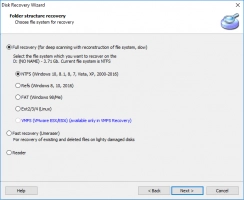
- Step 2. The Recovery Wizard will launch automatically. Select the disk where the lost files were located and the recovery mode (full, fast or reader).
- Step 3: Scan the disk. This procedure can be lengthy. Next, you will see a list of deleted files that can be recovered. They will be marked with a red cross in the upper-left corner.
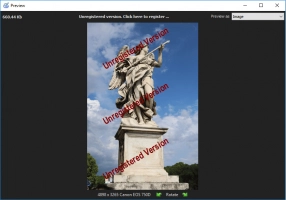
- Step 4. Preview. Preview all found files by right-clicking on them and choosing Preview in the new window.
- Step 5. Save files. Purchase a license for this software; you will receive a license key and will be able to save all recovered files to any connected device.

