What Should You Do if Razer Synapse is Not Opening?

In this article you will find out:
- how to fix Razer Synapse is Not Opening issue
- how to protect your data
Are you ready? Let's read!
1. Work With the App and its Drivers
A Razer Synapse is Not Working Error can happen due to the drivers for the Razer software. The logical conclusion would be to reinstall the Razer device drivers on a personal computer or laptop. Walkthrough the following chain of instructions step by step.
- Right-click on the Microsoft icon in the lower-left corner of your monitor screen and go to Device Manager.
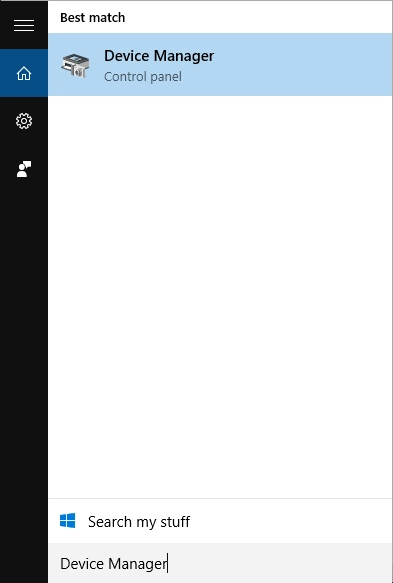
- Find and click on the Mice and Other Pointing Devices section, then the Keyboards subsection, and finally the User Interface Devices tab.
- Now right-click on All Razer Devices in the Device Directory and navigate to the Uninstall Device category.
- Be sure to check the box next to Uninstall Driver Software For This Device For All Razer Devices.
- Click on the Delete tab and confirm your choice.
- Then you will need to turn off all Razer category devices for a while.
- Reboot your operating system.
- Once the system restarts, reconnect your Razer devices.
- Windows OS will automatically reinstall the Razer drivers.
You will also need to download the latest Razer Synapse software and install the software patch on your PC. Check if your steps helped with the Razer Synapse Won't Open Windows 10 Error.
If the Razer Synapse software is malfunctioning or simply won't open, the error could be in the Razer Surround module. Therefore, removing or disabling such a module can correct the program error. Once Synapse is reinstalled, you may not need to install the Razer Surround. You can do this in your Razer account after the software installation is complete. When the Synapse device is connected to the Internet, a window will appear with information about updating the parameters, this must be canceled. Click on the Razer Surround message at the end of the installation and cancel the installation process. You can now update the Synapse app and reboot your operating system. Moreover, you can uninstall the Razer Surround software if the application is already on your system.
- Press the Windows key + R key combination, the Run window will open.
- In the field line, type appwiz.cpl and press Enter.
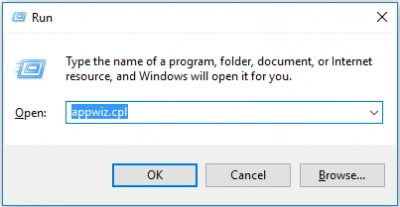
In the new window, find and select Razer Surround and click the Uninstall tab, follow the instructions in the uninstall wizard.
2. Update Microsoft Framework
Another possible solution for you to remove the Razer Synapse 3 Not Working Error is to download the installation wizard for the latest version of the .NET Framework. This utility is a system requirement for Razer Synapse to function properly. Otherwise, Razer Synapse 3 may simply not launch. If the NET Framework is already installed on your system, but the version is outdated, you need to update the NET Framework to a more recent version. After updating the NET Framework, add the latest version to Windows OS.
3. Disable Protection
Additional antivirus software and Windows Defender Firewall often cause Razer Synapse to stop working, in particular freezes and problems opening the program. It follows from this that you can try to disable the work of antivirus programs and the Windows Defender Firewall to get rid of the Razer Synapse Failed to Start Error. For this, follow the instructions below.
- Hold down the Win Key + R hotkeys on your keyboard. The Run window will appear.
- Type firewall.cpl in the box and press Enter.
- The Windows Defender Firewall panel applet appears in a new window.
- Click on the Turn Windows Defender Firewall on or off tab. Here you need to check the two checkboxes for Turn off Windows Defender Firewall. Click on Ok for the changes to take effect.
4. Use Task Manager to End Process
According to various sources, closing Razer processes as suggested below can also help you solve the Razer Synapse Won't Open problem.
- Right-click on the taskbar at the bottom of the monitor screen and go to the Task Manager.
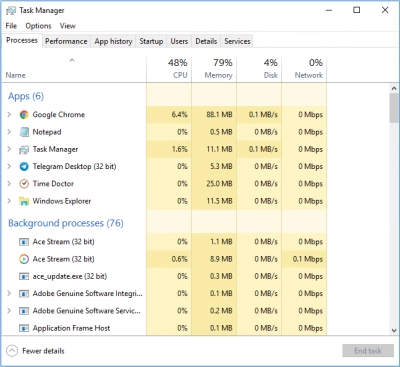
- Select all Razer processes that are in the directory and click End Task.
Once you have finished these steps, close the Task Manager window and open Synapse but only with administrator rights. Check if this solution helped you.
4. Use Task Manager to End Process
If not, try another method. Check if the latest Windows OS updates are installed on your device. As a rule, Windows updates occur automatically. But if this is not the case, you may have changed the settings of the Windows Update Center, which led to the loss of some updates. Follow the step-by-step instructions.
- Launch the Cortana utility using the search menu in the Windows taskbar area.
- In Cortana's search bar, type in the name of the update using a keyword.
Click on the Check for Updates tab in order to find out if there are new updates for the operating system. Be sure to update the system if any updates are available and restart your PC.
Make Sure Your Data is Safe
Are you still worried about the safety of your personal data on devices? You definitely need a program to recover files of any type or size on external or internal storage devices.
Now it has become possible. Recover any files such as documents, videos, music or pictures from the comfort of your home using DiskInternals Partition Recovery software.
The recovery process can be carried out with any file system, for example, HFS, NTFS, ReiserFS, APFS (reader mode), RomFS (reader mode), Reiser4, XFS, Ext2, Ext3, and Ext4, FAT, ReFS, UFS. For successful work with the program, do not perform any actions in the system directory where the files were deleted or damaged. This will inevitably lead to permanent data loss.
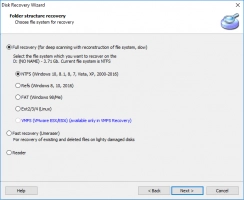
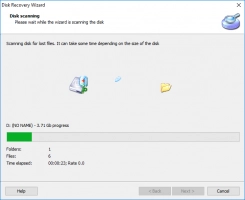
Download and open the executable file of DiskInternals Partition Recovery on your personal computer or laptop. Now select the location on the system disk and the way to scan the system “reader,” “uneraser,” or “full recovery.” Now, wait for the end of the scanning process. You will be offered to check the presence of files for recovery in the preview mode absolutely free of charge.
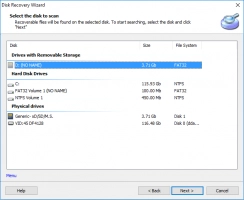
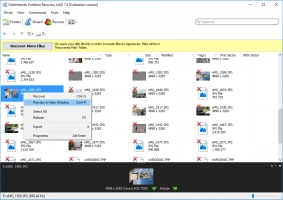
Are you satisfied with the quality of recovery of valuable files to you? Just purchase a license key and use the recovery software for any type of media at any time convenient for you.
