How to Recover Data from a Dead Hard Drive on Windows
The data we store holds immense value, ranging from irreplaceable family photos to essential business documents, and our much-loved music collections. The prospect of losing these data to hard drive failures can be distressing. Regrettably, such malfunctions are a common reality in the tech world, often occurring unexpectedly. However, facing a non-functional or failed hard drive doesn't mean all is lost. Employing the correct methods, tools, and strategies can often lead to the successful retrieval of a substantial amount, if not all, of the lost data. This article serves as a thorough guide, demystifying the process of data recovery from non-operational or failed hard drives, and providing you with the knowledge to reclaim what might seem permanently lost. Let's explore this process in detail.
How a Hard Drive Becomes Dead or Failed
A hard drive, whether it's an HDD (Hard Disk Drive) or SSD (Solid State Drive), can become dead or fail due to various reasons. Understanding the root causes can help in determining the best approach for data recovery. Here are some of the common reasons behind hard drive failures:
- Physical Damage: Physical shock can cause a hard drive to malfunction. For HDDs, the read/write heads may come into contact with the spinning platters, leading to a head crash.
- Wear and Tear: All hard drives have a limited lifespan. With time, the mechanical components of an HDD can wear out. Similarly, the flash memory cells in SSDs can degrade after a certain number of write and erase cycles.
- Electronic Failures: A power surge or an unstable power supply can damage the electronic components of a hard drive, rendering it inoperable.
- Heat: Excessive heat can harm the electronic and mechanical components of a hard drive. A cooling fan malfunction or inadequate ventilation can lead to overheating.
- Corrupted Firmware: The firmware is the software that controls how the hard drive interacts with the computer. If this becomes corrupted, it can render the hard drive unresponsive.
- Manufacturing Defects: Sometimes, a hard drive can fail prematurely due to inherent manufacturing flaws.
- Logical Errors: While not a physical failure, logical errors refer to issues with the file system on the drive. This can happen due to software conflicts, malware, or unintentional formatting, making the data inaccessible.
- Bad Sectors: As hard drives age, they can develop bad sectors or parts of the drive where data can no longer be written or read.
- SSD-specific Failures: For SSDs, flash cell degradation or controller chip malfunctions can lead to failures.
- Human Error: Accidental deletion of crucial system files, improper handling, or exposure to static electricity can damage the drive.
It's important to note that while some of these causes lead to complete drive failure, others may only result in partial malfunction, allowing for a higher likelihood of successful data recovery. The approach to data recovery and the tools used will vary depending on the nature and extent of the failure.
Several Unmistakable Symptoms of a Dying Hard Drive
Detecting the early warning signs of a failing hard drive can save you from sudden data loss. Here are several unmistakable symptoms indicating that a hard drive may be on its last legs:
- Frequent Freezes and Crashes: If your computer frequently hangs or crashes, especially during boot-up or while accessing certain files, it might be due to a malfunctioning hard drive.
- Slow Data Access: An unusually slow response time when accessing or transferring files can indicate a problem. This is especially noticeable if it becomes progressively worse over time.
- Clicking or Grinding Noises: For HDDs, unusual noises are often the most telling sign of impending failure. If you hear clicking, grinding, or whirring sounds, it could indicate a problem with the mechanical components of the drive.
- Corrupted Data: Files that were previously fine suddenly becoming corrupted, or files that mysteriously disappear and then reappear, can be symptoms of a failing drive.
- Bad Sectors: As previously mentioned, bad sectors are areas on the hard drive that can no longer be written to or read from. If your disk utility software reports an increasing number of bad sectors, it's a sign of a deteriorating drive.
- S.M.A.R.T. Warnings: Modern hard drives have a built-in monitoring system known as Self-Monitoring, Analysis, and Reporting Technology (S.M.A.R.T.). If this system sends out a warning, take it seriously, as it indicates potential drive failure.
- Frequent Error Messages: If you're constantly receiving error messages when trying to move or copy files, or if disk utilities consistently fail to start or freeze during operations, it could be a sign of hard drive problems.
- Inability to Boot: Struggling to start the OS, with messages like "Disk Boot Failure" or "No Boot Device Found", strongly indicates hard drive issues.
- Distorted Files and Folders: Files or folders that appear distorted, fail to open, or display scrambled content may be on sections of the drive that are failing.
- Aging Factor: If you've been using the same hard drive for more than 3-5 years, there's a higher probability that it might be nearing the end of its lifespan, especially if other symptoms are present.
It's important to act quickly if you notice any of these signs. Backing up your data immediately is the best precautionary measure. The more advanced the symptoms, the more challenging (and potentially costly) the data recovery process will be if the drive fails completely.
How to Recover Files from a Dead or Failed Hard Drive
DiskInternals Partition Recovery is a comprehensive software solution designed to recover data from deleted, damaged, formatted, or otherwise inaccessible partitions. If your hard drive is failing or appears to be dead, this tool can be instrumental in helping you retrieve your files.
Here's a step-by-step guide to recover files from a dead or failed hard drive using DiskInternals Partition Recovery:
Step 1: Connect your dead hard drive to a PC
1. Preparation:
- Ensure that you have another working hard drive or external storage device to save the recovered files. Never save the recovered files back onto the potentially failing drive.
2. Installing DiskInternals Partition Recovery:
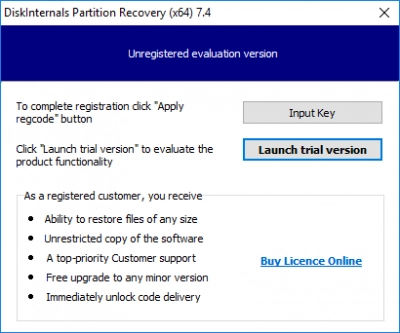
- Install the software on a working computer.
3. Connect the Dead or Failed Hard Drive:
- If your main system drive is the one that's failed, you'll need to remove it from your computer and connect it to a working computer using a USB to SATA adapter, external hard drive enclosure, or dock.
Step 2: Start DiskInternals Partition Recovery
4. Launch DiskInternals Partition Recovery:
- Run the software.
- In the software's main window, you'll see a list of all drives. Select the dead or failed hard drive from which you want to recover data.
5. Start the Recovery Process:
- Right-click on the drive or partition you wish to recover and select 'Open'.
- Choose the recovery mode:
- Reader (to view files),
- Uneraser (for deleted files),
- Recovery (for formatted, damaged, or RAW partitions).
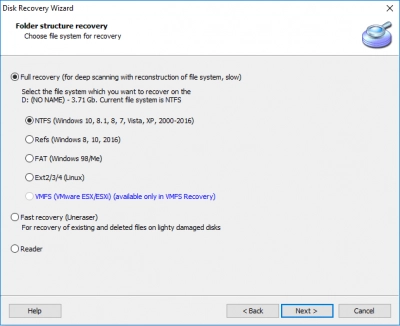
For severely damaged drives, the "Full Recovery" mode is often the best choice.
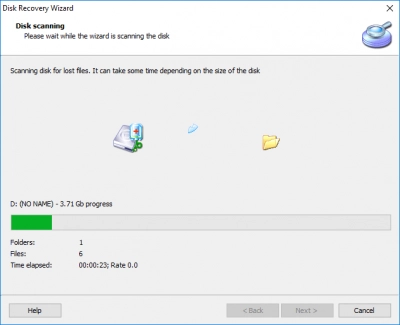
- Click 'Next', and the software will start scanning the drive. This process can take some time, especially for large drives or in "Full Recovery" mode.
Step 3: Recover Files from Dead Hard Drive
6. Preview and Recover Files:
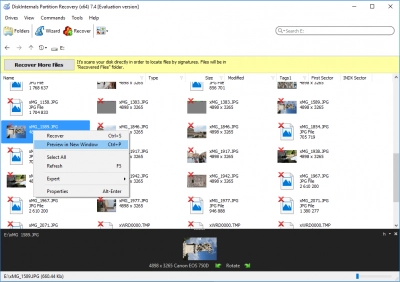
- Once the scan is complete, the software will display a list of recoverable files and folders.
- Browse through these files, and you can preview them to ensure the data is intact.
- Select the files or folders you want to recover by marking the checkboxes next to them.
- Right-click and choose 'Recover' or click the 'Recovery' button.
7. Save the Recovered Files:
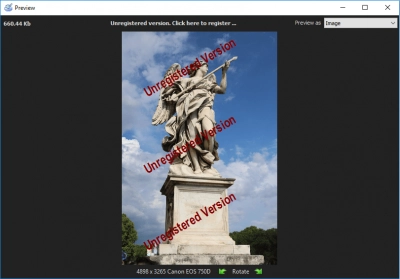
- The software will prompt you to select a location to save the recovered files. Choose a location on a different drive or an external storage device.
- Click 'OK', and the software will start recovering and saving the files to the selected location.
8. Purchase a License (if required):
- The trial version of DiskInternals Partition Recovery allows you to scan and preview files. However, to save the recovered data, you'll need to purchase a license for the software.
Other Methods to Recover Deleted Files from Dead Hard Drive
Method #1: Check the Recycle Bin
When you delete files from your computer, they aren't immediately and permanently removed. Instead, they are moved to the Recycle Bin, a temporary storage for deleted files. This gives users an opportunity to restore files if they were mistakenly deleted.
Steps to Recover Files from the Recycle Bin:
1. Accessing the Recycle Bin:
- Locate the Recycle Bin icon on your desktop and double-click to open it.
2. Locate the Deleted Files:
- Browse through the Recycle Bin to find the files or folders you wish to restore. If you've deleted a lot of items, you can use the 'Search Recycle Bin' feature at the top right corner to find specific files more quickly.
3. Restoring the Files:
- Right-click on the file or folder you wish to restore.
- From the context menu, select 'Restore'.
- The file will be restored to its original location before it was deleted.
4. For Multiple Files:
- If you wish to restore multiple files at once, hold down the 'Ctrl' key on your keyboard and click on each file to select them.
- Once all desired files are selected, right-click on any of the highlighted files and select 'Restore'.
5. Permanent Deletion:
- If you cannot find the file in the Recycle Bin, it may have been permanently deleted either by emptying the Recycle Bin or using the 'Shift + Delete' command. In such cases, you'll need to resort to other methods like using data recovery software or professional services.
Tips:
- It's a good practice not to empty the Recycle Bin immediately after deleting files, just in case you realize later that some files were deleted by mistake.
- If you have emptied the Recycle Bin or used methods that bypass the Recycle Bin, don't panic. There are more advanced recovery methods available, including data recovery software and professional services.
Remember, this method is ideal for situations where the hard drive is still functioning. If the hard drive itself has failed, you'll need more specialized techniques or tools for data recovery.
Method #2: Restore From a Backup
One of the best precautions against data loss is maintaining regular backups. If you have a backup of your data, whether it's on an external hard drive, cloud storage, or another medium, you can restore files from there, bypassing the need for intricate recovery processes.
Steps to Recover Files from a Backup:
1. Determine the Backup Source:
- Before proceeding, identify where your backup is stored. It could be an external hard drive, a network drive, cloud storage like Google Drive or Dropbox, or a dedicated backup solution like Windows Backup and Restore.
2. External Hard Drive or USB:
- Connect the external storage device to your computer.
- Navigate to the backup folder or specific location where the files were saved.
- Copy the files and paste them onto your computer.
3. Cloud Storage:
- Log in to your cloud storage account via a web browser or dedicated app.
- Navigate to the folder or area where your backup resides.
- Download the files or folders you wish to restore.
4. Windows Backup and Restore:
- If you used the built-in Windows Backup and Restore feature:
- Navigate to the Control Panel.
- Under "System and Security," choose "Backup and Restore."
- Click on "Restore my files" and follow the on-screen instructions to select and restore your files.
- If you used the built-in Windows Backup and Restore feature:
5. Network Drives or NAS:
- If your backup is on a network drive or NAS (Network Attached Storage), connect to the network or NAS.
- Navigate to the backup location.
- Copy the necessary files or folders and move them to your desired location on your computer.
Tips:
- Regular Backups: Make it a habit to perform regular backups of your important data. The frequency depends on how often your data changes.
- Multiple Backup Locations: It's advisable to have backups in different locations or formats. For example, having both a local external hard drive backup and a cloud backup ensures more safety.
- Test Your Backups: Periodically, ensure your backups are working as intended. Try restoring a file now and then to verify the integrity of the backup.
By having a reliable backup strategy in place, you can save yourself from the stress and complications associated with data recovery. It's always easier to restore from a backup than to attempt complex recovery methods after data loss has occurred.
How to Repair a Corrupted, Failed, or Dead Hard Drive
Method #1: Repair Using CheckDisk
CheckDisk, often referred to as "chkdsk," is a built-in Windows utility designed to check the integrity of your file system and, in many cases, repair issues found. While it's primarily used to fix minor logical errors, it can sometimes help in situations where the hard drive appears to be corrupted or failing.
Steps to Repair a Hard Drive using CheckDisk:
1. Backup Your Data:
- If you can still access the drive, back up any essential data before running chkdsk. While the tool is generally safe, there's always a slight risk when working with corrupted or failing drives.
2. Open Command Prompt as Administrator:
- Search for "cmd" or "Command Prompt" in the Windows search bar.
- Right-click on "Command Prompt" from the search results and choose "Run as administrator."
3. Run CheckDisk:
- In the Command Prompt, type the following command and press Enter:Replace "X" with the letter of the drive you want to scan and repair. Thebash
chkdsk X: /f /r/fparameter tells chkdsk to fix any errors it finds, and the/rparameter tells it to locate bad sectors and retrieve readable information.
- In the Command Prompt, type the following command and press Enter:
4. Wait for Completion:
- CheckDisk will begin scanning and repairing the drive. This process can take a while, especially for larger drives or those with numerous errors.
5. Review the Results:
- Once chkdsk completes, it will provide a summary of its findings. Take note of any messages about bad sectors or other issues.
6. Reboot Your Computer:
- If CheckDisk made any repairs, it's a good practice to reboot your computer to ensure that all changes are properly integrated.
Points to Consider:
- Scheduling a Scan: If you're trying to scan and repair the system drive (usually C:), CheckDisk may not be able to perform the operation immediately and might ask if you wish to schedule the scan for the next system restart.
- Extent of Repair: While CheckDisk is excellent for repairing logical file system errors, it's not designed to fix physical damage. If the drive has suffered physical damage, other methods or professional assistance may be required.
- Using Graphical Interface: For those who prefer not to use the command line, you can also run a disk check from the Windows graphical interface. Right-click on the drive in File Explorer, choose "Properties", go to the "Tools" tab, and select "Check."
Remember, while CheckDisk can be a lifesaver for fixing minor errors and logical issues, it's essential to be cautious and back up essential data whenever possible. If your drive continues to experience issues after running CheckDisk, it might be time to consider other recovery or repair methods, or the drive's health may be deteriorating to the point of needing replacement.
Method #2: Fix Damaged Windows Files
Sometimes, the apparent "corruption" or "failure" of a hard drive might actually be due to damaged or corrupted system files on your Windows operating system rather than the hardware itself. By repairing these system files, you can potentially resolve the issues you're experiencing.
Steps to Repair Damaged Windows Files:
1. Backup Your Data:
- If possible, back up your essential data before proceeding. It's always better to be safe, especially when making changes or repairs at the system level.
2. Open Command Prompt as Administrator:
- Search for "cmd" or "Command Prompt" in the Windows search bar.
- Right-click on "Command Prompt" from the search results and select "Run as administrator."
3. Run System File Checker (SFC):
- In the Command Prompt, type the following command and then press Enter:bash
sfc /scannow - The System File Checker will begin to scan all protected system files and replace corrupted or incorrect versions with correct Microsoft versions.
- In the Command Prompt, type the following command and then press Enter:
4. Wait for the SFC to Complete:
- The process can take some time, especially if it finds and has to repair many files.
5. Review the Results:
- Once the scan is complete, the tool will provide a summary of its findings. If it found and repaired corrupted files, you should see a message indicating so.
6. Using DISM if SFC Fails:
- Sometimes, SFC might not be able to repair some files. In such cases, you can use the Deployment Image Servicing and Management (DISM) tool.
- In the Command Prompt, type the following command and press Enter:mathematica
DISM/Online/Cleanup-Image/RestoreHealth - DISM will attempt to fetch healthy system files online and use them to repair the corrupted ones. Ensure you have an active internet connection when running this command.
7. Reboot Your Computer:
- After the process completes, whether you used SFC or DISM, restart your computer to integrate any changes and check if the issue has been resolved.
Points to Consider:
- Internet Connection for DISM: The DISM tool, when run with the mentioned parameters, requires an active internet connection to fetch fresh copies of corrupted system files. Ensure your connection is stable.
- Persistence of Issues: If, after trying both SFC and DISM, issues persist, there may be deeper system problems, or the hard drive itself might be failing.
- Windows Updates: Sometimes, merely updating Windows to the latest version can resolve certain system file issues. Make sure your system is up-to-date.
Remember, the methods above target system-level file corruption. If your drive shows other symptoms of failure, such as strange noises or if it's not recognized by the BIOS, then the issue might be hardware-related, and these methods may not help. In such scenarios, professional data recovery or hard drive replacement might be necessary.
Method #3: Scan for Viruses
Viruses, malware, and other malicious software can corrupt, damage, or even delete files on a hard drive. Some of these harmful entities can also cause the system to misbehave in ways that may lead you to believe the drive itself is failing. Scanning for and removing such threats can often restore the normal function of the drive and system.
Steps to Scan and Remove Viruses:
1. Backup Your Data:
- Before proceeding with any repair method, always back up your essential data, if possible. This ensures you have a copy of your data in case of further complications or unintended consequences.
2. Update Your Antivirus Software:
- Make sure your antivirus software is up-to-date. Updated virus definitions allow the software to detect and combat the latest threats.
3. Run a Full System Scan:
- Open your antivirus software.
- Select the option to perform a full or comprehensive system scan. This option will thoroughly check all files and folders on your computer for malicious entities.
4. Review and Act on Findings:
- Once the scan completes, the software will provide a summary of its findings.
- Follow the software's recommendations to quarantine, repair, or delete any detected threats.
5. Consider Using Multiple Tools:
- No antivirus software is perfect, and different tools can sometimes catch different threats.
- Consider running an additional malware scanner, such as Malwarebytes or a similar reputable tool, to ensure no threats are overlooked.
6. Reboot Your Computer:
- After all threats have been addressed, restart your computer. This will ensure any changes made by the antivirus software are fully integrated and any malware processes in memory are terminated.
7. Strengthen Protection:
- If malware was found and removed, take steps to strengthen your system's defenses:
- Ensure your operating system and all software (especially web browsers) are up-to-date.
- Avoid downloading files or software from untrusted sources.
- Do not open email attachments from unknown or suspicious senders.
- Consider using a robust firewall and regularly updating your antivirus software.
- If malware was found and removed, take steps to strengthen your system's defenses:
Points to Consider:
- Persistent Malware: Some malware is notoriously difficult to remove and might require specialized tools or methods. If you suspect your system is still compromised after a scan, you might consider seeking expert assistance.
- System Behavior: Monitor your system's behavior after the malware removal. If it returns to normal, the issue might have been software-related. If problems persist, however, there might be other underlying issues.
- Protection Over Cure: Regularly scanning your computer for threats and keeping your antivirus definitions updated can prevent many issues from occurring in the first place.
While virus or malware infections can indeed cause strange system behaviors that might resemble hard drive failures, it's essential to remember that genuine hardware failures won't be fixed by simply removing malware. If after removing all threats your hard drive continues to exhibit problems, it might be time to consider hardware diagnostics or even a replacement.
Conclusion
Hard drive problems can manifest in various ways, from corrupted data to complete drive failure. Understanding the nature of these issues and being equipped with the right methods to address them is crucial to minimizing data loss and ensuring the longevity and health of your storage devices.
- Understanding the Problem: Before jumping into solutions, it's essential to recognize the signs of a dying hard drive. Recognizing these symptoms early can allow for timely interventions, potentially preventing more significant data loss.
- Proactive Measures: Tools like CheckDisk and built-in Windows utilities like SFC and DISM are invaluable for detecting and rectifying logical errors on a drive. These tools can fix minor corruptions, ensuring your data remains accessible.
- Threat Protection: In today's digital age, threats from viruses and malware are ever-present. Regularly scanning your drives and maintaining updated antivirus software can prevent many issues and keep your data safe.
- Backup, Backup, Backup: Perhaps the most reiterated advice—yet often overlooked—is to maintain regular backups. Many problems, whether arising from hardware failures, software corruptions, or malicious threats, become significantly less daunting when a recent backup is at hand.
In the end, while hard drives and the data they store can feel overwhelmingly complex, a proactive approach, coupled with a keen understanding of the signs and solutions, can make all the difference. Keep your tools updated, your data backed up, and always be on the lookout for unusual behaviors or symptoms in your system. Safe computing practices can go a long way in ensuring the longevity and integrity of your data and devices.
FAQ
How do I revive a dying hard drive?
- Backup Immediately: If the drive is still accessible, back up your important data as soon as possible.
- Check Connections: Ensure cables and connections are secure. Sometimes, a loose connection can mimic drive failures.
- Run Diagnostic Tools: Use tools like CheckDisk (Windows) to scan and repair logical errors.
- Address Heat Issues: Overheating can impact drive performance. Ensure your drive is adequately cooled.
- Virus Scan: Run a comprehensive virus and malware scan to eliminate any malicious threats.
- Data Recovery Software: Consider using specialized software like DiskInternals Partition Recovery if files are inaccessible.
- Seek Professional Help: If the drive is not responsive or if important data is at stake, consult a data recovery specialist.
Can a failing hard drive be repaired?
Yes, some failing hard drives can be repaired, but the success largely depends on the nature of the failure:
- Logical Errors: These can often be repaired using tools like CheckDisk (Windows) or disk utility tools on other platforms.
- Physical Damage: Issues like damaged platters or failed motors are generally not repairable at home. Professional data recovery services might retrieve data, but the drive itself is typically beyond repair.
- Firmware or Electronic Failures: Some specialized services can address these, but it's often more cost-effective to replace the drive.
Always back up essential data, and remember: a repaired drive should not be considered as reliable as a new one. It's wise to replace a failing drive soon after experiencing issues.
What can I do to deal with a dying hard drive?
- Backup Data: Immediately save any critical data to another location.
- Diagnostic Test: Use built-in tools like CheckDisk (Windows) to identify and potentially repair errors.
- Reduce Use: Minimize operations on the drive to prevent further damage.
- Cool Environment: Ensure the drive is not overheating. Good ventilation can sometimes help.
- Virus Check: Scan for malware or viruses that might be causing issues.
- Consider Replacement: If the drive is consistently showing signs of failure, it's best to replace it.
- Seek Expert Help: If data retrieval is vital, consult a professional data recovery service.
What should I do if my hard drive is making clicking noises?
- Stop Using It: Clicking often indicates a severe physical issue. Continued use can worsen data loss.
- Backup Data: If accessible, immediately back up important data to another drive.
- Do Not Open: Avoid attempting to open or tamper with the drive; this can cause further damage.
- Seek Professional Help: Consult with a data recovery specialist to evaluate the drive's condition and potential for data recovery.
- Consider Replacement: Typically, a clicking drive is a sign of impending failure. Plan to replace it soon.
What are the signs of HDD failure?
- Clicking or Grinding Noises: Unusual sounds often indicate physical issues.
- Frequent Freezes or Crashes: System hangs or blue screen errors.
- Corrupted Data: Files that can't be read or suddenly become corrupted.
- Slow Performance: Sluggish system or file transfer speeds.
- Bad Sectors: Disk utilities report an increasing number of bad sectors.
- Failure to Boot: System struggles or fails to boot up.
- Disappearing Files: Files or folders go missing without deletion.
- Read/Write Errors: Errors when trying to open, save, or delete files.
- Drive Not Recognized: The HDD isn't detected in BIOS or by the operating system.
