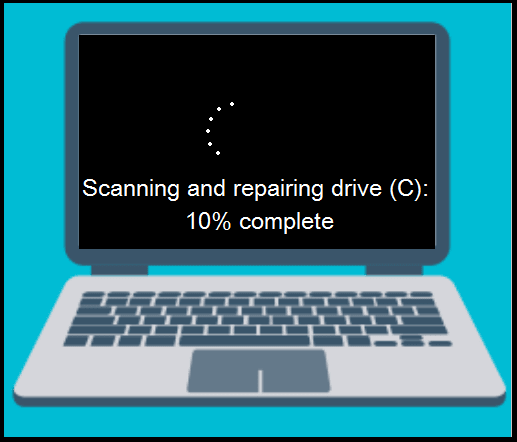
If scanning and repairing drive is stuck
Here you will find out:
- about computer issue when scanning and repairing of the drive is stuck
- methods of how to fix it
- how DiskInternals can help you
Are you ready? Let's read!
So, the computer says scanning and repairing of the drive is stuck...
Usually, Windows 10 scanning and repairing drive is a useful feature that helps the system automatically deal with sudden crashes. But sometimes, the computer gets stuck on scanning and repairing the drive, and what to do next becomes unclear.
Unfortunately, for owners of computers running Windows 10, it is common for drive scanning and repairing to become stuck. Moreover, if it gets stuck, it can last from a few seconds to forever, and some users say that they have to do scanning and repairing the drive with every boot.
So, if you need to understand what you are dealing with and what steps you should take in doing so, this important and interesting article is for you.
Why does scanning and repairing of the drive become stuck?
Almost always, Windows scanning and repairing of the drive gets stuck in the event that the computer or laptop was turned off incorrectly. This can occur in several situations:
- long press on the power button to force the computer to turn off
- electricity surges
- sudden power outage
- discharging (in laptops)
In all these situations, the same thing happens: the hard drive and RAM are doing their work and suddenly turn off; because of this, some processes can be damaged and some files can even be deleted.
To avoid this, the OS will automatically start scanning and repairing the drive. And, if everything goes well, after a while the system will boot. If the system is not able to cope with the errors that occur, it freezes (which is quite often what happens).
And what to do in this situation is not at all clear. The following sections will clarify this situation.

Method 1. Just wait
First, it’s best to wait for the maximum amount of time.
If you have the opportunity, leave the computer alone for a day. Sometimes, after just a few hours, the system will boot without a single error.
Give it time, and if all else fails and you still want to stop scanning and repairing the drive, use the following method.
Method 2. Check all the connections of the PC
If you recently installed a hard drive, then pay attention to whether it is connected properly. If so, the error will disappear from your screen.
Method 3. Check the drive status
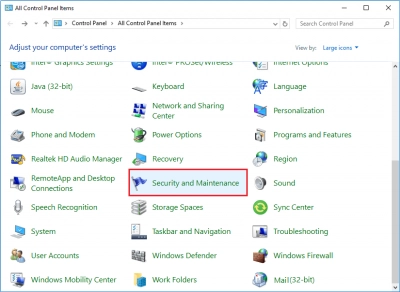
This can be seen in the Control Panel.

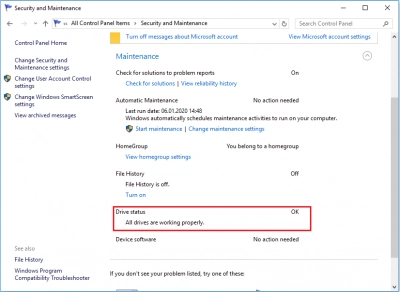
In Service, there is a disk status section. Look at the status of your hard drive. If it is inactive or damaged, click on the appropriate link and fix it.

If it says all disks are working without problems, then proceed to the next method.
Method 4. Stop the scanning and repairing the drive process
If the hard drive is in order, you can simply cancel the scanning and repairing of the drive.
As soon as the computer starts to boot and the “Preparing for automatic recovery” screen appears, immediately press any key until this screen disappears. Thus, your computer will not freeze on automatic recovery. After that, you can run any utility to check and fix the disk.
But, before doing this, take care of your data, as it may be damaged or deleted during the repair of the disk.
Method 5. Save your data
Make a backup or disk image of your data.
DiskInternals Partition Recovery is a very helpful tool for disk image creation and any information will remain available to you in the future.
DiskInternals Partition Recovery does the most in-depth scanning of each disk partition, so even the smallest and oldest file will be found and restored. The program restores a variety of file formats, up to 1 Pb in size; it is almost endless!
As for the OS and file systems, any version of Windows and the most recognizable file systems are compatible. There are also many additional features: options for the Recovery Wizard, preview at no cost, several scanning options, etc.
The application can be used in a trial version (free) or fully functional, including export (paid with license key). The disk image creation function is another feature, and also free.
Method 6. Try CHKDSK via Safe Mode
The CHKDSK utility is free and is initially installed with your system. It is better to work with it in safe mode (it's safer for data).
Right-click on Start and run Command Prompt as an administrator. Next, enter the command "chkdsk K: / f", where K is the drive letter. Then press Enter and wait for the disk check and subsequent error correction. Restart your computer and work as before; the error is unlikely to bother you again soon. Do not forget to exit safe mode and switch to normal.
If some files are yet damaged during the scan, restore them from the disk image or from the backup copy that you created using Partition Recovery.
