Second Monitor is Not Detected in Windows 10, 11: Fix it Now!
In this article you will find out:
- how to deal with this issue
- how to protect your data
Are you ready? Let's read!
About This Issue
Multiple monitors can be used to improve the performance of your computer. However, when connecting a second monitor, some Windows 10 users complained that the system only detects one of the two connected monitors. This most often occurs with HDMI and VGA monitors, in other cases the problem is related to the monitor configurations or display drivers.
When doing so, you may receive the following error messages:
- Windows 10 cannot detect the second screen.
- Windows 10 second monitor not working.
- Second monitor does not recognize Windows 10.
- Second monitor flickers Windows 10.
- Second monitor in Windows 10 turns black.
- Windows 10 second monitor keeps turning off.
Don't get discouraged right away, you can connect a second monitor using the tips in this article
1. Work with Drivers
First, update your display driver. This can be done by visiting thewebsite of the video card manufacturer. Next, just find your video card and download the latest drivers for it.
You can also update your drivers manually:
Open Device Manager, locate Display Adapter and right-click on it. Next, select Update Driver and follow the instructions to complete updating the display drivers.
If you recently updated your driver it may be bad, so roll it back to an older driver. Open Device Manager and locate the display driver, then right click it. Next, select Roll Back Driver and follow the instructions to fix the driver failure.
Then you can simply prevent Windows from updating the display drivers so that the problem won’t bother you from now on.
You can also uninstall your driver and use the default one.
In Device Manager, locate the display driver, right-click the display driver and select the Uninstall button. Next, select the Uninstall Driver Software checkbox and click Uninstall. Next, restart your computer, during this process the default driver will be installed.
If that doesn't work, uninstall the problematic IDE ATA / ATAPI driver and restart your computer as well.
2. Work with Device Preferences
If your second monitor still does not work as expected, try temporarily disabling your graphics adapter.
Press Win + X and select Device Manager from the list. Now find your graphics adapter, right-click it and click on the Disable device option. After a couple of minutes, right-click the display adapter again and select Enable Device.
You can also change the monitor frequency. However, remember that not all frequencies are compatible with your monitor. If you want to avoid damage to the display, use the frequencies recommended by the device manufacturer.
To do this, open the Settings app (Windows Key + I), go to the System section, scroll down and select the Multiple Displays subsection. Next, click on Display Adapter Properties. Go to the Monitor tab and set the refresh rate to 60 Hz. Click Apply and OK to save the changes.
If you notice that your monitor is already set to 60Hz, select a different value. Then remember to set it back to 60Hz.Keep in mind that not all frequencies are compatible with your monitor, so if you want to avoid damage to your display, use the manufacturer's recommended frequencies.
The second monitor should now work properly.
You can also temporarily switch to only the first monitor and then switch to two monitors. Open the Settings app, go to the System section and open Display Settings. Select the Show Only One Option and save your changes.
Then change the monitor settings to Advanced and re-save the changes.
Thanks to the simple and intuitive interface of the DiskInternals Partition Recovery software application, you can recover absolutely any data
This can be done not only by professionals, but also by ordinary users. The software can perform damaged file recovery on Windows 10, 8, 7 and XP and even older versions of Windows operating systems.
DiskInternals Partition Recovery works with hard drives, flash drives, solid-state drives, and memory cards (including SD cards, SDXC, SDHC, etc.). Try the free version of the software before purchasing a license. Only after you have made sure that your files have been restored will you need to purchase a license for this product. Then you only need to follow the step-by-step instructions below.
Once you've lost your files, it's best not to write anything else to this disc, no matter how difficult it is. If you do this, the data will be overwritten and you will lose your documents forever. Therefore, for best results, try to repair damaged files immediately.
Recover your lost file using DiskInternals Partition Recovery:/p>
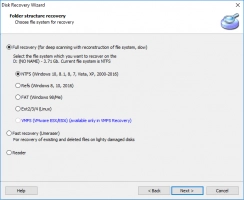
1. Download DiskInternals Partition Recovery, run the program and click Next.
2. Left-click on the wizard icon. Click Next.
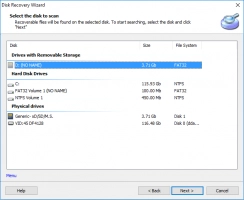
3. Select the disk containing the damaged file with the left mouse button and click Next.
4. Then select the type of file you want to recover and scan the disk.
5. As a result, you will see files that can be recovered (they will be marked with a red cross in the upper left corner).
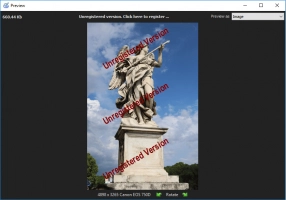
6. Preview - Right-click the file and select Preview in New Window (Ctrl + P).


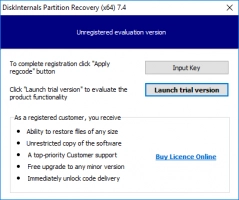
7. To save the found files, just purchase a license on the official website and enter the license key.
3. Update OS
Your system may be out of date and your system is not automatically updated. If this is the case, you should install Windows Updates immediately.
To do this, open the Settings app and go to Update & Security. Click the Check for Updates button - if updates are available, Windows will automatically download and install them in the background after you restart your computer.
4. Windows + P
If the problem is still not resolved, you can use the Windows Key + P keyboard shortcut to change the project mode.
You need to select the Expand or Duplicate option after that both monitors will work.
Other Recommendations
There are some more recommendations to help fix the Windows Doesn't Detect Second Monitor problem.
- Try adjusting the resolution.
Move your cursor to your desktop, right-click and select Display Options. Open the Resolution section and reduce the resolution until the external display starts working. Keep in mind, if this solution to the problem helped you, then the resolution must be changed every time you want to use an external display.
- Try closing the laptop lid or entering sleep mode.
As soon as you close the laptop lid, then your second display will become the main one and will work without any problems. Then, open the laptop lid and the two displays should work equally well.
Keep in mind, if this solution to the problem helped you, then these steps will need to be applied every time you want to use an external display.
If your monitor doesn't work on a desktop computer, you can solve it by using hibernation. After a few minutes, wake it up and both monitors will work properly.
- If you are using DisplayLink to connect two monitors, try updating DisplayLink to the latest version.
- Try activating the Scale to Full Panel Size option.
To do this, open the Catalyst Control Center and go to My Digital Flat Panels. Next, select Properties, click on your monitor and find the Image Scaling Settings section.
Select the Maintain Aspect Ratio option - the problem should now be resolved.
- Try disabling the deep sleep feature of your monitor.
Certain monitors have deep sleep functionality, and if enabled, your second monitor will be disabled.
So, open your monitor settings and disable the monitor deep sleep feature. Now the Second Monitor not Detected Windows 10 problem should be settled.


