5 ways to get rid of hard disk error 301

In this article you will find out:
- what is smart hard disk error 301
- hints on how to get rid of an issue
- how to protect your data
Are you ready? Let's read!
This article will address the issue of smart hard disk error 301, which indicates a hard disk failure or severe disk damage. This situation can happen with HP Notebook and PCs with HP SMART Testing built-in. System scans the hardware for boot problems and if such a scan detects a problem, the firmware displays SMART error code 301.
This situation is unexpected. You never know when it will happen, but you cannot boot your computer. Thus, it becomes critical for you to act very quickly to prevent data loss. Here are some factors that can lead to HP hard disk error:
- Outdated BIOS or problems with its settings.
- Incorrect connection, power surges, or unexpected system shutdown.
- Incompatibility of recently installed applications or drivers.
- Virus attacks and file corruption by malware.
- Single or large-scale system failures.
- Physical damage to the hard drive.
Most of these factors are not critical and you can try to fix them, so let's do it!
Hints on how to get rid of an issue
Change booting configurations.
Turn off the HP laptop, and then start downloading it. Immediately start pressing the BIOS key (for HP notebooks, this is the F10 key) continuously until you see the BIOS screen.
Use the arrows left / right to navigate to the Advanced tab and select the Boot Order section.
Follow instructions on the screen to move the hard drive up in boot order and press F10 to save changes and exit BIOS.
Alternatively, as soon as you press the Power button, you can continuously press the F9 key to enter the boot priority order. Next, select the hard drive to boot Windows, confirm your decision, and exit the BIOS.
If this method helped you boot into the system, the first step is to back up your data.
Reset BIOS
Resetting the BIOS configuration is a reasonable solution, especially if you have ever changed your BIOS settings. In this case, some parameters may not match and cause various kinds of errors, for example, smart disk errors.
Follow these steps:
Enter the BIOS as described in the previous method and press the F9 key, then press F10 to save and exit the BIOS setup menu.
Your system will reboot and if this does not resolve the error, try updating the BIOS, it may be out of date.
If this option didn't help you in any way, move on to the next step.
Reset disk
Your HP laptop may have been thrown on the couch, accidentally dropped, etc., in which case the connection between the hard drive and the laptop could loosen or disappear altogether.
You need to verify if this is the case by reinstalling the hard drive.
However, if you have not done this before and are not particularly familiar with the hardware of the laptop, then do not do this, but immediately proceed to the next method. After all, you can damage your laptop even more without wanting to.
Reboot system
A hard reset involves shutting down the system while discharging the traces of current from the motherboard. This should get rid of the HP smart hard disk error and allow the system to boot normally.
So, turn off the computer, unplug the power cord, and remove the battery, removable drives from the laptop.
Press the power button for 10-20 seconds. This way, you discharge every bit of current left in the motherboard (inside coils, capacitors, etc.). After a couple of minutes (2-7 minutes) do the same. Now you can be sure that there are no traces of current on the motherboard.
Then connect the battery and other devices and turn on the laptop, it should start without errors or problems.
Use data recovery settings
All the previous methods are not safe in the first place for your data, because their priority is not data, but fixing a system error in any way. Therefore, if you notice that the data has been damaged or deleted, you need to restore it as soon as possible. You can also create a disk image and recover data from there.
DiskInternals Partition Recovery is equipped with all these features:
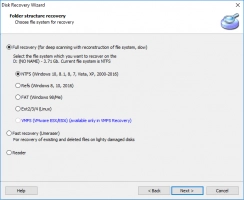
- You can recover data in several modes (shallow recovery and full recovery) depending on your goals and free time.
- You can open previously inaccessible files like in Explorer if you don't need export.
- You can create a disk image, free and simple.
This software works with Windows, including 7,8,10, etc., and also supports file systems: FAT12, ReFS, UFS, HFS, NTFS, ReiserFS, Reiser4, XFS Ext2, Ext3, Ext4. You can download a fully functional free trial version and enjoy the whole recovery process.
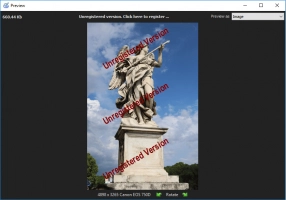
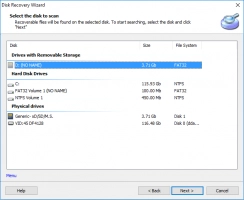
The recovery wizard in this program opens by default and follows the entire recovery process, so don't worry. You will be supervised. You can recover absolutely any type of files of any size, and with the free Preview function you will be sure of the quality of the recovered photos, videos, documents, etc.


As you can see, there are no hopeless situations, especially if you own a tool like DiskInternals Partition Recovery.


