How to fix: the drive where Windows is installed is locked
This article is fully dedicated to the "Windows drive is locked" theme and how to unlock it on Windows 10/11 or on the previous versions.
Here you will find out:
- what are the reasons for this problem
- methods to fix it
- why would you need to restore files
Are you ready? Let's read!
The drive where Windows is installed is locked — why?
There are actually a lot of reasons for this error and it leads to many difficulties. Here are the most frequent reasons:
- 1. Damage to a BCD file. This file contains the basic configuration parameters of the Windows OS.
- 2. Windows Bitlocker encryption is disabled. This bootable agent is usually used to unlock the Windows disk when the OS boots.
- 3. The TPM (Trusted Platform Module) has been cleared. This will also lead to a drive where Windows is locked.
- 4. The boot disk itself is damaged or contains errors.
In any case, in this article, you will learn how to unlock a hard drive on Windows 7, 10 or 11. So let’s start to solve the problem!
Step 1. Reboot Windows and Recover Data from the Hard Drive
If you see a blue screen with an error “The drive where Windows is installed is locked”, you need to restart Windows, using USB or DVD.
After Windows restarts, use DiskInternals Partition Recovery to open the disk or recover its files. Why? Because almost all the methods that help you with repairing the drive where Windows is installed when it is locked are harmful to your data and can completely delete them. And there are not many chances to recover any files afterward.


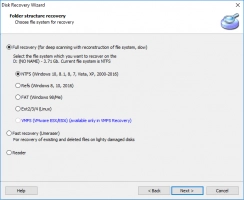
With DiskInternals Partition Recovery, you have nothing to worry about, because all your data will be restored with the built-in recovery wizard’s help.
You can also select the reading mode and open any file as in File Explorer!
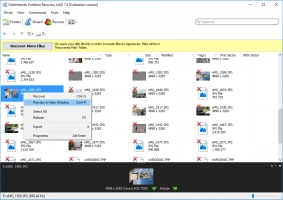
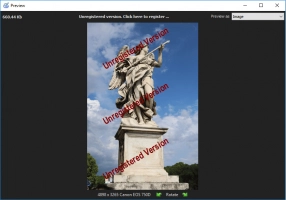
DiskInternals Partition Recovery supports absolutely all file types and recovers up to 1 Pb of data. The Preview function will visually show you the quality of the files being restored, and it is also free. Partition Recovery is equipped with a trio of helpers: Partition Recovery Wizard, NTFS Recovery Wizard, and FAT Recovery Wizard. This allows the program to be used not only by professionals but also by ordinary users. But, if you do not understand something about the problem and have any questions, you can easily contact the DiskInternals support service and receive highly qualified advice as soon as possible.
Download the free version of the software right now and no longer worry about the safety of your files!
Step 2. Use Windows Automatic Repair
This is a built-in Windows utility, which is very easy to use, to eliminate the error of “Drive where Windows is installed is locked”.
So insert your Windows DVD / USB boot disk. Now reboot the system and click “Repair your Computer”.
Then select Troubleshoot -> Automatic Recovery and follow the wizard’s recommendations until the error correction process is complete. If this method does not help, proceed to step 3.
Step 3. Use Windows CHKDSK Utility
To do this, boot the computer from the original Windows disk.
Note! This method is dangerous to your files because the CHKDSK utility cut disks files up to 512 kb in size. Any file that is bigger than that size will be cut (that is, damaged!). So make sure you have a backup of your files!
Now select and left-click "Recover the computer", then select "Choose an option screen” -> “Troubleshoot” -> “Advanced Settings” -> “Command Prompt".
In the new Command Prompt window, enter the command: "chkdsk Z: /f /x /r" (Z: is the drive where Windows is located). Now press Enter and wait until the disk check completes and the “drive where Windows is installed is locked” error will be fixed.
Do not forget to restart the computer and double-check it. If everything remains as before, proceed to the next step.
Step 4. Use Windows Bootrec
Pay attention! For this method, you may need to re-activate your Windows! This method is especially good if you have a damaged BCD file.
Again, boot the computer from the original Windows disk and go to the Command Prompt. (“Recover Computer” -> “Advanced Startup Options” -> “Troubleshoot” -> “Advanced Settings” -> “Command Prompt”) In the Command Prompt, type the following commands, after each one, press Enter.
- bootrec /FixMbr + press Enter.
- bootrec /FixBoot + press Enter.
- bootrec /ScanOs + press Enter.
- bootrec /RebuildBcd + press Enter.
After this command, remove the boot disk and type:
- exit + press Enter.
Now, it’s time to restart the computer and check if the error “Drive where Windows is installed is locked in Windows 10 (11)” is missing.
One last thing:
The above steps are feasible. If you are using them right, you have a high chance of solving the error for good!
If, after all these methods, you still have a drive where Windows is installed that is locked, you can use the SFC command as the solution. How to use SFC is fully described here.
As a last resort, you can always refresh the PC with the installation USB or DVD. All you need to do is: attach the USB drive (or DVD) to the computer and enter Troubleshoot (as mentioned above). Select Refresh the PC.

