Here is How to Fix This PC Can't Run Windows 11 Issue
Here you will find out:
- how to fix this issue
- how Partition Recovery can help you
Are you ready? Let's read!
About This Issue
Microsoft announced the release of Windows 11 and immediately received negative feedback from users. Many of them complain about the error This Computer Cannot Start Windows 11, which occurs when checking the compatibility of a computer with a new version of Windows 11. This happens even on those powerful computers that fully meet the system requirements set by Microsoft.

The most common issue is the presence of the TPM 2.0 chip on the motherboard, as well as the BIOS setting that needs to be enabled.
So, first of all, you need to be sure that the TPM 2.0 chip is actually on your motherboard (especially if you do not have a brand new computer). Here's how to do it:
Press Windows Key + R, type tpm.msc in the Run dialog box, and click OK.
This will open the Trusted Platform Module management console.
Go to the TPM manufacturer information screen and check the specification version value (the value should be 2.0).
If you do not see this libr value, or the console screen does not appear, you will receive a Compatible TPM Not Found Error Message. This means the platform module chip is not available on your motherboard or is actually disabled in the BIOS.
In this case, you will need to enable the TPM status chip from the BIOS.
1. You Might Need a Specific .dll file
Now, it's time to download the appraiserres.dll file from an external source (or from a Windows 10 ISO image).
Next, mount or extract the Windows 11 ISO and navigate to the Sources folder. In this folder, select the appraiserres.dll file and cut it.
Now paste the appraiserres.dll Windows 11 ISO image and try to install Windows 11 on your computer again.
This workaround helps you install the most recent version of Windows quickly and smoothly.
2. Examine BIOS Settings
Windows 11 requires a computer that supports secure boot, and this function must be activated.
So, first you need to restart your computer and press the function key (F2, F11, depending on your model) to enter the boot menu. Next, you need to find the location of the Secure Boot option and activate it. If your system won't boot, you will need to use a disk converter. This is necessary to switch your disk from Master Boot Record (MBR) to GUID Partition Table (GPT) partition style without deleting data on the disk.
But don't be overconfident and back up your data to be safe.
When you convert a disk to GPT, disable Legacy or CSM boot from BIOS before booting the system.
DiskInternals Partition Recovery - with this app you can not only recover the data, but also create a disk image
The program has a high rating due to deep scanning of each disk partition, so as not to miss a single lost file.
It is also possible to convert any selected file system (FAT, ReFS, UFS; HFS, NTFS, ReiserFS, APFS (read mode), RomFS (read mode); Reiser4, XFS, Ext2, Ext3 and Ext4) if it is damaged and inaccessible. Forget about the limitations of recovery: you can recover an unlimited amount of data in any format. Also, after any scan (full or superficial), you can see each found file in reading mode for free. Then you can buy a license directly on the company's website at any time, with the subsequent storage of data in the right place.
DiskInternals Partition Recovery also offers a free option to create a disk image in case of an emergency or for your experiments; you can save the system configuration (along with all data) to another device. Later, if you want, you can apply this disk image on your new computer and keep working.
Instructions are included:
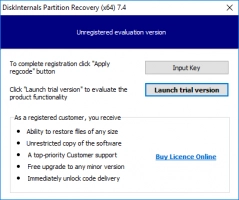
1. Download and install DiskInternals Partition Recovery from the official website.
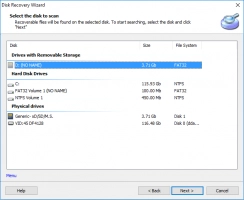
2. Select the basic search parameters for data from a damaged hard drive (the Recovery Wizard will help you with this).
3. Select the scanning mode: Unerase,r Reader, or Full Recovery (recommended). Click "Next.
4. The scan will start, which will take some time.
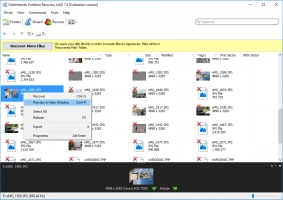
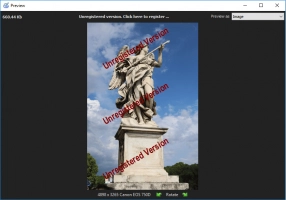
5. Preview and restore. Right-click the file and select" Preview in a new window. "After this step, you can be sure that your data will be restored properly.


6. If you want to save the recovered files from your hard drive, just buy a license and enter the license key; the program itself will ask you to choose a location to save the data.
