Guide on how to fix Trustedinstaller.exe issue
In this article you will find out:
- what is Trustedinstaller.exe
- how to fix it
- how to protect your data
Are you ready? Let's read!
What is Trustedinstaller.exe?
If you notice that something has happened to your system, namely: there is a high load, the computer often freezes and responds slowly to commands, launching programs has become a very long process, most likely the cause may be TrustedInstaller.exe.
So what is TrustedInstaller.exe? So, TrustedInstaller.exe is a process that is present in all versions of Windows, starting with Vista, which is associated with the Windows Modules Installer. It is also one of the main components of Windows resource protection.
TrustedInstaller.exe is able to install and modify not only Windows updates but also other additional system components that will greatly affect the computer. This file's location is in the C: Windows Servicing folder and is approximately 100-200 KB in size.
Thus, TrustedInstaller is a Windows component and should not be removed or changed, especially since it rarely affects computer performance.
On the contrary, if you try to delete this file, then some Windows functions will simply stop working, and sometimes the system may appear.
How to fix it?
If you still think that it was TrustedInstaller.exe that damaged your system, then most likely the process. If you are also in this case, you should know that the TrustedInstaller.exe process has been corrupted or even replaced by malware of the same name.
In such a case, you need to check the CPU utilization with InSpectre or any other similar tool. If you see that the processor is really overloaded, most likely TrustedInstaller.exe was infected with a virus.
Another way to check the TrustedInstaller.exe process is to check the location of the given file. If the file is not in the C: Windows Servicing folder, then you are probably dealing with malware.
Well, the last way to check the TrustedInstaller.exe process is to run a system file scan using SFC.
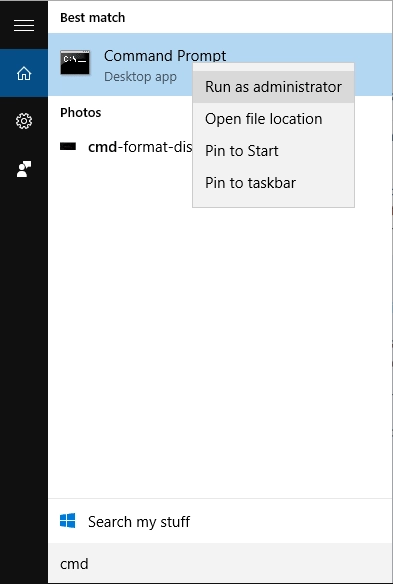
To do this, type cmd in the Windows search box and right-click the first result; select Run as administrator.
In the new cmd dialog box, type sfc /scannow, hit Enter, and wait for the process to complete and restart your computer.
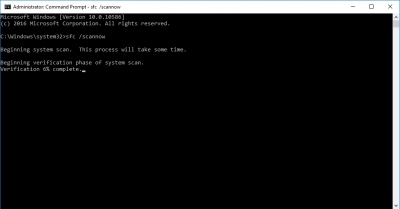
You do not need to do anything else; this action will restore all damaged files, including TrustedInstaller. After that, the work of the computer should be restored.
Keep in mind that the TrustedInstaller malware is very dangerous for your privacy, as it can use your camera and microphone without your knowledge. Therefore, if you determine that a process has become malicious, delete it immediately.
What is Trustedinstaller.exe?
Protecting your data is easy with dedicated software. DiskInternals Partition Recovery is best for recovering photos, music, documents, videos, and other files from any storage device connected to your computer.
You can use the free trial to view all recovered data and then decide about purchasing the program. DiskInternals Partition Recovery is equipped with a simple recovery wizard to help you recover your data, even if you are new to the business.
If you have enough skills, you can also recover data manually, without the help of the wizard. Unlike other software tools, DiskInternals Partition Recovery will restore your data to its original location with its original names.
This program is compatible with many file systems: FAT12, FAT16, FAT32, NTFS, NTFS5, EXT2 / 3/4, etc. The recovered files can be saved on any media connected to the computer. As you can see, this program has all the necessary properties and functions to easily and correctly recover data from a hard drive or any other removable media.
Just follow the step-by-step instructions below, and you will forget about your problem forever:
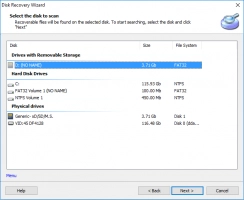
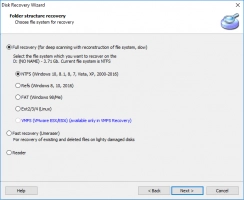
- Step 1. Download and run DiskInternals Partition Recovery. The wizard will start automatically. You will be prompted to select the folder or drive you want to recover. Select and click Next. Then determine the type of file to be restored. Click Next.
- Step 2. Scan the data. Here, select the scanning method: full or fast. It depends on how much time you have and how long ago the data was deleted. It is recommended that you select full validation for more accurate results. After a while, you will see a list of deleted files.
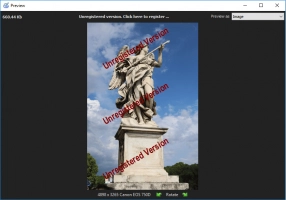
- Step 3. Preview and restore. To preview the recovered photos, right-click the selected file and select Preview. This means that your information is intact and can be recovered. Select all or only some of the found data and click the "Recover" button.
- Step 4. Data export is available after purchasing a product license - this action can be performed online without leaving your home.

