USB Ports Are Not Working in Windows 10: Fix it Now!
In this article you will find out:
- how to deal with this issue
- how to protect your data
Are you ready? Let's read!
About This Issue
- USB mouse and keyboard do not work in Windows 10
- USB ports do not work Windows 10
- USB does not work Windows Code 43
- USB does not work Toshiba, Samsung, Dell, Lenovo
- USB not recognized, appearing, revealed, showing
- USB not read, can not be initialized, does not open files
The first thing you should do in a situation like this is to try to connect the device to another USB-port. If that doesn't work, try connecting your USB device to a different PC.
If these simple methods do not work for you to connect to the USB port, you should use the other, more appropriate methods described below.
Let's Fix it
1. Work with Drivers
In most cases, the general drivers for your PC's peripherals are not regularly updated by the system.
In this case, you need to download the latest drivers for your USB device yourself and install them on your computer.
Press Windows Key + X and select Device Manager, then locate the device driver and right-click it to select the Uninstall function.
After restarting your computer, the latest drivers will be installed automatically.
You can also do this automatically using third-party software that will scan your computer for new compatible driver versions and update them for you.
If that doesn't work, try updating your USB Root Hub drivers.
To do this, in Device Manager, expand the Universal Serial Bus Controllers section. Next, right-click USB Root Hub and select Update Driver from the menu. Then click Search Automatically for Updated Driver Software and repeat these steps for all USB Root Hub devices on your PC.
2. Configure Power Preferences
If USB still doesn't work on your PC, change the power management settings for the USB controller.
In Device Manager, locate the Universal Serial Bus Controllers section and open it. Click each driver named USB Root Hub, and then click on Properties'. On the tab Power Management, disable the Allow the Computer to Turn Off This Device to Save Power option and save the changes and repeat the process for all USB Root Hub drivers.
Restart your computer and the USB port will work properly.
3. Work with Device Control Panel
You need to remove the USB controller if the previous methods were ineffective. In Device Manager, find the Universal Serial Bus Controllers section and open it. Right click each driver under Universal Serial Bus and select Uninstall, reboot your PC.
4. Disable Advanced Start Options
You can disable Fast Startup as follows:
From the Control Panel, select Power Options, then, in the left sidebar, click Choose What the Power Button Does. Next, click on Change Settings and in a new window disable the function Enable Fast Startup. Press Save Changes. Now, when Windows 10 boots up, there will already be enough time to detect all external devices.
You can also fix the problem by disabling USB Selective Suspend: under Power Options, click Change Plan Settings, then click Change Advanced Power Options and navigate to USB Settings. Set the USB Selective Suspend option to Disabled and save your changes.
5. Edit Registry
Modify your registry as follows and your USB ports should start working again without any problems. Note: A registry backup is fine, but it doesn't have to be done - purely for the safety of your system.
So:
Press Windows Key + R and type regedit, then press Enter.
Next, on the left pane, navigate to HKEY_LOCAL_MACHINE/SYSTEMCurrentControl/Set/Control/Class {4d36e965 - ///}
The key name must start with 4d36e965. Next, in the right pane, find the UpperFilter and LowerFilters files, delete them and immediately restart your computer.
6. Update OS
If the USB still doesn't work in Windows 10, you can fix this problem simply by installing the necessary updates for your system.
Usually, Windows 10 installs updates automatically, but sometimes, due to a lack of time, you may miss an important update.
Therefore, install the necessary updates automatically.
Open Settings (Windows Key + I) and go to the Update & Security section. Press the Check for Updates option, and Windows will check and download any available updates.
Make Sure Your Data is Safe!
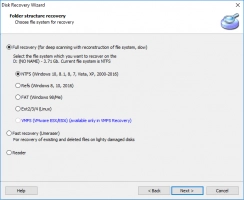
In order to maximize the protection of all your files from peripheral devices, you need to find good software - DiskInternals Partition Recovery software is a great solution. This tool works with all versions: Windows 7/8/10, etc. and supports the following file systems: FAT32, UFS, HFS, NTFS, XFS, Ext2 / 3/4, ReiserFS, FAT12, ReFS, Reiser4. Here you can also easily use the Recovery Wizard (by the way, there are three options to choose from) - this is very convenient if you have not encountered such utilities before. The app can do a lot:
- Provide you with explorer-like read access to files.
- Provide services for the complete or superficial restoration of a peripheral device.
- Provide services for creating a disk image, you can dwell on this in more detail, since it is completely free. The disk image will give you the ability to restore the system with all its files, programs and settings.
Instructions for using DiskInternals Partition Recovery:
Step 1. Connect the USB drive to your laptop or computer via a card reader if needed.
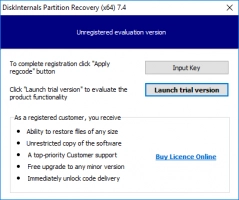
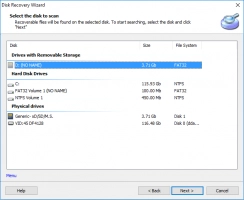
Step 2. Install and run DiskInternals Partition Recovery on your computer - select the required peripheral disk for scanning.
Step 3. The Recovery Wizard will ask you to select the type of files you want to recover, or you can skip this step. You can then search for files by type after scanning.
Step 4. Scan.
Step 5. Preview and recovery. View deleted files for free by right-clicking on them and selecting Preview in New Window - after that, the data will be restored correctly.
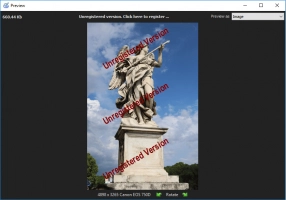
Step 6. Export files. You will receive a license key after purchasing a license and then activate the Export Wizard to save the recovered data to a new location.

