We couldn't install some updates because the PC was turned off: your actions

While updating your computer, you may receive an unwanted message: "we couldn't install some updates because the PC was turned off". As a result, the correct installation of updates will be impossible.
This can happen due to many circumstances: virus attacks, corrupted Windows updates, incompatibility of antivirus applications with the system, etc.
Here, you will learn how to complete the Windows update correctly without losing a single precious file.
In this article you will find out:
- how to get rid of "Windows couldn't install updates" issue
- how to protect your data
Are you ready? Let's read!
What to do if "Windows 10: we couldn't install updates because the PC was turned off" massage appears
Here are 6 ways of the useful methods of solving Windows update issue. Any of these methods can be helpful for you.
1. Turn off antivirus
As mentioned above, third-party antivirus may cause the “Windows couldn’t install updates” message, so disable your antivirus or even uninstall it.
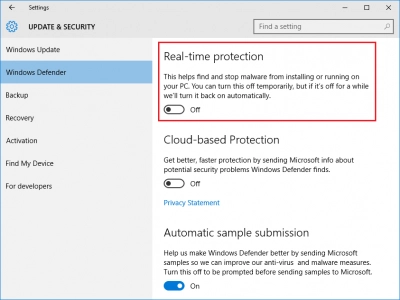
You will find how to do this on the official website of the antivirus application manufacturer. Do not hesitate in these actions because your computer will still be under reliable protection - Windows Defender will protect you and your data.
2. Clean boot
You can also perform a clean boot of the computer (all background applications will be disabled) and thus determine the cause of the problem.
Press the Windows + R keys at the same time and open the Run application. Then enter msconfig and click OK. Go to the Services tab and select the Hide all Microsoft services check box. Next, to disable all third-party services, click on "Disable all". Save all changes and go to the "Startup" tab. Click "Open Task Manager" and select each service in turn and click the "Disable" button.
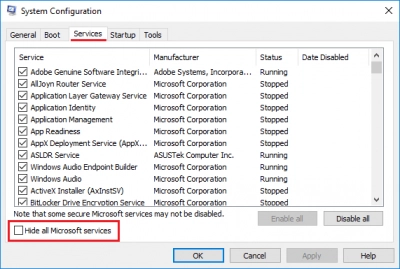
After rebooting, you can again try installing updates. If this helps, then the problem is caused by some service. To find out which particular service is to blame, you can start Task Manager again and try to enable each application one by one until you find the culprit.
3. Get rid of Software Distribution
This method is often very effective, and this is how to use it:
Conveniently open a command prompt as an administrator and run the following commands one after another:
clean stop wuauserv, press Enter
clean stop cryptSvc, press Enter
clean stop bits, press Enter
net stop msiserver, press Enter.
Now, go to C: \ Windows \ SoftwareDistribution and delete all files and folders inside.
Next, you need to enter certain commands one after another in the command line to restart the services associated with Windows Update:
clean start wuauserv and press Enter
clean start cryptSvc and press Enter
clean start bits and press Enter
clean start msiserver and press Enter
Now, go to Center update Windows and try updating Windows again.
4. Use troubleshooter
To run the Windows Update troubleshooter, open Computer Settings. Next, go to the "Update & Security" section and select the "Troubleshoot" option. In the new window, under Getting Started, select Windows Update. Then click Run the troubleshooter and wait while the scanning process detects existing problems. If problems are found, click Apply this fix.
Finally, restart your computer and try updating Windows to see if the "get rid of Windows 10 updates couldn't be installed" error persists.
5. Update Windows
To manually install Windows updates, you will have to do several steps: in the section "Settings', go to the "Update and Security" subsection.
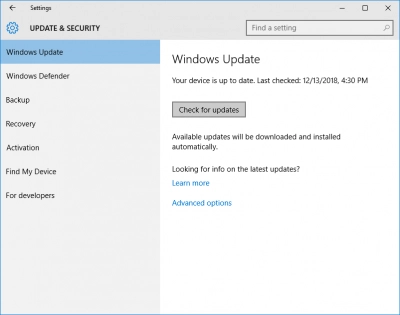
Select the View update history option and copy the latest KB number to the Windows Update package.
On the site, Microsoft Update Catalog, paste this Windows Update KB number in the search box and press Enter.
In the new window, click the Download button and then click the link for the .msu file to download it.
When the .msu file has finished downloading, open it, and Windows will install the new update.
6. Reinstall OS
This method should be used as a last resort, as it requires a lot of conventions (creating a data backup, possibly creating a disk image, creating a bootable USB disk from an ISO file, etc.).
So, first, you need to create a bootable USB disk from the ISO file and select your language, time, currency format, and the keyboard or input method in the window. Then click "Install Now", accept the license terms, then select the installation type and choose where you want to install Windows. Once the installation process is complete, you need to follow the on-screen instructions to configure the basic system settings.
If something went wrong...
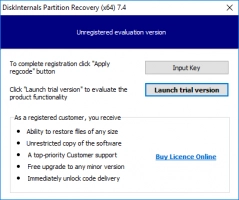
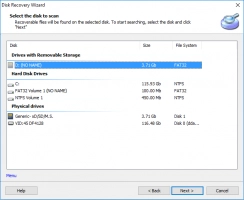
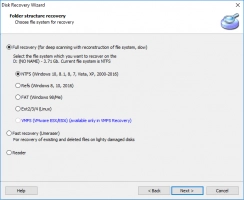
If something went wrong (data was lost) or you didn't back up your data before fixing the error "Windows 10 we couldn't install updates because the PC was turned off", you can still recover your files with the professional tool, DiskInternals Partition Recovery. This application is equipped with Recovery Wizard. It will guide you through recovery process of lost file from any disk partition, even if this is your first time doing it. DiskInternals Partition Recovery supports many file systems, including:
HFS, NTFS, ReiserFS, APFS (Reader mode).
FAT, ReFS, UFS.
Reiser4, XFS, Ext2, Ext3 and Ext4.
There are three scan modes in the application for your choice:
- Fast scan, when missing files are checked superficially.
- A full scan is recommended for a more thorough scan of disk partitions.
- Reader mode will help you to view files from unsupported file systems as in Explorer.
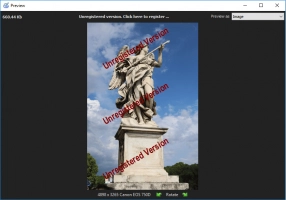
Partition Recovery's great feature is file preview. Even in the trial version, you have the option to preview files before recovering them for free. It should be noted that the program recovers data from hard disks and their partitions, regardless of the type and size of the file or the reason for the loss. Now, you are confident that DiskInternals Partition Recovery is a reliable and proven way to get your data back.

