Wi-Fi Network is Not Showing Up? Fix it Now!

In this article you will find out:
- how to deal with this issue
- how to protect your data
Are you ready? Let's read!
About This Issue
Sometimes the wireless connection does not appear in the list of available networks. This can happen at the most inopportune moment, so this article can be extremely useful.
The inability to access your home network can happen due to a number of reasons:
- Driver problems (not updated, corrupted)
- Problems with your router or your network configuration
- Incorrect Wi-Fi connection
- Incorrect Wi-Fi settings
- Using a 5 GHz network
- Other reasons
Knowing the cause of your Wi-Fi Not Showing problem makes it easy to find the right solution
1. Use System Commands
You can use the command line to modify the registry (delete certain entries) and fix the Wi-Fi is Not Showing Up problem.
So, run Command Prompt as administrator: press Windows Key + X and select Command Prompt (Administrator).
Type:
reg delete HKCRCLSID {988248f3-a1ad-49bf-9170-676cbbc36ba3} / va / f
netcfg -v -u dni_dne, press Enter.
Reboot your computer for the changes to take effect and check if the problem is resolved. If this solution didn't work, go to the next solution.
2. Examine Running Tasks
In order for the Internet connection to work properly and without interruption, certain services need to be activated:
- Windows Event Log
- Remote Procedure Call (RPC)
- Windows Update
Then, go to Services and check if the above services are working.
This can be done as follows:
Press Windows Key + R, type the MSC and press Enter or click OK.
You will be taken to the System Services window. Now make sure that all these services are running. If any of the above services are not working, right-click it and choose Start from the menu.
When all services are running, check if Wi-Fi Not Showing Up on Laptop problem persists.
3. Exit Your Windows Account
This method is temporary, but it can help you if you have problems with the network in Windows. So, you need to log out of Windows and select your Wi-Fi network:
Press Windows Key + L - this will help you log out of Windows. Click on the Wi-Fi icon in the lower-right corner and select the desired Wi-Fi network. Log back into Windows. Now you should be able to connect to your Wi-Fi network.
If this helps, you will need to repeat these steps whenever you need to connect to the network.
4. Update OS
The home network may not be available due to failures in Windows. And the best way to get rid of all kinds of crashes is to update Windows to the latest version.
To do this, open the Settings application, go to the Update and Security section. In the right pane, click the Check for Updates button.
In order to update the system, you need an internet connection. Therefore, be sure to connect your computer to the Internet using an Ethernet cable.
If any updates are found, they will be automatically downloaded in the background during the next system reboot. Then check if the problem persists.
Any action associated with the solution of the problem can lead to data loss
Therefore, the first thing you need to do is find good professional hard drive recovery software. The best option for you is DiskInternals Partition Recovery.
This program uses an advanced scan of every sector of your hard drive and finds over 90% of all lost files. Partition Recovery can recover files in most file systems, including FAT 32, NTFS, exFAT, FAT 12, FAT 16, NTFS / HFS, etc. Besides, unlike other related applications, there are no restrictions on the amount of data recovered. This program has a convenient and user-friendly interface with a built-in wizard that will help you quickly and easily restore the original disk, even if this is your first time.
A free demo version of Partition Recovery has been developed especially for you. With it, you can make sure that it is a decent program that also quickly and correctly recovers data from your hard drive. All you need to do is download and install DiskInternals Partition Recovery; the rest will be done by the program automatically.
Here is a quick guide to recovering a disk using Partition Recovery:
1. Download and install DiskInternals Partition Recovery.
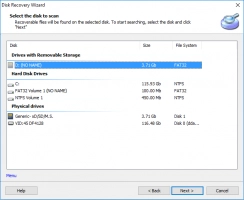
2. Select basic options to search for data from a damaged hard drive.
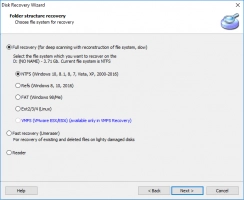
3. Select the mode of operation of the recovery wizard: Reader, Uneraser or Recovery (recommended in most cases). Click Next.
4. Next, the scanning process will start, which will take some time.
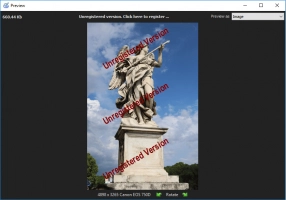
5. Preview and restore. Right-click the file of interest. Select Preview in a new window. Then you will be sure that your data will be restored correctly.


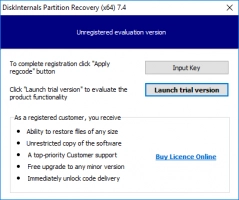
6. If you want to save the recovered files to your hard drive in any format, simply purchase a license and enter the license key itself will prompt you to select the location to save the data
Tip: Do not save the recovered documents on the same hard disk so that the data will not be overwritten.


