What to do if Windows delayed write failure occurs
Here you will find out:
- what causes Windows delay write failure
- how to fix this error
- how DiskInternals Partition Recovery can help you
Are you ready? Let's read!
What causes Windows delay write failure?

The lazy write error is related to a useful Windows feature - Disk Write Caching. This feature improves the read/write speed of data, resulting in increased system performance. It works like this: when you move a file to or from some medium, the data is cached in fast, non-volatile memory and later written to the slower hard drive.
And when this process is interrupted - the system displays the error "Delayed write failed". This can eventually lead to data loss and file corruption. To correctly and quickly cope with this problem, you need to know what causes the error "Delayed write error". Quite often, the problem is with a device driver; it can be outdated, corrupted device drivers, and USB controllers.
You should also pay attention to the state of the USB cable and the correctness of its connection (a loosely connected drive may disconnect during data transfer).
In addition, bad sectors, mechanical problems, SMART errors, and other logic errors can also lead to the error under investigation.
So, what if the data has already been damaged or deleted, and the error still accompanies you? You will find the answer in this article.
How to fix the issue?
DiskInternals Partition Recovery will give you the confidence that you can still rescue and recover your photos, videos, images, music, documents, mail, etc. With this software, you can not only open data like in Explorer, but also restore them in several ways, and the “Windows delayed write failed xp” error will no longer seem so terrifying.
The application works with all versions of the Windows operating system and with many file systems, such as FAT12, ReFS, HFS, NTFS, ReiserFS, Reiser4, XFS Ext2, Ext3, and Ext4.
In addition, a free trial version of DiskInternals Partition Recovery has been developed, which you can download and use right now. The preview function, which is also provided free of charge in both the trial and the licensed version of the program, will help you ensure that the information is restored correctly and the data is intact.
After recovering the data, you can export it to various storage devices that are convenient for you using a pre-purchased license. You can also count on remote technical support of the company's specialists in critical situations within a year after purchasing a license!
Step-by-step instructions for recovering damaged and deleted data:
Step 1 - Connect the USB drive to the computer via a card reader, if required.
Step 2 - Install and run the trial version of DiskInternals Partition Recovery. The program will automatically detect all disks on the computer; select the required disk for scanning.

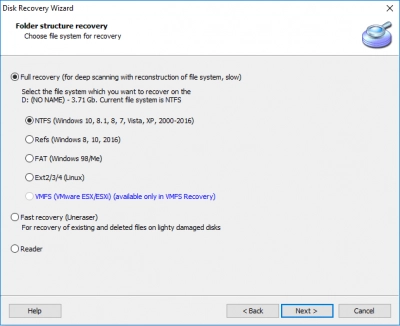
Step 3 - The Recovery Wizard will launch itself and ask you to select the type of files you want to recover, or you can skip this step and search for files by type after scanning.
Step 4 - Scanning. It may take a while; please wait patiently.
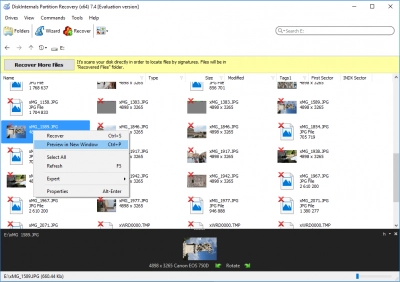
Step 5 - Preview and Recovery. Preview the deleted files by right-clicking on them and choosing “Preview in new window” and then be sure that the data will be restored correctly.

Step 6 - Saving files. To do this, you just need to buy a license for this product, and you will receive a license key and then click on “Save”. Save the recovered data to a new location to avoid data overwriting in the future.
How to prevent delay write failure?
To prevent the Delayed Write error in advance, you need to disable the Write caching policy. You can do this as follows:
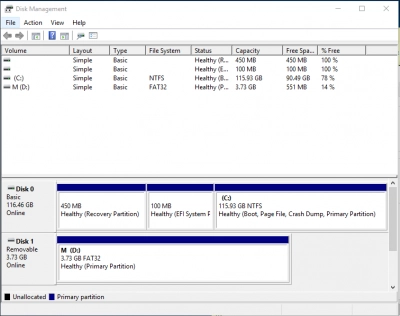
Open the Disk Management tool and right-click the required disk. Next, select "Properties" and go to the "Hardware" tab. In this tab, select Properties and go to the Policies tab.

Herewith it, uncheck the Enable write caching on the device box below the Write caching policy frame and click OK.
Be careful; these actions can slow down your PC.
To avoid this effect, as well as to avoid errors and data loss, do the following:
- Always use the correct cable and make sure it is securely connected before sending or copying data to an external hard drive.
- Always remove the USB storage device safely.
- Always keep your device drivers and Windows updated.
