Here is everything you need to work with Windows Partition Manager
In this article you will find out:
- how to work with Windows partition manager
- how to protect your data
Are you ready? Let's read!
Access management tool
It doesn't take much knowledge and effort to run the Disk Management tool, you just need to click Start, enter the word "partition" in the search field, and click OK. Then you will need to click the "Create and format hard disk partitions" option that appears.
The Disk Management utility itself is divided into two panels:
- The top panel displays a list of your existing volumes.
- The Bottom pane displays a graphical representation of your disks and volumes on each disk.
If you select a volume in the top pane, the bottom pane will show the drive containing that volume. If you select a disk or volume from the bottom pane, the top pane will show you the corresponding volume.
For a better understanding, you should know that a partition is a space allocated on a disk separately from other space on that disk, and a volume is a partition formatted in the file system.
Change volume
Sometimes you may need to change (decrease or increase) the size of a volume. All this can be done quite simply using the disk manager if you follow the instructions below.
1. To shrink the volume:
Right-click the volume and select the Shrink Volume option. Next, select the volume to reduce, as a result, you will see the total new size of the current volume after you reduce it by the amount you selected.
Note that you can only shrink a volume if there is enough free space on it. And now that you've shrunk the volume, you should notice that the disk contains our shrunk volume on the left and the new unallocated space that was freed up on the right.
2. To increase the size of a volume:
This function is available if there is unallocated space to the right of it on the same disk. You must also right-click an existing volume and then click "Expand Volume". In the new window, you will see "Volume Expansion Wizard" - click "Next". Now select the appropriate drive, select the space you want to use, and click the Next button. Finally, click the Finish button for Windows to expand the volume.
Create new partition
If you have reduced the size of a partition and you have unallocated space, you can make good use of the free space and create an additional volume. Right-click the unallocated space and select the New Simple Volume option.
In the new Simple Volume Wizard window, specify the size of the volume to create, assign a drive letter (or accept the default), and then click Next. Now you need to format the partition to make it usable.
After that click the "Finish" button and you will see your new partition listed in the Disk Management Tool.
Delete volume
Of course, Windows 10 partition manager can help you as well delete an existing volume.
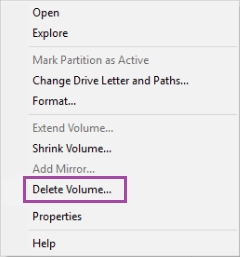
This may be required if you are no longer using this section. As a result, you will receive unallocated space, which can later be used to expand the existing volume. Before deleting a volume or partition, double-check its contents and back up important data if necessary, as deleting a volume also deletes all data on that volume.
Right-click the volume in Disk Management and select Delete Volume option, click Yes, and wait for the process to complete.
Work with Drive Letter
Also, Windows 10 disk utility is perfect for changing drive letters. So, right-click any volume and select the "Change drive letter" option, then click the "Change" button.
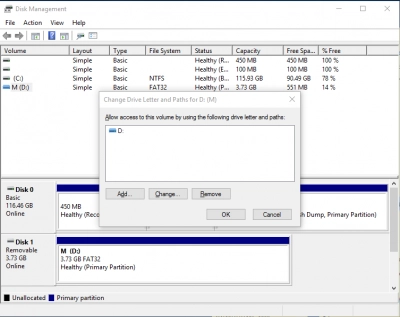
In the Assign the next drive letter drop-down list, select a new drive letter from the options provided, click OK.
If you still have problems or change your mind about changing the drive letter, you can change it back.
Formatting volume
You can also use Windows 10 disk management to format a volume or partition. Remember that if you format the volume in any way, you will lose all data. If you have thought well and secured your data, then proceed: Right-click the volume and select the "Format" option, then enter the volume label, select the file system and choose whether you want to perform a quick format or not.
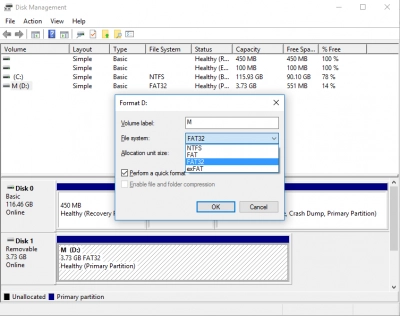
Finally, click OK and wait from a few seconds to a minute or so, depending on the size of the volume.
Protect your data!
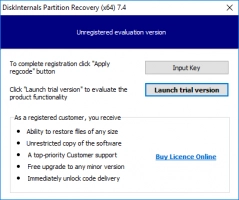
You can recover and protect your data using special software. However, it is necessary to treat the choice of a specific program with full responsibility because the result depends on this - DiskInternals Partition Recovery is developed by professionals in their field and can recover up to 99% of lost files.
The software works with many file systems: HFS, NTFS, FAT, ReFS, UFS, EXT2 / ¾, ReiserFS, etc., the application works on each of the hard disk partitions, which provides stunning results that you could not even think of.
DiskInternals Partition Recovery will easily cope with the recovery of any type of data during formatting, virus attack, accidental or deliberate deletion, hard disk damage, operating system errors in various situations, etc.
To use this software, you just need to download and install it sequentially on your computer, and the built-in simple and convenient Recovery Wizard will do the rest for you. For customer convenience and clarity, DiskInternals has developed a free promo version that you can use right now.
The instructions for DiskInternals Partition Recovery are of course attached:
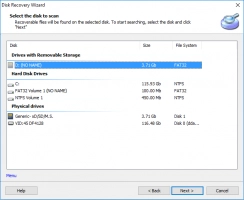
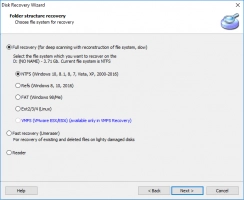
- 1. Download and install the DiskInternals Partition Recovery software and automatically launch the Recovery Wizard (you need to select the partition on the hard disk that you want to recover, as well as the basic parameters for finding data).
- 2. The scanning process will start (fast or full), wait for the process to complete.
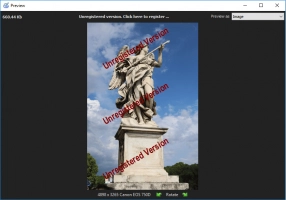
- 3. Free preview for everyone.
- 4. To export recovered files, you just need to buy a license for DiskInternals Partition Recovery and follow the detailed instructions of the Export Wizard.
The whole recovery process will not take you much time and effort, since everything here is extremely automatic; good luck, you will certainly succeed!

