What Should You do if Wireless Mouse is Not Working?

Here you will find out:
- how to deal with this issue
- how DiskInternals Partition Recovery can help you
About This Issue
Many users report having problems with their wireless mouse. It sometimes happens that after the next update of the Windows 10 OS, the wireless mouse does not work correctly. However, don’t worry. There are solutions that will definitely help you! Next, you will be provided with several fairly simple solutions and options for the most common reasons for the incorrect operation of a wireless mouse on devices with Windows 10. In addition, you will need other pointing devices such as a touchpad or wired mouse to configure and diagnose a wireless mouse malfunction.
1. Is it Compatible?
So, on the way to success, you first need to check the compatibility of your wireless mouse with the Windows 10 system. After all, despite the simplicity, many people miss this nuance. As a rule, almost all modern devices are manufactured with a built-in system of compatibility with Windows 10. But this may not apply to previous models that are five or more years old. In such a situation, you will be forced to replace the device with a more modern one.
However, it may happen that the new wireless mouse is not compatible with the OS. In this case, check that the receiver is plugged into the USB port, and that it is functional and is receiving power. Then change the USB ports and see if the problem has been solved. In addition, the wireless receiver is connected to its own ports on the computer or laptop, but not to external port repeaters. Try to connect the wireless port to another computer to see if it works.
This method will allow you to clearly and quickly check whether the port on the PC is working. An additional method would be to reconnect the wireless port. To do this, when the PC is functioning, disconnect the wireless USB port, wait about ten seconds and reconnect it to the PC.
Check if the wireless mouse is syncing with the device. Also, check the battery life of the wireless mouse itself before tackling more complex solutions.
2. What About Drivers?
A good solution to fix a wireless mouse that is not working, is to reinstall the driver. Follow these instructions.
- Hold down the Windows Key + X and go to Device Manager.
- In the Device Manager window, select and expand the Mice and Other Pointing Devices tab.
- Right-click the wireless mouse and click Delete.
- Confirm your choice by clicking Delete.
- Restart the operating system to apply the changes successfully. When restarted, the system will reinstall the wireless mouse driver.
If this solution does not work for you, proceed to the next step.
Please try to check the compatibility of the wireless mouse driver with Windows 10.
- Open the Device Driver menu in the previous scenario above.
- Expand the Mice and Other Pointing Devices tab.
- Right click on the wireless mouse and locate the Update Driver setting, click on it.
- Here you need to select Search automatically for updated driver software.
The OS will search for the necessary drivers both on the Internet and on your PC to install the most modern and suitable software. Reboot your PC.
You also have access to an independent search for the latest driver on the official website of the manufacturer. To do this, after you click on Update driver, select Search My Computer for Driver Software. You will be prompted to select the path in the system where the driver downloaded from the Network is located.
Follow the instructions of the installation wizard and be sure to restart your computer. However, be careful. If you download and install the wrong driver, you will not solve the problem and will face the black Web Mouse Not Working Error.
3. Use Clean Boot
Another way to help you with the Wireless Mouse Not Working on Laptop error is to perform a clean boot. To do this, follow these step-by-step instructions.
- Open the search menu and type msconfig in the line and press Enter.
- Find and click on the Services line and uncheck the box next to Hide All Microsoft Services.
- Select the Disable All tab.
- Next, click on Startup at the top of the list and click on Open Task Manager.
- In the new window, you will need to select all the values and click the Disable tab.
- Close the Task Manager window.
- Now in the System Configuration window click on Ok.
- Restart the OS.
When Windows starts up, plug in your wireless mouse. Next, you can find exactly which software is interfering with the operation of the wireless mouse with your PC.
4. Look for Corrupted Apps
The next step is to find problematic applications that caused the wireless mouse to stop working.
- Run System Configuration as mentioned above.
- Navigate to Services and check the box next to Hide all Microsoft Services.
- Select half of the possible services yourself.
- Click the Ok tab.
- Restart the OS.
If you fail, go through the previous steps with the rest of the services in the Services section until you find the problematic software. It can happen that such software is among the selected services. Repeat all described steps with fewer services and you will definitely find what you are looking for. This is similar to the binary search algorithm used to find sorted arrays. If successful, you will find the software causing the Wireless Mouse Not Working Error. Do not boot it under any circumstances, but restart the system. Everything should now work correctly.
In any case, there is always a means of communication with the developer of any wireless mouse and you can jointly solve the problem. Additionally, you have the ability to perform a clean boot with a minimum number of drivers necessary to keep the system running smoothly. This eliminates the possibility of incompatibility of third-party applications with the wireless mouse software.
5. Install New OS
An extreme option to resolve the issue with blackweb Wireless Mouse Not Working errors is to reinstall Windows 10. In the event that the same wireless mouse functioned without failure with another version of Windows, there is reason to roll back to it. This will save you time by reinstalling Windows 10 on your PC or laptop.
Make Sure Your Data is Protected
The problem of data recovery on storage media is relevant today. There are many recovery programs available, but not all of them meet the user's requirements for quality.
Therefore, you definitely need a unified program that will allow you to quickly and efficiently provide access to remote files without any kind of problems.
DiskInternals Partition Recovery does an excellent job with its tasks and has been in demand for many years.
The program carries out recovery of files of any size and format, allowing access to damaged disk partitions.
Moreover, the work of the program is associated with a wide range of both internal and external storage media such as memory cards, IDE disk, SATA disk, SCSI disk, HDD, SSD, flash drive, external hard drive, etc.
The program integrates three wizards at once - Partition Recovery Wizard, NTFS Recovery Wizard, and FAT Recovery Wizard. This allows the program to perform recovery on most known file systems.

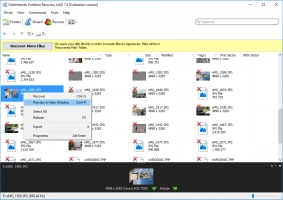
You can scan the file system partitions in just a few clicks. As a result, thanks to the built-in preview mode, you will surely see your valuable data.
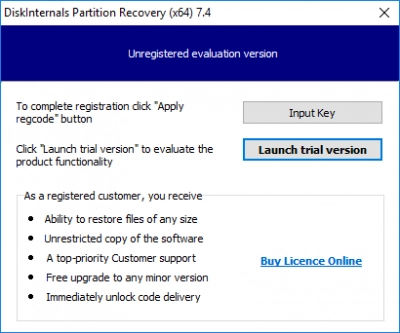
Do you want to return them to the system? Purchase a license key and use the software in any unforeseen situation, such as accidental deletion of files, power outage, or viruses and virus software.


With DiskInternals Partition Recovery, you will definitely be safe and never have to worry about the safety of your valuable data on any storage medium.
Good luck!
