How to backup and restore Active Directory: Step-by-step guide
Here you will find out:
- why it is important to back up Active Directory
- how to back up Active Directory
- when DiskInternals can help you
Are you ready? Let's read!
One of the most crucial components of every Windows network is Active Directory. Your business might be jeopardized if you don't have an AD backup policy in place. We show you how to back up Active Directory on Windows Server in step-by-step instructions.
What is Active Directory
For Windows domain networks, Microsoft's Active Directory (AD) is a proprietary directory service. It was first made available for centralized domain management in Windows Server 2000. The ability to create and administer domains, users, objects, rights, and access over a network is now included in all subsequent versions of the Windows Server operating system.
AD is excellent at managing traditional on-premises Microsoft infrastructure, but it fails miserably when it comes to cloud deployments. Azure Active Directory is used by Microsoft's cloud architecture, and it performs the same functions as its on-premises version. If your business has a hybrid deployment, Active Directory and Azure Active Directory are separate yet can operate together to some extent (on-premises and cloud).
Domains, trees, and woods are used to create a tiered structure in the AD plan. A domain is a collection of objects (such as persons or devices) that share an Active Directory database. A forest is a collection of trees, whereas a tree is a collection of domains.
Active Directory Domain Services (AD DS), which is part of the Windows Server operating system, is the core Active Directory service. Domain Controllers are the servers that operate AD DS (DCs). Some companies have many DCs, each of which has a copy of the domain directory. Changes made to the directory on one DC, such as a password change, are replicated to the other DCs to keep the DCs up to date.
The Active Directory database (directory) is organized in a hierarchical tree structure and contains information on the domain's AD objects. Users, computers, programs, printers, and shared folders are all examples of AD objects. The AD database is stored in the Ntds.dit file. A schema partition (which sets the AD database architecture), a configuration partition (information about AD structure), and domain names context are all components of the database that include different sorts of information (users, groups, printer objects).
Windows protected system files, a domain controller's System Registry, Sysvol directory, COM+ Class Registration Database, and cluster service metadata are all tightly interwoven with Active Directory. It is critical to consider such integration while developing a backup strategy, especially because of the direct impact it has on the AD.
Do you need to back up the active directory?
One of the most crucial components of every Windows network is Active Directory. Having no backup plan in place might put the entire company at danger. It's better to have many active directory domain controllers with fail-over capabilities so that if one fails, you can still recover even if you don't have a backup.
Having numerous domain controllers, on the other hand, is insufficient excuse for not performing a backup. Whether you have numerous domain controllers or not, you should still backup your active directory. Multiple domain controllers might fail at the same time, resulting in the unintentional or deliberate loss of all accounts or vital organizational units (OUs), database corruption, viruses, ransomware, or some other calamity wiping out all domain controllers. You'd have to restore it from a backup in this circumstance. This is why you must back up your data.
To get a solid backup of the AD, you generally don't need to back up every single domain controller. Only one of the domain controllers should need to be backed up. When your domain controller fails, your network and, as a result, your company operations grind to a standstill. Despite the fact that active directory services are intended with a high level of redundancy (if you deployed several DCs in your network).
As a result, creating and implementing a clear active directory backup strategy is critical. If you have numerous DCs operating, at least one of them must be backed up. The DC that runs the Flexible Single Master Operation (FSMO) function is the best to backup. Your business can simply recover if your domain controllers crash if you have a robust backup and recovery strategy in place.
Users cannot log in and systems cannot work correctly if the Active Directory Domain Controller (AD DC) is unavailable for any reason, which can interrupt corporate operations. That is why it is critical to back up your Active Directory. We'll teach you how to backup an Active Directory domain controller operating on Windows Server 2019 in this post. Before we get started, let's look at what System State backup is and how it affects Active Directory data.
Backup of System State
Microsoft Windows Server allows you to execute either a 'Full' or a 'System State' backup. A full backup copies a real or virtual machine's system disks, including programs, operating systems, and even the System State. This backup may be used for bare metal recovery, which enables you to quickly reinstall the operating system and recover from the backup.
On the other hand, System State backup produces a backup file for important system components. In the event of a system crash, this backup file can be utilized to restore crucial system components. When you use Windows Server Backup, Wbadmin.exe, or PowerShell to make a backup on a domain controller, Active Directory is backed up as part of the System State.
We'll utilize System State backup for this guide since it allows us to backup only the components required to restore Active Directory. It's worth noting, however, that Microsoft doesn't enable restoring a System State backup from one server to another of the same model or hardware configuration. System State backups are excellent for restoring Active Directory on the same server.
Before you can use Windows Server Backup to back up or restore your server, you must first install it using the capabilities in Server Manager, as discussed later in this tutorial. The kind of backup you choose for your domain controllers will be determined by the frequency of Active Directory updates as well as any data or applications placed on the domain controller.
The System State is the bare minimum you should back up to safeguard critical Active Directory data on a domain controller. The System State contains the following things, as well as several more based on the installed roles:
- Active Directory DC database files (NTDS.DIT), boot files and system protected files, COM+ class registration database, registry, and system volume (SYSVOL).
- Member of the domain: COM+ class registration database, boot files, registry.
- A cluster service-running machine: Backs up cluster server information as well.
- A computer that provides certificate services: Additionally, certificate data is backed up.
Furthermore, System State backups will backup Active Directory-integrated DNS zones, but not file-based DNS zones. A volume-level backup, such as a critical volume backup or a full server backup, must include file-based DNS zones. All of the following backup options may be performed manually or scheduled using Windows Server Backup.
To back up Active Directory, you can use either Windows Server backup or Wbadmin.exe to execute a System State backup of a domain controller. To conduct backups, Microsoft suggests utilizing either a dedicated internal drive or an external detachable disk such as a USB hard disk.
The rights necessary to schedule backups are not available to backup operators. To plan a System State backup or restoration, you must have administrator permissions. A System State backup is very useful for disaster recovery since it eliminates the requirement to restore Windows to its previous state before the system breakdown. It's critical to keep a current backup of your System State on hand at all times.
To boost your degree of safety, they may demand you to take frequent System State backups. Before and after making any substantial changes to your server, we recommend doing System State backups.
Take notice of the following preliminary measures before beginning the backup procedure:
- 1. It's critical that you have sufficient storage space to support the backup you're going to do.
- 2. You must setup the Volume Shadow Copy Service, also known as Volume Snapshot Service (VSS), on the disk for the backup to be successful if you are backing up while the apps that create the data are still operating (which is generally the case). This service aids in the creation of backup copies or snapshots of computer files or volumes, even if they are currently in use.
- 3. If you haven't already done so, you must install the Windows Server Backup function. Windows Server 2019, like earlier editions, has the Windows Server Backup capability, which aids in the backup and recovery of Active Directory databases. Now we'll go through each of the processes in detail.
Configuring the Shadow Copy Service (VSS) on the Volume
It's critical to back up the AD database in such a way that database consistency is preserved. Backing up the AD database when the server is shut down is one technique to ensure consistency. If the Active Directory server is in 24/7 mode, however, backing up the server when it is switched off may not be a smart idea.
As a result, Microsoft advises backing up an Active Directory server using Volume Shadow Copy Service (VSS). VSS is a Microsoft Windows feature that allows you to generate backup copies or snapshots of computer files or volumes while they are in use.
To avoid altering active files used by Active Directory during a backup operation, VSS writers establish a snapshot that freezes the System State until the backup is complete. It is feasible to back up a running server in this manner without compromising its performance. We'll teach you how to adjust the Shadow Copy size limit configuration on the drive where the AD database will be stored in this article.
1. To access the Disk Manager, use the Win+X key combination on your keyboard. Right-click on the partition where the server is installed, then select Properties from the context menu.
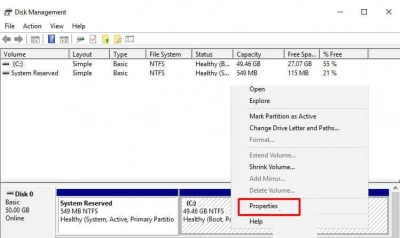
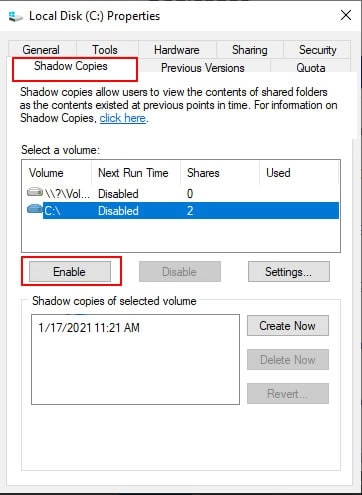
2. Click the Enable button under the Shadow Copies tab, as seen in the figure below.
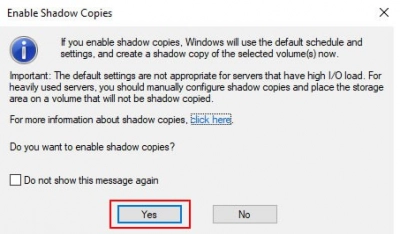
3. Click Yes to indicate that you wish to allow shadow copies in the following box, as shown below.
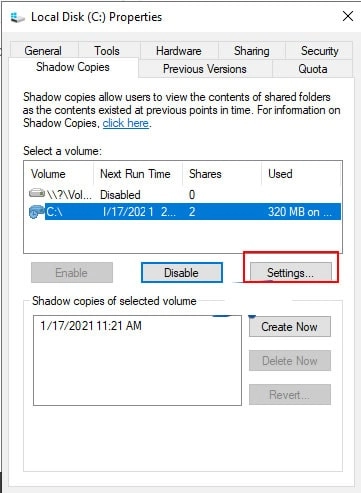
4. After you confirm, a restore point will be generated in the specified partition. To proceed, select Settings.
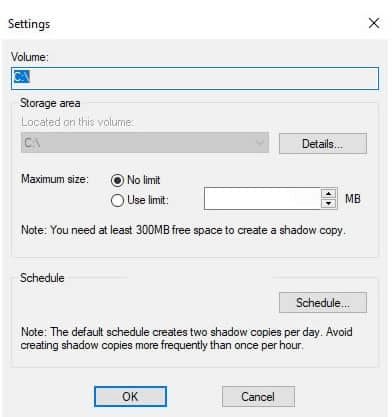
5. Select No restriction under Maximum size in the Settings page shown below. Once you've finished, click OK, and you're done with this section—configure the Volume Shadow Copy Service (VSS).
Install the Windows Server backup feature
Microsoft includes Windows Server Backup as part of Windows Server 2008 and subsequent versions. It took the place of the NTBackup application that was included with Windows Server 2003. Windows Server Backup, like previous editions, is a feature that may be installed in Windows Server 2019. So, if you haven't utilized the backup option yet, you'll very certainly need to do so first. The Server Manager is where you may install this functionality.
Active Directory database backup
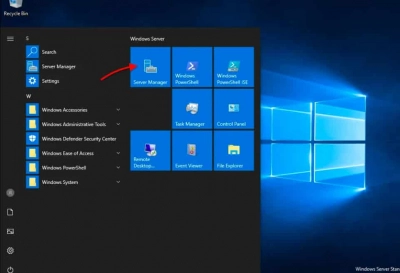
1. As seen in the figure below, open the Server Manager console.
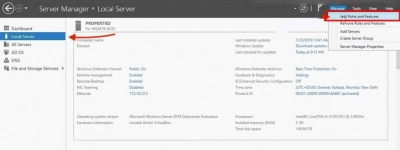
2. Go to Local Server >> Manage tab >> and select Add Roles and Features from the drop-down menu, as shown in the figure below. This will launch the Wizard to Add Roles and Features.
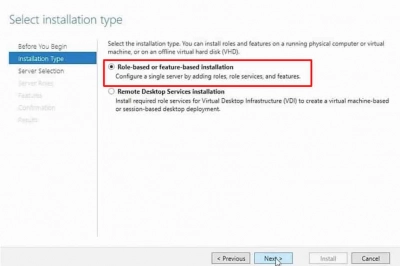
3. On the Select installation type page, click Next after selecting Role-based or feature-based installation.
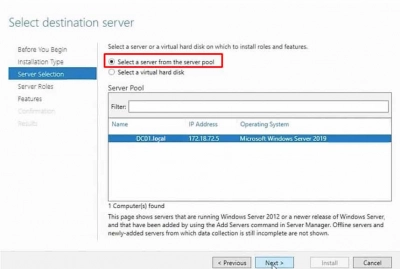
4. On the following page, titled Select target server, you must choose the server where you wish to install roles and features. The server pool will be displayed automatically by Windows. We'll choose the local server in this example, which is WD2K19-DC01-mylablocal.
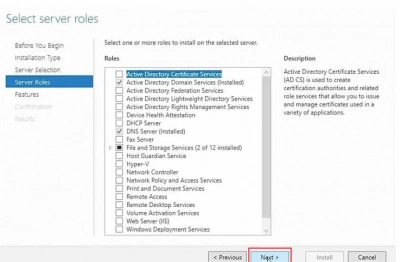
5. You must pick the roles to install on the server in the Select server roles page. You may skip this area and move on to the next screen since we're adding a feature. To continue, click Next.
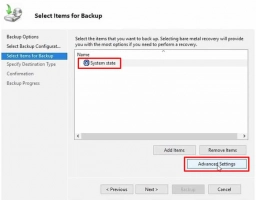
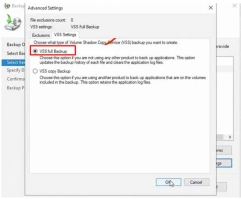
6. For this backup item, we'll now enable the Volume Shadow Copy Service. This disables any changes to AD data while the backup is in progress. Click Advanced Settings >> VSS Settings >> Select VSS Full Backup and click Ok to enable VSS. If this is your first backup and you are not utilizing a third-party backup application, the VSS Full Backup is the best option. This option allows you to back up all of your files. It's also the ideal option for incremental backups because it doesn't mess up the backup process.
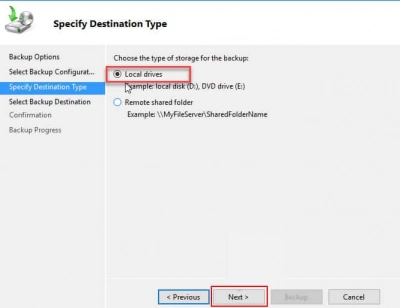
7. Select the kind of backup destination — local disks or remote shared folder — on the following page. We're storing the backup on a local hard disk for the sake of this example. So choose Local drives and go to the next step.
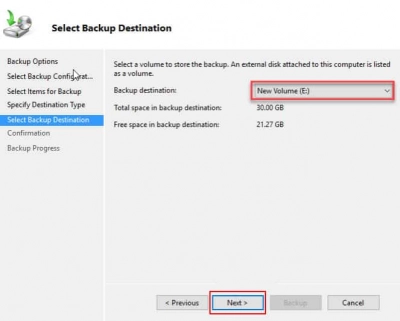
8. Choose the exact partition where you want to save the backup in the Select Backup Destination screen. When you're finished, click Next to advance to the next screen.
9. You may double-check that all backup parameters are set correctly on the Confirmation screen. When you're ready, click the Backup button. Depending on the size of the domain controller server, the backup should take some time. You can close the Backup Wizard once the backup has been finished successfully.
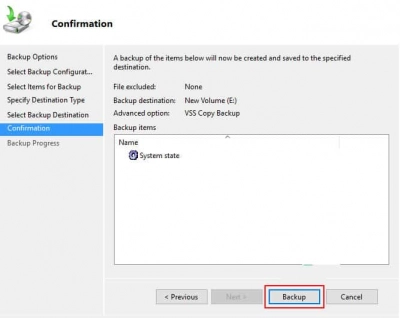
The backup will continue to run in the background if you close the Backup Wizard without waiting for the last message status. From the webadmin portal, you can also check the status and results of the backup (or Windows Server Backup Feature). A message from the backup will be shown on the console (and others).
Recover Lost Data Using DiskInternals RAID Recovery
DiskInternals RAID Recovery is a professional software application that allows you to recover lost files and partitions from all kinds of RAID arrays. It is the favorite RAID backup & recovery tool of many IT experts; this software program has been regularly updated for more than 15 years.
More interestingly, DiskInternals RAID Recovery comes with a suite of useful features, as well as support various file systems. With the software, you would definitely get back your lost data from both software and hardware RAIDs; it works for macOS, Linux, and Windows OS. There are three (3) recovery modes supported by this program; there is also a built-in Recovery Wizard to guide users.
DiskInternals RAID Recovery is reliable and works only on Windows PCs. It supports all file types and works pretty very fast.
First Step:
Firstly, you need to turn off your computer/network server and disconnect the RAID drives in the array.
Second Step:
Remove the drives and connect them to a computer system via USB or any other supported means of connectivity.
Third Step:
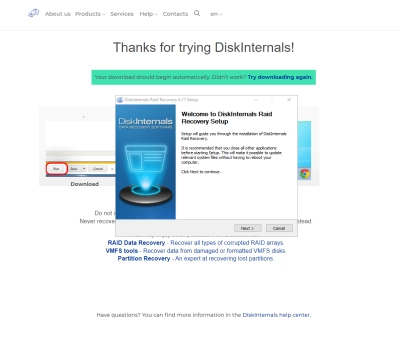
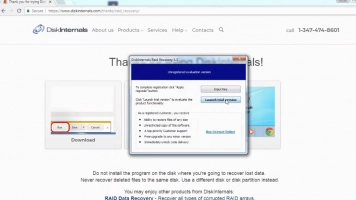
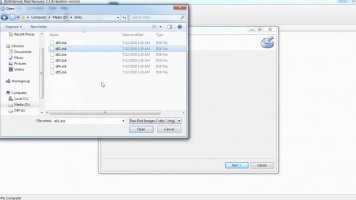
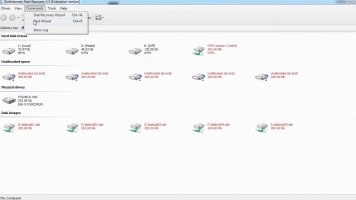
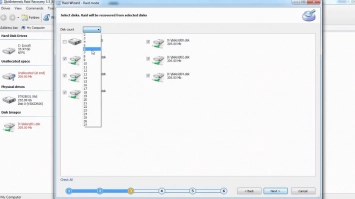
Boot the computer where the hard drives are connected and install DiskInternals RAID Recovery software. After the installation, launch the program and follow the Recovery Wizard prompts to recover your lost files from each of the connected drives, one after another.
Recovery Tips
These are tips you should have at the back of your mind when attempting to recover files using DiskInternals RAID Recovery.
- Don’t rush the process - allow each step to run completely and successfully before proceeding to the next. Else, you may not recover all your lost files.
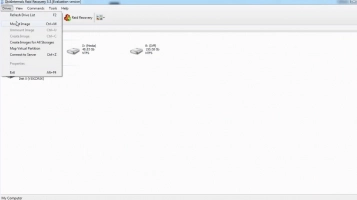
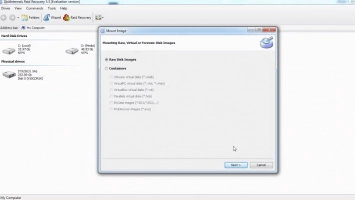
- Verify that you chose the exact disk drive that had the lost files you want to recover. If you select the wrong drive, you won’t get back any of the lost files.
- DiskInternals RAID Recovery comes with a previewing engine, so you can preview the recovered files before saving them back to your local or remote storage.
Important Note: Don’t save the recovered files on the same drive where they were previously saved - from where they got lost.
Why Choose DiskInternals RAID Recovery?
Yeah, there are pretty many RAID Recovery tools out there, but DiskInternals RAID Recovery is much-advanced and backed by IT experts. It works very fast too, and there are three recovery modes you can choose from. Hereunder are other reasons to choose this recovery software:
- Retrieves lost files from software and hardware RAIDs
- Supports manual and automated recovery (Recovery Wizard) options
- Can save recover files from remote directories or local drive
- Supports Unicode filenames and multi-level folders
- Allows you to create backups for free (disk images)
- Automatically fixes pool and filesystem parameters, including disk order
- Recovers previous versions of files if available
- Verifies checksums to validate data credibility.
RAID Failure Prevention Tips
To prevent RAID array failure, there are some handy tips you need to know. It's simply knowing the common reasons why RAID arrays fail and then implementing safety measures that would curb those "reasons."
- Firstly, you should always monitor the RAID disk drives’ critical SMART parameters, health status, and temperature routinely. This will help you identify RAID array failure signs earlier and fix them before it escalates.
- Secondly, always back up your data regularly because no one can be too sure when data loss could occur.
- Don’t perform CHKDSK or SFC scans in a bid to fix and repair RAID array errors.
- Don’t ever use the “beta” version of a RAID firmware, OS, or system file. However, ensure to keep your OS and critical software apps updated to their latest stable versions regularly.
- Retain at least two new or empty drives, which would be used to replace failed drives in the array.

