Basic Disks vs Dynamic: What is the Difference
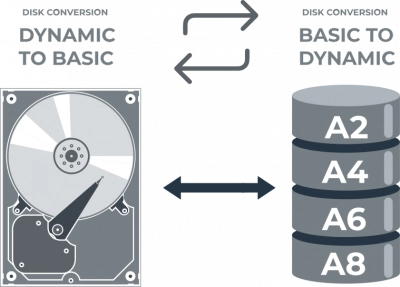
In this essay on basic and dynamic disks, you will discover what these disks are and how they differ from one another. As a result, you may choose the disc type that is appropriate for you. You will also discover the quickest and most reliable way to recover data from a damaged dynamic or Basic disk.
Let's begin with the fundamentals.
Article content:
- What Is a Basic Disk?
- What Is a Dynamic Disk?
- The Difference Between Basic Disk and Dynamic Disk
- How to Convert
- Recover your Lost Data Using DiskInternals
What Is a Basic Disk?
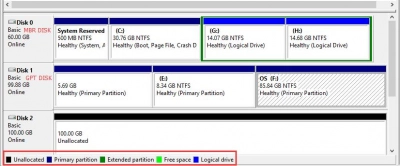
Basic disks are most often used by Windows OS, here partition tables or logical disks process data on hard disk partitions.
Basic disks are a storage model where your operating system is installed on a hard disk, configured as a primary disk. Each new disk is created as a base disk by default.
Basic disk volumes are partitions that can be formatted using basic disk setup. This way you can change or expand sections later. It should be understood that the maximum partition size is the entire hard disk space, and the number of partitions on a basic disk depends on the partition style that the disk uses.
There are two partition styles:
- Master Boot Record (MBR), up to 4 partitions can be created here, such as four primary partitions or three primary partitions and one extended partition with different logical.
- Partitions GUID Partition Table (GPT), up to 128 primary partitions can be created here.
What Is a Dynamic Disk?
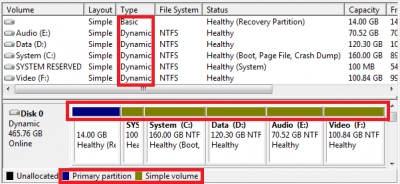
The dynamic disk appeared in Windows in 2000, this technology allowed flexible data management and fault-tolerant volumes.
Dynamic disks use a dynamic volume that can be converted, partitioned, and extended even after they are created. You can also expand volumes across non-contiguous spaces on physical disks, although the maximum size of a dynamic disk may vary.
Dynamic disks support MBR and GPT, and can also use the Virtual Disk Service (VDS) or the hidden Logical Disk Manager (LDM) database.
There are several types of dynamic disk volumes:
- simple - this is one dynamic volume,
- spanned - these are several disks combined into one dynamic volume,
- striped - this is one dynamic volume distributed over several disks,
- mirror - two copies of stored data, which provides fault tolerance,
- RAID-5 is a fault-tolerant dynamic volume that stores data on disks that cannot be mirrored or expanded.
In general, a hard disk can have up to 2000 dynamic volumes, but the recommended number is no more than 32, and the partition style does not affect this number of volumes.
Tip: RAID 0 failed!The Difference Between Basic Disk and Dynamic Disk

If you're having trouble choosing a disk, you should compare the basic settings.
Both dynamic and basic disks are designed to store information and the main difference is how these disks are used.
Basic disks are the good old kind of disks that have been around since DOS. Data is distributed in the following styles - GTP and MBR, in which only primary and logical partitions are allowed. Once you create partitions, they cannot be changed without the help of third-party tools, so partition sizes are limited by hard drive space.
However, the basic disk is still a commonly used storage method for certain reasons. For example, it has dual multi-boot, it's easy to use, and it protects your data a bit. At any time, you can convert a basic disk to dynamic without losing a single file.
Dynamic disks are a special type of storage that tracks volumes using LDM and VDS, MBR, or GTP databases.
Dynamic disks allow you to create volumes with different space configurations that can be resized and moved between volumes. Using the database, the computer creates new dynamic disks and also repairs damaged ones.
By linking multiple disks together, you can form a borderless dynamic volume and partition it into partitions to make data management easier. At the same time, to change the volume or create a data backup, you do not need to restart the operating system to avoid data loss.
If you suddenly need to directly convert dynamic disks to basic, then this will not work, since you need to remove them before converting. Thus, you will have to back up your data first to avoid data loss.
How to Convert Basic Disk to Dynamic Disk
You will need the Windows Disk Management utility, which, in addition to all the basic functions, will help you convert basic disks to dynamic ones.
Follow this step by step guide:
Step 1. Right-click the Start button and click Disk Management.
Step 2: In the new Disk Management window, you will see the downloaded disks.
Step 3: Right-click the disk and select "Convert to Dynamic Disk".
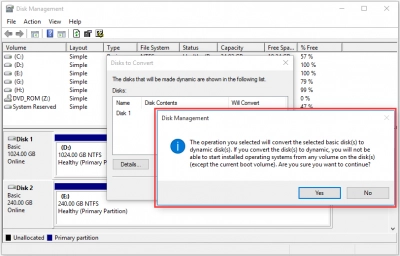
Step 4. In the new window, select the disk to be converted and click OK.
Step 5. If everything is correct, you can confirm the conversion, to do this, click on the "Convert" button.
Step 6. You will receive a warning: after the conversion is completed, you will not be able to run operating systems from any volumes on these drives, except for the current boot volume. Then just wait for the process to start turning the basic disk into a dynamic disk.
How to Convert Dynamic Disk to Basic Disk
Built in utility does not allow you to directly convert dynamic disks to basic disks, so be prepared that the dynamic disk conversion option will not be available.
However, everything is possible to do, first you need to perform several laborious procedures in order to implement the intended action. You will have to delete all volumes on a dynamic disk and only then convert it to a basic disk. This inevitably leads to total data loss.
Therefore, before applying this disk conversion method, recover corrupted data and back up all your data.
Then follow the instructions:
Step 1. Run the Disk Management utility with administrator rights, as described in the previous method.
Step 2: Delete each dynamic disk volume that will be converted. To do this, right-click on each volume and click "Delete Volume".
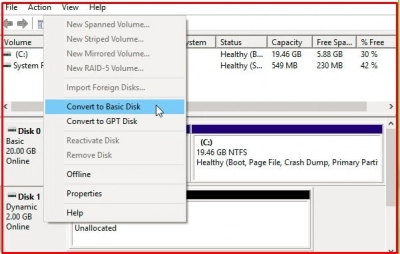
Step 3. And the final touch - right-click the disk and select the "Convert to Basic Disk" option. After that, wait for the complete conversion and reboot the system.
Recover your Lost Data Using DiskInternals RAID Recovery
Take it easy and don't worry about possible data loss from a dynamic or basic disk. Before converting disks, you should immediately download and install the professional DiskInternals RAID Recovery utility, and here's why: this application can repair damaged disks or arrays both automatically and manually.
The DiskInternals team strives to make the recovery process simple and fast, as this leading application has been improved and modernized by leading IT professionals for 16 years.
In addition, DiskInternals RAID Recovery is designed to restore software and hardware RAIDs.
There are many more advantages of this application that make this offer tempting to potential customers:
- Automatic recovery includes a step-by-step recovery wizard.
- Recovered data of all types are exported to local or remote locations, this application also supports filenames and tiered folders in Unicode format.
- You can use DiskInternals RAID Recovery to create a disk image and protect your data from future loss, no matter what happens in your daily life.
- It should be noted that the application recovers data even from badly damaged pools that are no longer mounted. It also automatically detects the pool and file system settings.
- The utility works even if a new empty pool was created on top of the original one and at the same time perfectly restores deleted files, previous versions of files and checks the checksums to make sure that the file data is correct!
Here's how to use the recommended application to recover data from basic and dynamic disks.
Step 1: Shut down the computer/server and disconnect the drives that make up your array.
Step 2: Connect these drives in series and carefully to a running computer (after turning off the power).
Step 3: Turn on a working computer. Then download and install RAID Recovery from the official website and rest without worrying about data loss.
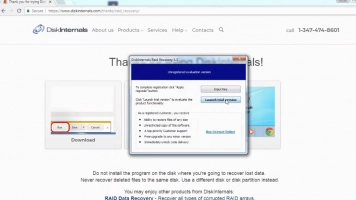
Step 4: Open the application and run the Recovery Wizard (then automatic data recovery will occur), or switch to full manual control of the application (if you have enough experience in this area).
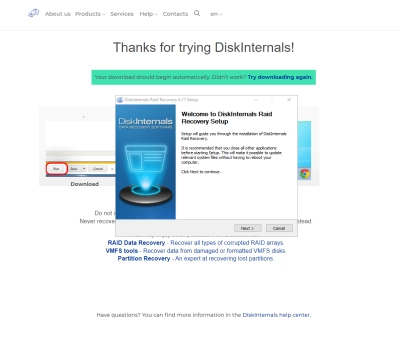
Step 5: RAID Recovery automatically detects available connected drives - select the one you want and then select the desired recovery mode. Be patient, as the process of restoring your data will most likely take a long time, and this is normal, because the recovery volumes here are huge.
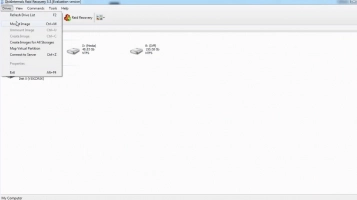
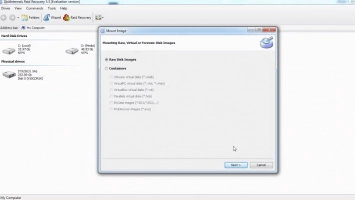
Step 6: After scanning, the results will appear on the monitor screen - view them for free, and then complete this whole process by purchasing a license. Save your data.
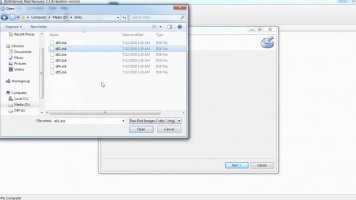
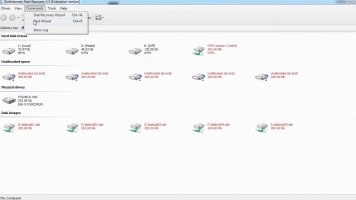
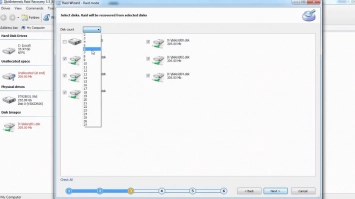
Note: Don't worry, buying a license won't take your precious time - it's a matter of a few minutes.
Recovery tips:
- When choosing a drive for quick scan, select the correct drive; otherwise, you will have problems finding the right files.
- Do not rush into this matter, wait until each step is completed in accordance with the standards.
- Review all data for integrity before restoring it to a safe location.
- Do not save data again to the same drive, as this may overwrite the data and make it permanently inaccessible.
Conclusion
You have learned what basic and dynamic disks are and their main differences, so your choice will be obvious to you. Sure, dynamic disks are much more flexible, but they cannot be directly converted to basic disks, and multiboot partitions can only be created with basic disks.
Converting basic disks to dynamic disks and vice versa using the Disk Management tool is unlikely to happen without data loss. Therefore, before carrying out such an operation, it is worth recovering the necessary information using the professional DiskInternals RAID Recovery tool. If you still have any questions, you can contact the 24/7 customer support service and solve your problem.
