How to Clone RAID Disk (Hardware & Software)

RAID (Redundant Array of Independent Disks) has become very popular in recent times, thanks to its unique data storage and protection features. There are, of course, many types of RAID setups for data storage, and each setup offers distinctive benefits – and requires a specific setup procedure.
Most RAID levels can be set up with at least two (2) hard drives, but some RAID levels require a minimum of three (3) or four (4) disks to set up. This article explains all you should know about RAID setups and how you can clone RAID drives. Cloning RAID drives could be a way of backing up the data content on the drive(s) for data loss scenarios.
What is a RAID Array?
What is a RAID? In simple understanding, a RAID array is the systematic arrangement of two or more hard drives to achieve a RAID level. What distinguishes between RAID levels and arrays is how the member drives are set up using a RAID controller (could be software or hardware controller); it is the RAID controller that determines the actual RAID level or array you’re building.
Common RAID levels are RAID 0, RAID 1, RAID 5, RAID 6, RAID 10, RAID 01, RAID 50, and other configurations. A RAID array could offer striping, mirroring, parity distribution, or any two of these data storage techniques. While some RAID levels may offer high data redundancy and resilience in critical hard drive conditions, they are still not a full substitute for data backups.

Setting up RAID can significantly improve read and write performance, as well as foster business continuity in case of drive failure. Most RAID levels will continue to function even when there’s a failed drive in the array and will automatically rebuild when you replace the failed drive with a new one.
There are complexities among RAID levels, but the fact remains that RAID is better than single-storage, especially in data centers or business environments where drive failure could affect a whole lot if there are redundancy solutions set up for such scenarios.
How to clone RAID?
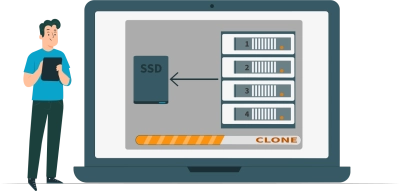
Some RAID arrays like RAID 1 do not offer “more space,” regardless of how many drives you use in the array – you will only get the space of the “smallest” drive as your total space. Cloning a RAID array is possible; you can either clone the individual drives or clone RAID. Well, to clone the entire RAID to a new single drive, the new drive must have enough space relative to the total storage offered by the RAID array.
For example, if the total storage offered by a RAID is 2TB, you need a single 2TB drive to clone RAID. There are several reasons why one may want to clone RAID storage, and this can be linked to data backup considerations. Also, RAID levels can be complicated in how they read and process data, so at some point, you may just want to switch to a single-drive storage. But regardless of what your reasons are, cloning a RAID storage is possible.
Why Should You Clone RAID to a Single Drive?

- RAID rebuilding
- RAID array decommissioning
- System migration
- Data backup
Different data environments call for specific data storage needs. Moreover, RAID is not foolproof for data loss – and is more difficult to manage compared to single-drive storage. NAS systems and DAS setups all use RAID technologies for data storage – allowing you to access your data from different systems simultaneously without sacrificing data transfer speed and upholding redundancy.
But then, most RAID levels can’t reconstruct data when one or two drives fail in the array, which makes regular backups the only reliable foolproof solution to data loss cases. Backing up and restoring RAID data can be a bit challenging, but much easier with a single drive. You can clone RAID to a single drive, so when a drive fails in the array and the RAID won’t rebuild automatically, you can retrieve the lost files/data from the single drive.
Also, if you’re about to run system migration, cloning your RAID to a single drive to run the migration from the single drive would be a lot easier. But, cloning RAID to a single drive to subsequently use the single drive as your preferred storage is quite risky, if the single drive fails, all your data will be instantly inaccessible and lost, probably.
How to Clone RAID Array to Single Drive/SSD in Windows?
First things first, you need a professional software tool to clone RAID. Most RAID cloning software programs are premium apps, you have to pay to use them.
- Step One: Download and install RAID cloning software like Wondershare UBackit, and launch the program.
- Step Two: From the program’s main screen, click on the “Clone” tab and select the RAID drives/volumes as the “Source” drive(s). Click “Next.”
- Step Three: Select the single drive storage device as your “Destination Disk,” and click next. In the pop-up prompt, confirm the cloning process and wait for the cloning process to run completely. Your RAID data will now be available on the selected single-drive storage.
Note: Before you can clone RAID drive with this program, the clone destination disk must offer sufficient space equivalent to the total data size from your select source “RAID drives.” The cloning process may take a long time depending on the data size and disk speed.
Clone Hardware RAID

Hardware RAID is when you use an external RAID controller hardware for your RAID setup. This type of RAID setup is proven to offer faster performance and flexibility than software RAID, but at a cost – hardware RAID is more expensive to set up because of the additional hardware (the controller). Cloning hardware RAID is no different from cloning any other type of RAID setup and hereunder are the steps.
- Step One: Download and install MiniTool Partition Wizard and launch the program on your Windows PC
- Step Two: On the program’s main page, right-click on the RAID drive and select “Copy.”
- Step Three: Choose the single drive to where you want to save the RAID data. (Note: any previously saved data on the single drive will be overwritten).
- Step Four: Confirm the operation following the on-screen prompts and wait for the cloning to be complete.
Clone Software RAID

Most home users prefer the software RAID because it is more affordable and also flexible to a great extent. While software RAID might not offer the best performance compared to hardware RAID, it does offer reasonable performance speeds – based off the host PC’s specs and capabilities. Cloning software RAID is the same as cloning hardware RAID, the only difference, in software RAID, you’re choosing “volumes” and not drives per se.
- Step One: Download and install MiniTool Partition Wizard and launch the program on your Windows PC
- Step Two: On the program’s main page, right-click on the stripped or mirrored RAID volume and select “Copy Volume.”
- Step Three: Choose the single drive to where you want to save the RAID data to. (Note: you can’t copy the RAID volume to another partition on the same disk).
- Step Four: Set partition size and other configurations and confirm the cloning; you should leave everything at the default values and settings if you’re unsure what they imply.
How To Recover RAID Data
Need to recover data from RAID drive? If you discover that some files or important data are missing from your RAID volume after trying to clone RAID, you can retrieve the files and data using DiskInternals RAID Recovery for data recovery on RAID. This software supports all RAID levels and types (hardware or software RAID); it also supports all known Windows and Linux OS filesystems.
DiskInternals RAID Recovery is the professional go-to solution tool for system admins and IT experts when they face a RAID recovery situation. The software comes with a built-in Wizard to help users navigate the RAID recovery process swiftly. DiskInternals RAID Recovery runs on all Windows OS versions and editions; it can recover multiple RAID data formats with high efficiency.
Conclusion
When cloning a RAID disk, it is important to note that any existing data on the drive you’re cloning to will be erased. RAID technology offers data resilience and redundancy to a great extent, but still doesn’t come in as a complete alternative to native backups. Cloning a RAID disk can be for different reasons and there are many intuitive PC programs to help you achieve that. If you’re ever faced with a RAID recovery scenario, DiskInternals RAID Recovery is a reliable tool to use.
FAQ
Can I Clone a RAID 1 Drive?
Yes, you can clone a RAID 1 drive. RAID 1 is a mirrored set, meaning data is duplicated across two or more disks. Cloning a RAID 1 drive involves creating an exact copy of one of these mirrored drives. This process is typically straightforward since RAID 1's redundancy ensures that each disk contains a complete copy of all data. You can use disk cloning software that supports RAID configurations to perform this task. It's important to ensure the destination drive has equal or larger capacity than the source drive in the RAID 1 array.
Can I Clone a RAID 0 Drive?
Cloning a RAID 0 drive is more complex than cloning a RAID 1 drive. RAID 0 splits data across multiple disks (striping) without redundancy, aiming to increase performance. To clone a RAID 0 array, you must clone all drives in the array simultaneously because the data is distributed across each disk. This requires cloning software capable of recognizing and handling RAID 0 configurations. The process involves creating an exact copy of the striped set of disks onto another set of disks or a single large disk. Ensure the destination storage can accommodate the total data from the RAID 0 array.
How to Clone RAID 1 to a Single Drive
- Select Cloning Software: Choose software that supports RAID configurations and can clone to a single drive.
- Prepare the Destination Drive: Ensure the destination drive has enough capacity to hold all the data from the RAID 1 array. It should be equal to or larger than the RAID 1 drives.
- Start the Cloning Process: Using your chosen software, select one of the RAID 1 drives as the source and the single drive as the destination. Follow the software prompts to start the cloning process.
- Complete the Cloning: Wait for the process to finish. Once done, your single drive should have an exact copy of the RAID 1 data.
How to Clone RAID 0 to a Single Drive
- Select Cloning Software: Use cloning software capable of recognizing RAID 0 arrays and cloning them to a single drive. The software should be able to interpret the striped data arrangement.
- Prepare the Destination Drive: The destination drive must be large enough to store the combined data of all drives in the RAID 0 array. Ensure it has sufficient capacity before proceeding.
- Start the Cloning Process: In the cloning software, select the RAID 0 array as the source and your single drive as the destination. Initiate the cloning process according to the software’s instructions.
- Monitor the Cloning: The software will reconstruct the striped data onto the single drive. This process might take some time, depending on the amount of data and the speed of your drives.
- Completion: Once the cloning is complete, the single drive will contain all the data from the RAID 0 array, effectively consolidating your data onto one drive.
How to clone RAID disk in Windows 11?
Step 1: Choose Cloning Software
- Select Compatible Software: Ensure the cloning software you choose is compatible with Windows 11 and supports RAID configurations.
Step 2: Prepare Your Destination Disk
- Capacity: The destination disk or array should have equal or greater capacity than the source RAID array.
- Connection: Ensure the destination disk is properly connected to your computer and recognized by Windows 11.
Step 3: Backup Important Data
- Safety Precaution: Back up important files and data from both your RAID array and the destination disk to avoid accidental data loss.
Step 4: Initialize Cloning Software
- Install and Launch: Install your chosen cloning software and open it.
- Select Source and Destination: Choose the RAID disk/array as the source and the destination disk/array as the target for cloning.
Step 5: Start the Cloning Process
- Configure Options: Some software may offer options like resizing partitions or excluding certain files. Configure these settings according to your needs.
- Begin Cloning: Start the cloning process. The duration will depend on the size of your RAID array and the speed of your disks.
Step 6: Monitor the Cloning Operation
- Progress: Keep an eye on the cloning progress through the software's interface. Some applications provide a time estimate for the cloning process.
Step 7: Completion and Verification
- Verify the Clone: Once cloning is complete, verify that the data on the destination disk matches the source RAID array. You can do this by browsing the cloned data or using a disk verification tool provided by the cloning software.
- Boot from the New Disk (if applicable): If you cloned a bootable RAID array, adjust your BIOS/UEFI settings to boot from the new cloned disk to ensure everything works as expected.
Step 8: Post-Cloning Steps
- Backup: Consider keeping the original RAID disk/array as an additional backup for some time.
- Update Your Backup Plan: If the cloned disk will be used regularly, ensure it's included in your ongoing backup strategy.
How to clone a RAID 10?
Step 1: Choose the Right Cloning Software
- Compatibility: Ensure the cloning software supports RAID 10 arrays and is compatible with your operating system.
Step 2: Prepare the Destination Disk or Array
- Capacity: The destination storage should have at least the same capacity as the used space on your RAID 10 array to ensure all data can be cloned.
- Connectivity: Verify that the destination disk or array is properly connected to your system and recognized by the operating system.
Step 3: Backup Your Data
- Safety Measure: Although cloning is generally safe, backing up important files to another location is recommended to prevent any potential data loss.
Step 4: Launch the Cloning Software
- Installation: Install and open your chosen cloning software on your computer.
- Source and Destination Selection: Select the RAID 10 array as the source and the destination disk or array as the target within the software.
Step 5: Configure Cloning Options
- Settings: Some software might offer additional options such as resizing partitions, excluding certain files, or optimizing for SSDs. Configure these according to your needs.
- Start Cloning: Initiate the cloning process. The time required will depend on the amount of data and the performance of your drives.
Step 6: Monitor the Process
- Progress: Keep an eye on the software's progress bar or indicator to monitor the cloning operation. Some applications provide an estimated time to completion.
Step 7: Finalize and Verify
- Completion: Once the cloning is complete, the software may prompt you with a success message.
- Verification: It's important to verify that the clone was successful by checking the data on the destination disk or array. Ensure that all files are accessible and intact.
Step 8: Post-Cloning Actions
- Boot Test (if applicable): If the RAID 10 array contained a bootable system, you might want to test booting from the cloned disk or array to ensure everything operates correctly.
- Backup Strategy: Consider integrating the new clone into your ongoing backup and data protection strategies.
Can you move a RAID from one computer to another?
Step 1: Verify RAID Controller Compatibility
- Hardware RAID: If your RAID array is managed by a hardware RAID controller, ensure the new computer has a compatible controller. Ideally, use the same model or one from the same manufacturer that supports your RAID configuration.
- Software RAID: For software RAID configurations (managed by the operating system), ensure the new system supports the same software RAID setup.
Step 2: Backup Your Data
- Before moving the RAID array, back up all data to another location. This precaution protects against data loss due to unforeseen issues during the transfer process.
Step 3: Document RAID Configuration
- Note down the RAID type (e.g., RAID 0, RAID 1, RAID 5, RAID 10), stripe size, disk order, and any other configuration details. This information is crucial for reconfiguring the RAID array on the new system.
Step 4: Prepare the New Computer
- Ensure the new computer can physically accommodate the RAID disks (enough drive bays, compatible interfaces).
- Install any necessary RAID controller drivers or software on the new system before installing the RAID disks.
Step 5: Shut Down and Disconnect
- Safely shut down the old computer and disconnect the RAID disks, noting their order and configuration.
Step 6: Install the RAID Disks in the New Computer
- Install the RAID disks in the new computer, maintaining their original order. If using a hardware RAID controller, install the controller in the new system (if not already compatible or integrated).
Step 7: Reconfigure RAID Setup
- Hardware RAID: Access the RAID controller’s BIOS or management software to reconfigure the RAID array as it was on the old system, using the documentation from Step 3.
- Software RAID: Boot the new system and use the operating system’s RAID management tools to reconfigure the RAID setup.
Step 8: Verify and Boot
- Once the RAID array is reconfigured, boot the new system and verify that the RAID array is recognized and functioning correctly. Check data integrity and accessibility.
Step 9: Perform a Final Data Backup
- After ensuring the RAID array is operating as expected in the new environment, perform another data backup to safeguard against future data loss.
