Hyper-V Live Migration
In this article you will find out:
- what is Hyper-V Migration and how it works
- difference between Quick and Live Migration
- how to perform Hyper-V Storage Migration in different ways
- how to protect your data, Hyper-V troubleshooting and tips
Are you ready? Let's read!
The Hyper-V storage migration feature was introduced in Windows Server 2012 version; it is a useful feature that allows you to move VMs from one host to another.
What Is Hyper-V Storage Migration?
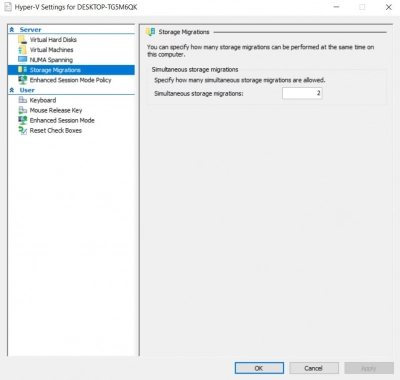
To put it in simple terms, Hyper-V Storage Migration is a feature in Microsoft's Windows Server 2012, and newer Windows Server versions; it allows the migration of Virtual Machines (VMs) from one Hyper-V host to another, without facing compatibility issues and without disturbing the "Online" status of your the VM(s).
Before this feature was introduced, the only way to migrate VMs was to shut them down before attempting migration, so as not to cause the operation to fail; this was a failsafe method (it still works even today), but it could take long hours to complete, and also cause downtime.
Hyper-V Storage Migration technology makes VM migration easy and seamless. However, not everyone may easily understand how it works. But then, to understand how this migration works, you need to understand its main characteristics.
- You can move VHD and VHDX files through this tech - but ensure to move VHD and VHDX files first, before other files.
- Virtual hard disks can be migrated to another storage device while the Virtual Machine that has the disks is still online.
- Data storage can be moved across VMs in the same Hyper-V host or different Hyper-V hosts.
- Compatible with PowerShell, Windows Failover Cluster, Hyper-V Manager, and System Center Virtual Machine Manager.
- This technology only moves the storage, not the VM.
- The new location/host can be local or remote; however, the Hyper-V host needs to have access to the new storage.
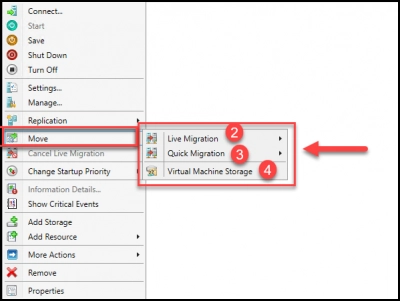
- Simultaneous migrations can be configured.
Live Migration Types
Shared-Nothing Live Migration
This option is only accessible for non-cluster Virtual Machines in a Standalone Hyper-V Server.
The ability to move Virtual Machines that are on Standalone Hyper-V Servers and/or situated in non-shared storage or Storage Spaces Direct without any downtime on your Virtual Machine or VM Applications is the key benefit of this sort of migration.
Shared-Nothing Live Migration allows you to migrate from a local disk to another local disk (in another Hyper-V), as well as from a local disk to an iSCSI/NFS volume or a shared Storage Volume in a Cluster.
VMs may be moved to and from iSCSI/NFS Volumes by administrators.
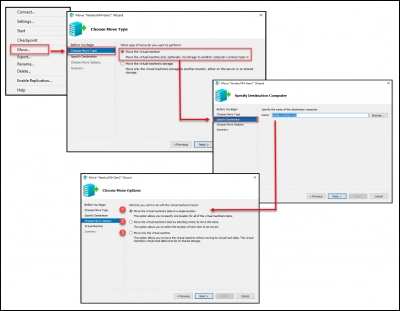
In the last option, we have three options to migrate the Virtual Machine.
1. "Move the data from the virtual machine to a single place."
As the name implies, this option will consolidate all data into a single place.
Meaning, VM configuration files and Virtual Disk(VHD/X file) files will all be moved to the same position in their respective Hyper-V folders (e.g., Virtual Machine folder, Virtual Disks folder), in accordance with the Hyper-V folder structure.
All of the files will be stored on the same local drive or on an iSCSI/NAS volume. Or even a Cluster Volume that is shared.
This option relocates the Virtual Machine as well as all data files from the Hyper-V source.
2. "Choose where to relocate the things in the virtual machine's data"
This choice differs somewhat from the previous two. Administrators can migrate each file to a different location/folder using this option.
The Hyper-V folder structure is not required, and we may choose multiple locations for each file, even on separate disks/volumes.
This option, like the previous one, transports the Virtual Machine as well as all data files from the source Hyper-V.
3. "Move just the virtual machine" is a phrase that means "move only the virtual machine."
Tip: VM backup vs SnapshotShared-Nothing Live Migration Process
The state of the Virtual Machine is stored and automatically transferred to the destination Hyper-V Node, and the Virtual Machine is then reset to bring it online.
The virtual machine's initial state is stored, and a new virtual machine is established on the destination Hyper-V, with the virtual machine's initial memory state replicated over the live migration network.
The memory pages that were altered during the original copy operation are transferred to create a second memory state. A third copy of memory pages is made to the destination Hyper-V Server, and this procedure is repeated until the number of pages for the final copy and move of the Virtual Machine is quite modest.
Finally, on the source, the Virtual Machine is paused, and the final state of the VM and data are moved to destination Hyper-V Server, and the source VM is deleted.
2. Live Migration
This option is only accessible for VMs that are powered on and in a Hyper-V Failover Cluster Manager, and it is a Live Migration with no downtime when migrating to a new Cluster Node, as the name implies.
Live Migration is the most similar sort of migration in Hyper-V to VMware's vMotion.
The simplest sort of migration is live migration, which may be triggered manually or automatically.
Live Migration Process
The Live Migration method begins by copying the VM state and RAM used on the source node to the destination node. The Virtual Machine migrates/moves after the state is stored, and the destination Hyper-V node takes ownership of the VM. The network is used for all VM transactions.
Because the Virtual Machine state and memory are already in the destination, the entire procedure is much faster.
There is no need to move any data across storage or volumes because this option is only accessible in a Hyper-V Cluster, and the migration procedure just migrates the VM memory state to the target host.
Note: The time that migration takes it depends on the network used and their bandwidth.
Next is an example of how to use Live Migration manually.
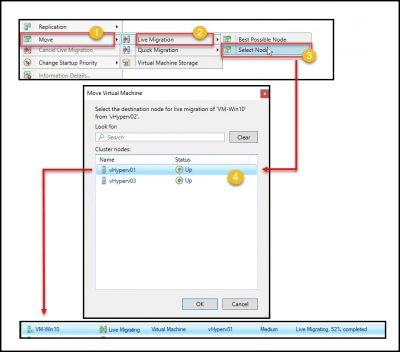
If you pick "Select Node" in the previous choice, you may choose which Node to run this VM on, but if you select "Best Possible Node," Hyper-V Cluster will determine the best Hyper-V to migrate to (as an example of the rules is the one with more resources available).
When a Hyper-V Cluster node fails or becomes isolated, the automatic option is activated. All Virtual Machines that are operating in the node that has failed will be immediately moved by Hyper-V Cluster.
We can see the entire process operating in the next picture, which was prompted by a node failure (vHyper-V02).
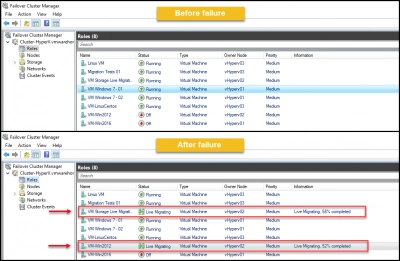
In the above image, we notice that VMs using Live Migration are automatically migrated from the node vHyper-V02 after the failure.
Quick Migration
Only the Hyper-V Failover Cluster Manager supports this sort of migration.
Quick Migration is similar to Live Migration in that it is only initiated by the user, and the user may choose the destination location for various VM files. In addition, in Quick Migration Virtual Machines may have a brief timeout; VM service downtime is always dependent on how the Guest OS and apps manage these timeouts.
When utilizing Quick Migration, there is a small wait and the possibility of service disruption when accessing the Virtual Machine. The duration of the interruption and the pace with which it migrates are determined by your network capacity and the programs you utilize.
Power On VMs and Power Off VMs may both benefit from Quick Migration.
The easiest method with this sort of migration is to move only the Virtual Machine (config files), leaving the data files (virtual disks) in the source Hyper-V.
Note: A shared NFS or other form of shared volume must exist between the source Hyper-V Server and the destination Hyper-V Server.
Quick Migration Process
The Quick Migration technique is similar to Live Migration in that it is a simple process.
A stored state is constructed first (only if the VM is powered on), and then a copy is copied to the target Hyper-V node.
Only a symbolic link (xml file) remains on the source Hyper-V node since the files are in a shared location or Cluster Volume.
The ownership of the file is moved to the target Hyper-V node once a copy of the pointer symbolic link is established in the destination Hyper-V node.
The last steps are to remove the source pointer symbolic link file and resume (reset) the saved state of the Virtual Machine.
Note: more about repair software RAID!Storage Live Migration
We may move Virtual Machine files (all Virtual Disks files, Configuration files, Paging files, Snapshots files, and so on) to another place using this form of migration.
Virtual Machine files may be moved to a local drive, a Storage Volume, or a CSV Volume without affecting your VMs or their applications.
When migrating a non-clustered VM, this method may be used regardless of the VM's location. The source or destination location does not have to be a NAS/iSCSI volume.
This type of Storage migration can be done while the VM is power on.
- This an example when using Standalone Hyper-V Server:
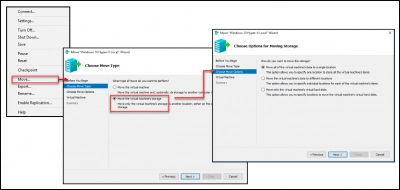
Next, you select a single destination for all files, different locations for different files (configuration files, data files, etc.), or select the new location just for Virtual Disks files.
- This is an example of how it works using Failover Management:
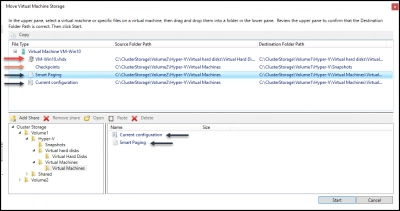
Right-click on the VM, to access the Virtual Machine menu, select Move, and then Virtual Machine Storage.
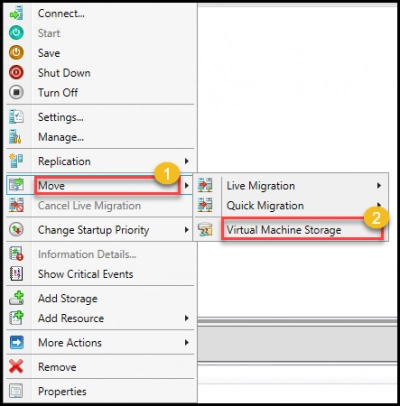
Select all of the files from the Virtual Machine and drag and drop them into the destination board in the next choice.
Virtual Disk files must be kept in the Virtual Disks folder. The Virtual Machines folder should contain the configuration and Smart Paging files.
Finally, the Checkpoints files should be saved in the Snapshots folder (if there are no VM snapshots in the current VMs, create a folder in the destination or save to the Virtual Machines folder).
How Hyper-V Storage Migration Works
It actually works in a simple way - but you need any of the Hyper-V management tools mentioned above. With the management tool, you can easily configure Hyper-V Migration since it is a feature inbuilt on Windows Server 2016.
After configuring the migration feature, you can then transfer the VHD files, VM configuration files, and important data from the main location to a new one. Read and write operations are done on the main virtual hard disk, but the write operations also get mirrored to the target virtual hard disks.
Both the source drive and target drive are synchronized and the VM switched to a new virtual hard disk after the transfer process is completed.
How to Perform Hyper-V Storage Migration
There are two main ways to use Hyper-V storage migration technology; it’s either you use Hyper-V Manager or PowerShell. Other Hyper-V management tools can work too. Hereunder are the comprehensive guides to using either of the two aforementioned utility tools.
1. Using Hyper-V Manager
At this time, you should have the Hyper-V Manager installed on the system, then you can proceed with the steps below, carefully.
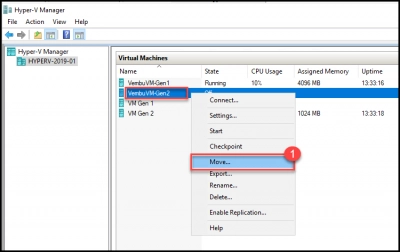
- Launch Hyper-V Manager and right-click on the VM you want to migrate its storage.
- Select “Move” from the context menu; when the Move Wizard pops up, click Next to continue.
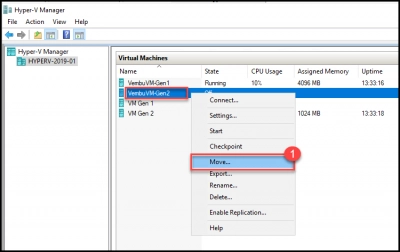
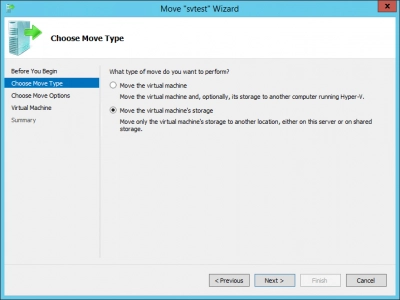
- Choose what you want to move: the VM itself or its storage? For this guide, the selected option is “Move the virtual machine's storage.”
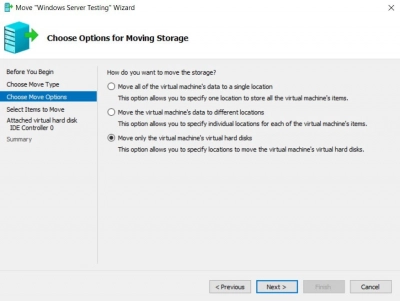
- On the next screen, choose how you want the move to be done; do you want to move all of the VM's data to another single location or different locations, or do you only wish to move the virtual hard disks. The last option was selected for this guide (moving the virtual drives).
- Next, select the virtual hard disks to migrate; check the box beside the ones you want to migrate.
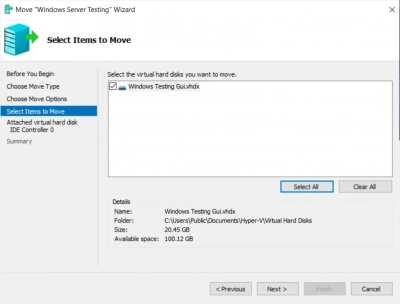
- Now, choose the target location.
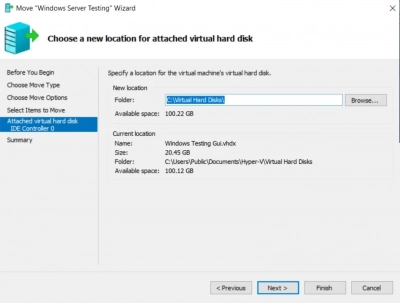
- Review all the options you chose and click “Finish” to trigger the operation.
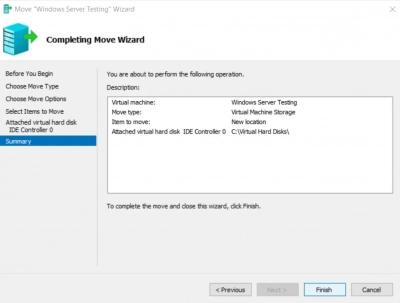
- The migration process may take a long time to complete depending on the size of the disks, wait till it is completely done.
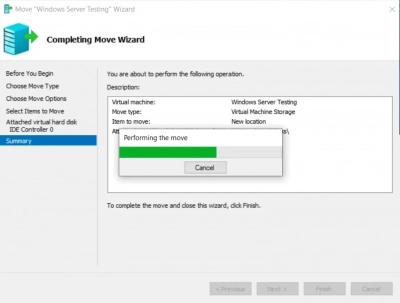
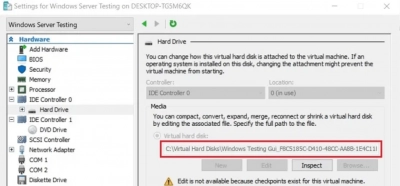
- After the migration is done, to verify if you did it right, right-click on the VM’s name >>> Settings >>> Hard Drive. If the migration was done well, you will see that the virtual hard disk was moved to the target location.
2. With PowerShell
Before launching the PowerShell console to carry out VM migration, you need to know the exact location of the VM’s virtual hard disk(s) you want to move. Here’s how to go about it:
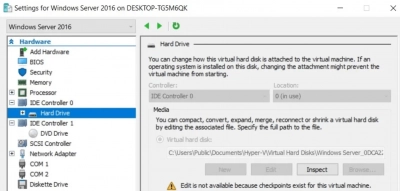
- Open PowerShell and run the following command: Move-VMStorage 'Windows Server 2016' -DestinationStoragePath C:\Virtual Disks

- This cmdlet allows moving the storage of a running VM, including its VHD/VHDX files, paging files, and snapshots.
- Wait for the command to execute and all files on the selected VM (in this case, Windows Server 2016) will move to the newly specified location, Virtual Disks.
- After the migration, you can use Hyper-V Manager to check if it actually went well.
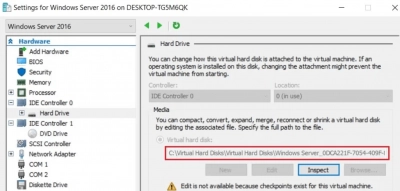
While PowerShell works great for migrating VMs storage to a new location, it doesn't allow the flexibility to perform complex tasks such as moving only selected files, or moving VM virtual disks to different locations.
DiskInternals RAID Recovery Solution
Here’s an all-inclusive RAID Recovery solution with a built-in "Wizard" to help novices and new users. This application can recover lost and deleted files from virtual machines and all kinds of RAIDs. DiskInternals RAID Recovery is regularly updated to integrate newer data recovery technologies and algorithms.
It supports various file systems, automatically figures out pool and filesystem parameters, including the disk order, and can recover previous versions of files (if available) - verify checksums to ascertain the file's integrity. You can use this data recovery app on all Windows PCs. Take the first step towards seamless VHD data recovery:
First Step:
Connect the hard drive where the files were lost - to a computer system via USB or any other supported means of connectivity.
Second Step:
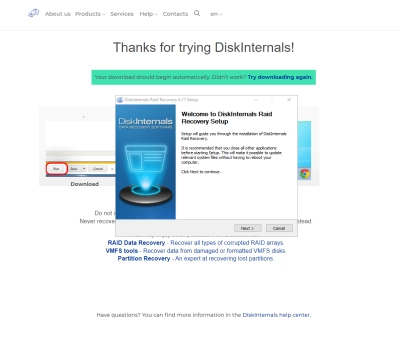
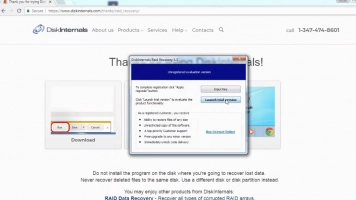
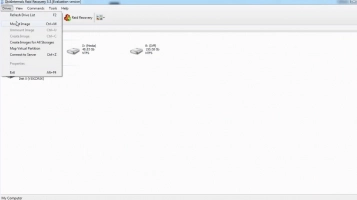
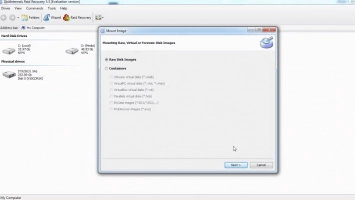
Boot the computer where the hard drive is connected and install DiskInternals RAID Recovery software. After the installation, launch the program and follow the Recovery Wizard prompts to recover your lost files from each of the connected drives, one after another.
Recovery Tips
Consider these tips when attempting to recover files using DiskInternals RAID Recovery.
- Don’t rush the process - allow each step to run completely and successfully before proceeding to the next. Else, you may not recover all your lost files.
- Verify that you chose the exact disk drive that had the lost files you want to recover. If you select the wrong drive, you won’t get back any of the lost files.
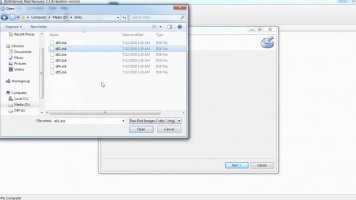
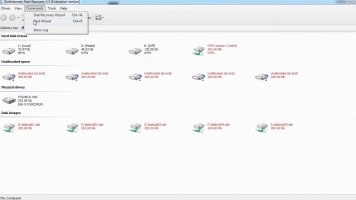
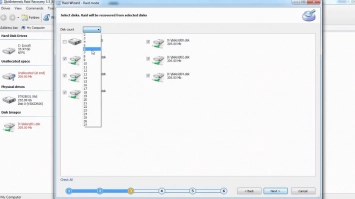
- DiskInternals RAID Recovery comes with a previewing engine, so you can preview the recovered files before saving them back to your local or remote storage.
Important Note: Ensure that you do not save the recovered files on the same drive where they were previously saved - from where they got lost.
Video Guide:
Here is a clear-cut video that visually explains the RAID Partition recovery process using DiskInternals RAID Recovery.
RAID Failure Prevention Tip
RAID failures cannot be entirely avoided, but here are some prevention tips that may be of help.
- Always monitor the RAID disk drives’ critical SMART parameters, health status, and temperature routinely. This will help you identify RAID array failure signs earlier and fix them before it escalates.
- Always back up your data regularly because no one can be too sure when data loss could occur.
- Don’t perform CHKDSK or SFC scans in a bid to fix and repair RAID array errors.
- Don’t ever use the “beta” version of a RAID firmware, OS, or system file. However, ensure to keep your OS and critical software apps updated to their latest stable versions regularly.
Reserve at least two new or empty drives to use in replacing failed drives in an array.
Conclusion:
Hyper-V storage migration means moving the virtual disks on a virtual machine to another location storage. This migration technology also works for migrating an entire virtual machine to a new location.
However, before you start performing any advanced action on a system, it is advisable to make a comprehensive backup, and that’s where DiskInternals RAID Recovery comes in to help.
Hyper-V storage migration works with zero downtime; the VMs being migrated would remain online. You can perform this migration using PowerShell or Hyper-V Manager. But, it is important to backup your important files before you start the migration - just in case it doesn’t complete successfully.
