RAID Consistency Check: Ensuring Data Integrity and Performance
What is a RAID? RAID (Redundant Array of Independent Disks) technology offers a robust solution to enhance both the speed and fault tolerance of data storage. However, even the most advanced RAID configurations are not immune to inconsistencies and data corruption. This is where RAID consistency checks come into play. These checks are essential procedures designed to ensure the integrity and accuracy of the data stored across multiple disks in a RAID array. In this article, we will delve into the importance of RAID consistency checks, how they work, and best practices for maintaining optimal RAID performance and data integrity. Whether you are managing a small business server or a large-scale data center, understanding and implementing regular RAID consistency checks can safeguard your valuable data and keep your storage systems running smoothly.
What is a RAID Consistency Check?
Definition and Purpose
A RAID consistency check is a process that verifies the accuracy and integrity of the data stored across the disks in a RAID array. This check ensures that the data is consistent and free from errors, such as corruption or mismatched parity information. By systematically scanning and comparing data blocks and parity, RAID consistency checks identify and correct discrepancies, thereby maintaining the reliability of the storage system. The primary purpose of these checks is to detect and rectify any data inconsistencies before they escalate into significant problems, ensuring that the RAID array continues to operate smoothly and efficiently.
How RAID Consistency Checks Work
Mechanisms Behind the Check
RAID consistency checks operate by systematically scanning the data stored across all the disks in the RAID array. The process involves reading data blocks and their corresponding parity information to verify that they match according to the RAID configuration rules (e.g., RAID 5 or RAID 6). If a mismatch is detected, the system can either correct the inconsistency automatically or log it for manual intervention, depending on the RAID controller's capabilities.
For instance, in a RAID 5 setup, the consistency check will read the data blocks from all disks and the parity block. It then recalculates the parity and compares it with the stored parity information. If a discrepancy is found, it indicates that either the data or the parity block has been corrupted. The system then reconstructs the correct data using the parity information and other data blocks, ensuring that the data remains accurate and reliable.
Common Tools and Software
Various tools and software solutions are available to perform RAID consistency checks, each tailored to different RAID controllers and storage environments. Some of the commonly used tools include:
- Manufacturer-Specific RAID Management Software: Many RAID controller manufacturers provide proprietary software to manage and monitor their RAID arrays. These tools often include built-in consistency check functions. Examples include Intel® RAID Web Console and Dell™ OpenManage™.
- Operating System Utilities: Modern operating systems like Windows and Linux offer utilities that support RAID management and consistency checks. For example, Windows Disk Management and Linux's
mdadmcommand can be used to initiate and monitor consistency checks on RAID arrays. - Third-Party RAID Management Tools: There are several third-party software solutions designed to offer comprehensive RAID management, including consistency checks. They provide advanced features for maintaining and optimizing RAID arrays.
Performing a RAID Consistency Check
Step-by-Step Guide
Preparation
Before starting a RAID consistency check, it's crucial to prepare your system to ensure the process runs smoothly and without interruptions.
- Backup Your Data: Although consistency checks are designed to detect and correct errors, there is always a risk of data loss. Ensure you have a complete backup of your data before starting the process.
- Check System Resources: Ensure your system has enough resources, such as CPU and memory, to handle the consistency check. This process can be resource-intensive and might affect system performance.
- Schedule Downtime: If possible, schedule the consistency check during a period of low activity to minimize the impact on system performance and user operations.
Execution
Once your system is prepared, you can proceed with the consistency check. The following steps outline a general process that can be adapted depending on the tools and software you are using.
- Open RAID Management Tool: Launch the RAID management software specific to your RAID controller or the third-party tool you are using.
- Select the RAID Array: Navigate to the section where your RAID arrays are listed and select the array you want to check.
- Initiate Consistency Check: Look for the option to perform a consistency check. This might be labeled differently depending on the software (e.g., "Consistency Check," "Verify," or "Scan").
- Monitor the Process: Start the consistency check and monitor its progress. This might take a considerable amount of time, depending on the size of the RAID array and the speed of your disks.
Post-Check Analysis
After the consistency check is complete, it's important to analyze the results and take any necessary actions based on the findings.
- Review Logs and Reports: Most RAID management tools provide detailed logs and reports of the consistency check. Review these documents to understand any errors or inconsistencies that were detected and corrected.
- Address Any Issues: If the consistency check identifies any errors that were not automatically corrected, take appropriate actions to resolve them. This might involve replacing faulty disks or restoring data from backups.
- Document the Process: Keep a record of the consistency check, including the date, any issues found, and the actions taken. This documentation can be useful for future reference and troubleshooting.
Benefits of Regular RAID Consistency Checks
Data Integrity
One of the primary benefits of regular RAID consistency checks is the assurance of data integrity. In any RAID configuration, data is distributed across multiple disks, and inconsistencies can occur due to various factors like hardware failures, power outages, or software glitches. Regular consistency checks help detect and correct these errors before they lead to data corruption or loss. By systematically verifying and repairing discrepancies, these checks ensure that the data stored in the RAID array remains accurate and reliable. This proactive approach to maintaining data integrity is crucial for businesses and individuals who depend on the availability and accuracy of their stored information.
Performance Optimization
Another significant advantage of performing regular RAID consistency checks is the optimization of system performance. Over time, inconsistencies and errors in the RAID array can degrade the performance of the storage system. These issues can cause slower read/write speeds, increased latency, and overall inefficiency. Consistency checks help identify and resolve these problems, ensuring that the RAID array operates at its optimal performance levels. By maintaining a consistent and error-free data structure, these checks help prevent the performance degradation that can result from accumulated errors. This not only enhances the speed and efficiency of the storage system but also prolongs the lifespan of the disks by reducing the likelihood of severe errors that can lead to hardware failure.
Tip: Learn how many drives can fail in RAID 10Common Issues Detected by Consistency Checks
Parity Errors
Parity errors are one of the most common issues detected by RAID consistency checks, especially in RAID levels that use parity, such as RAID 5 and RAID 6. Parity is a form of error checking that helps ensure data integrity by storing additional information that can be used to reconstruct data in the event of a disk failure. However, if the parity information becomes corrupted or does not match the corresponding data blocks, it indicates a parity error. These errors can occur due to hardware malfunctions, power surges, or incomplete write operations. Consistency checks detect these parity mismatches and typically attempt to correct them by recalculating the parity from the existing data blocks, thereby restoring the array to a consistent state.
Data Corruption
Data corruption refers to any alteration of data from its original state, which can render files unusable or lead to significant data loss. This can occur due to various reasons, including software bugs, hardware failures, or unexpected system crashes. During a RAID consistency check, the system scans through the data blocks and verifies their integrity against the expected values or parity information. If discrepancies are found, it indicates data corruption. The consistency check can sometimes fix these issues by reconstructing the corrupted data from parity information or other redundant data copies within the RAID array. Detecting and correcting data corruption early is crucial to prevent the spread of corrupted data and ensure the reliability of the storage system.
Troubleshooting RAID Consistency Problems
Identifying the Root Cause
When RAID consistency problems are detected, it is crucial to identify the root cause to effectively resolve the issues and prevent future occurrences. Here are the steps to identify the root cause:
- Analyze Consistency Check Logs: Review the detailed logs generated by the consistency check process. These logs often provide specific information about the types and locations of errors detected.
- Inspect Hardware Components: Check for any signs of hardware issues, such as failing disks, loose connections, or overheating components. Use diagnostic tools provided by the hardware manufacturer to test the health of the RAID controller and individual drives.
- Examine System Events: Look at the system event logs for any entries related to disk errors, power failures, or unexpected shutdowns. These events can provide clues about when and why the inconsistencies occurred.
- Software and Firmware Updates: Ensure that the RAID controller firmware and RAID management software are up to date. Outdated software can sometimes cause or exacerbate consistency problems.
- Environmental Factors: Consider external factors such as power surges, physical impacts, or environmental conditions that might affect the RAID array.
Corrective Actions
Once the root cause of the RAID consistency problems has been identified, the following corrective actions can be taken:
- Replace Faulty Hardware: If any disks or other hardware components are found to be failing, replace them immediately. Ensure that the replacement components are compatible with the existing RAID configuration.
- Rebuild RAID Array: In some cases, rebuilding the RAID array can help resolve consistency issues. This process involves reconstructing the data and parity information from scratch. Use the RAID management software to initiate and monitor the rebuild process.
- Restore from Backup: If the consistency check reveals severe data corruption that cannot be automatically corrected, restore the affected data from a recent backup. Ensure that your backup strategy is robust and regularly updated.
- Update Firmware and Software: Ensure that all firmware and software related to the RAID array are up to date. Manufacturers often release updates that fix known issues and improve stability.
- Implement Preventative Measures: To prevent future consistency problems, consider implementing measures such as uninterruptible power supplies (UPS), regular system maintenance, and scheduled consistency checks. Educate users and administrators about best practices for handling the RAID array and responding to potential issues.
Best Practices for RAID Maintenance
Scheduling Regular Checks
Regular RAID maintenance checks are essential to ensure the longevity and reliability of your RAID array. Here are some best practices for scheduling these checks:
- Set a Consistent Schedule: Establish a regular schedule for RAID consistency checks. Depending on your usage and criticality of data, this could be weekly, bi-weekly, or monthly. Regular checks help in early detection of issues before they become severe.
- Automate the Process: Utilize RAID management software that allows you to automate consistency checks. Automation ensures that checks are performed consistently without relying on manual initiation.
- Monitor and Log Results: Always monitor the consistency check process and log the results. Detailed logs help in identifying patterns or recurring issues that might need further investigation.
- Perform During Low Activity Periods: Schedule checks during periods of low activity to minimize the impact on system performance and user operations. This approach ensures that the consistency checks do not disrupt normal business activities.
- Include Other Maintenance Tasks: Combine consistency checks with other routine maintenance tasks like firmware updates, system health diagnostics, and backups. This integrated approach ensures comprehensive maintenance.
Backup Strategies
Having a robust backup strategy is crucial for protecting your data against potential RAID failures. Here are some best practices for effective backup strategies:
- Regular Backups: Schedule regular backups of your data, ideally on a daily basis. Frequent backups ensure that you have the most recent data available for restoration in case of a failure.
- Use Multiple Backup Locations: Store backups in multiple locations, including off-site or cloud storage. This practice protects your data against physical damage or localized disasters.
- Implement Incremental Backups: Utilize incremental or differential backup methods to save time and storage space. These methods only back up data that has changed since the last backup, making the process more efficient.
- Test Backup Integrity: Regularly test your backup files to ensure they are complete and not corrupted. Perform periodic restore tests to verify that the backup process is working correctly and that data can be restored successfully.
- Maintain Backup Logs: Keep detailed logs of all backup activities, including the date, time, and status of each backup. These logs are invaluable for troubleshooting and verifying that backups are being performed as scheduled.
- Update Backup Plans: Regularly review and update your backup strategies to incorporate new technologies, changes in data volume, or evolving business needs. Ensure that your backup plan remains aligned with your data protection requirements.
Recover Lost Data Using DiskInternals RAID Recovery
Ready to get your data back?
To start data recovery from RAID (documents, databases, images, videos, and other files), press the FREE DOWNLOAD button to get the latest version of DiskInternals RAID Recovery® and begin the step-by-step recovery process. You can preview all recovered files absolutely for free. To check the current prices, please press the Get Prices button. If you need any assistance, please feel free to contact Technical Support. The team is here to help you get your data back!
Overview of DiskInternals RAID Recovery
DiskInternals RAID Recovery is a powerful software tool designed to help users recover lost or damaged data from RAID arrays. Whether due to hardware failure, accidental deletion, or corruption, DiskInternals RAID Recovery offers a comprehensive solution to retrieve and restore valuable data. Here’s an overview of what this software provides:
- Support for Various RAID Levels: DiskInternals RAID Recovery supports a wide range of RAID configurations, including RAID 0, RAID 1, RAID 5, RAID 6, RAID 10, and even custom RAID setups. This versatility ensures that it can handle almost any RAID array setup you might have.
- Automatic RAID Parameter Detection: One of the standout features of DiskInternals RAID Recovery is its ability to automatically detect RAID parameters. This means the software can identify the RAID configuration, disk order, stripe size, and other critical parameters without user intervention, simplifying the recovery process.
- Comprehensive File System Support: The software supports various file systems, including NTFS, FAT, exFAT, ReFS, HFS+, UFS, Ext2/3/4, and more. This broad compatibility ensures that it can recover data from diverse storage environments.
- Preview Before Recovery: DiskInternals RAID Recovery allows users to preview files before recovery. This feature enables you to verify the integrity of the files and select only the data you need to recover, saving time and storage space.
- User-Friendly Interface: With an intuitive and easy-to-use interface, DiskInternals RAID Recovery is accessible to both novice and experienced users. The step-by-step wizard guides you through the recovery process, making it straightforward and efficient.
- Rebuild RAID Arrays: In addition to data recovery, DiskInternals RAID Recovery can rebuild damaged RAID arrays. This functionality helps restore the RAID configuration and recover data even when the RAID controller is no longer functional.
The recovery process bypasses the limitations of Windows OS, also supports named files in Unicode format and layered folders. You can view the information you find for free, and then decide for yourself whether to buy a license in a relaxed atmosphere. However, rest assured, you will be delighted with how much you can protect your data as much as possible.
This quality tool has thousands of positive reviews due to its innovative features and capabilities. Let's dwell on this in more detail:
- Restores information from badly damaged pools that are no longer mounted;
- Automatically determines the main parameters of the pool and file system, including the order of disks;
- The program works even if a new empty pool is created on top of the original one;
- Recover deleted files, as well as restore previous versions of files;
- Always checksums to make sure the file data is correct.
Step-by-Step Recovery Process
To start file recovery in Windows 10, first download the recommended RAID Recovery™ application on your computer or server. Then install the software on Windows 7 to 11, you can also install on Windows Server 2003 to 2019.
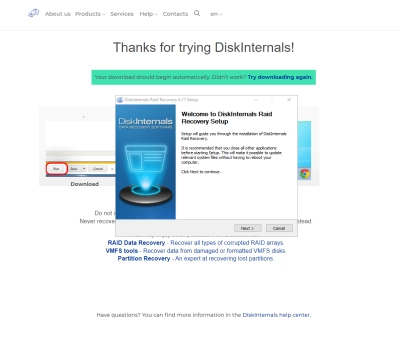
Open the RAID Recovery™ application, if you need automatic mode, activate the wizards, then be sure to select the target array.
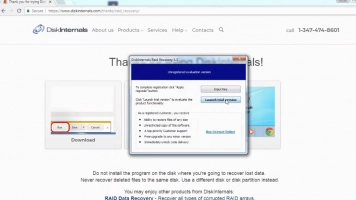
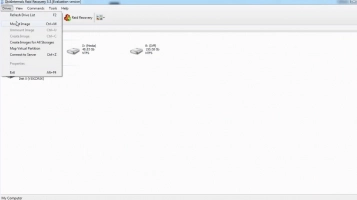
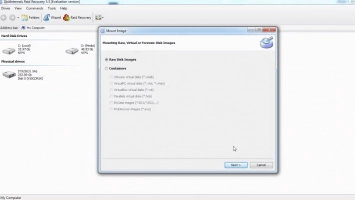
Then decide on the priority recovery mode:
- Quick recovery mode (try it first, it will be fast).
- Full recovery mode (deeper scan and the results will be much better).
You will then have read-only access to all files found during the scan. This is necessary so that you can use the preview function and check how successful the data recovery procedure was.
Once you've reviewed all the results and are now confident that your data is back and properly restored, purchase a RAID Recovery™ license and you'll have unlimited access to your files. You can export selected files to any suitable storage device, and you can also get technical support after purchasing a license - it's great.
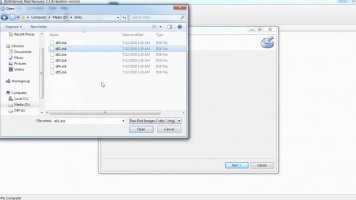
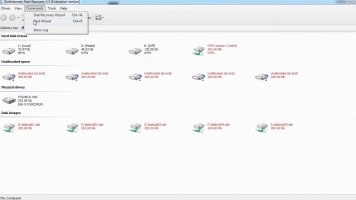
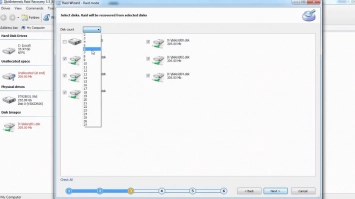
If the necessary files are already saved and you are satisfied with the result of the RAID recovery, congratulations and sincerely happy for you!
Recovery tips:
- Take your time and be patient until each step is completed properly.
- Review all data before recovery.
- Do not save data again to the same disk.
- When selecting a drive for quick scan, select the correct drive; otherwise you won't find your files.
Conclusion
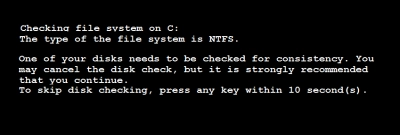
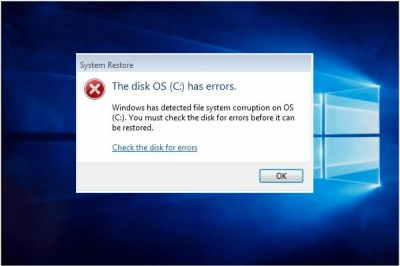
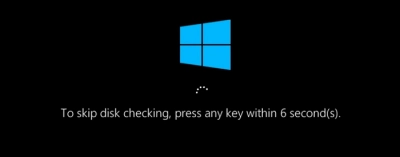
If the error "one of your disks needs to be checked for consistency" appears on your monitor screen, you must first of all remain calm, as rash actions will lead to data corruption.
Therefore, it is strongly recommended that you restore the data first (DiskInternals RAID Recovery will help you) and then try to fix the disk consistency check error using the above methods.
When you are sure that the required data is safe, you can try the methods above to fix the error.
