How to Replace Two Dead Drives in RAID 6
Here you will find out:
- what are RAID 6 peculiarities
- how to replace two dead drives in RAID 6
- how DiskInternals can help you
Are you ready? Let's read!
RAIDs aren’t imminent; the drives used in the array could fail at any time - due to a wide range of possible scenarios and factors. But then, when a RAID array drive fails, you can replace it.
About RAID 6
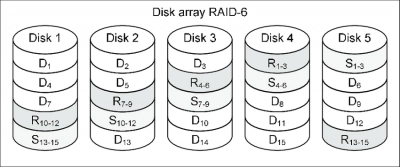
RAID6 is one of the most complex RAIDs to set up; it requires a minimum of 4 disks and has a lot of similarities with RAID5; so, if you really want to understand RAID6, you need to understand RAID5 first. That said, what is RAID5 and how does it relate to RAID 6?
Actually, RAID 5 is a type of RAID configuration that requires a minimum of 3 disks (HDD or SSD). This RAID array uses a parity check for data redundancy. In a RAID5 array, one of the drives stores the parity data, while the other disks are for data storage - configured to work as stripped volumes.
Now, in a RAID5 array, the parity data disk and other disks work hand in hand, and there is a formula for understanding how data can be recovered from a RAID 5 array in the case of data loss; the formula is AP = A1 ⊕ A2.
Where AP represents “Parity data” and A1/A2 represents the 2 data bits in the array; the "⊕" symbol represents (exclusive OR).
In RAID5, when data is lost in A1 or A2, the data can be recovered from the parity data drive. But if the two drives fail, you can't recover your lost files - that's where RAID 6 comes in to help.
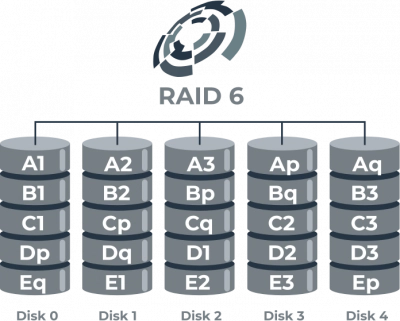
RAID6 is configured to have two independent parity data blocks. To set up this RAID array, you need a minimum of 4 drives; where 2 of the drives would be used to store parity data, and the other two or more disks would serve for data storage. With RAID6, when one drive in the array fails, you can recover your files the same way you would do if it was a RAID5 array.
However, when two disks fail, the recovery formula is represented as AQ = GF(A1) ⊕ GF(A2); where GF is for Galois Field. Well, this is not to take you into mathematics, but the summary is that you can still recover data from RAID6 even after two drives fail.
Note: more about repair software RAID!RAID6 Peculiarities
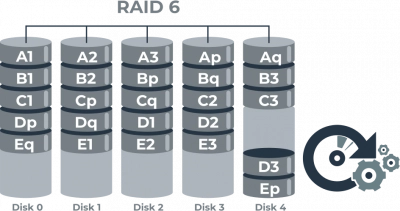
Every RAID configuration has its unique requirements - peculiarities. To setup RAID6, you need at least four(4) disks. The reason for using four disks is to provide a means of recovering your files, just in case two disks fail at the same time.
In RAID6, the fault tolerance is a bit higher than other RAID array types. Also, RAID 6 promises faster speeds since data are processed in a parallel manner. You may spend more money building up RAID6 than most other RAID types.
What to Have in Mind?
In building up a RAID6 array (or even any other type of array), there are a few tips you need to bear in mind.
- Firstly, you should understand that all disks in an array are equally important; so, if one or more disks in an array fail, the others are at great risk.
- Before replacing faulty or failed drives from a RAID array, ensure to back up your files saved in the RAID storage, entirely. This can be easily done by using DiskInternals RAID Recovery to create a “Disk Image.” while creating regular backups can be tedious and take a lot of time, creating disk images is much faster and easier.
How to Replace Two Dead Drives in RAID 6?
In RAID6, data is distributed across four or more physical disks, and there are usually two parity disks. Thus, RAID6 can conveniently withstand two disks failure, while your data remains accessible. It has a higher tolerance than RAID 5. That said, if two drives in your RAID6 array stop responding, you still have a good opportunity to recover all your files from the array, and then replace the dead drives. But, you've got to replace the dead drives one at a time; you add the first one, allow the array to rebuild, then introduce the second drive.
Note: RAID 10 vs RAID 6Replacing a Failing RAID 6 Drive With mdadm
Replacing a dead drive in a RAID 6 array requires some level of carefulness, and if you’re running “Software RAID6,” here is a comprehensive tutorial on how to use the mdadm utility for drive replacement in your RAID 6 array. However, you should take note of these steps, and follow each of them keenly:
- Figure out what made the drives fail
- Get all possible details from the array
- Un-attach the problematic drive from the array.
- Now, shut down the system before proceeding to replace the faulty disk.
- Ensure to partition the new disk and assign the drive letters appropriately
- Then, add the new disk to the RAID array and verify the recovery.
Now, this is just a quick rundown of how to replace a failing disk (or an already failed disk) in a RAID6 array. Below is the explicit, detailed tutorial on how to run the mdadm codes for the disk replacement.
First Step: Figure Out the Problem
It is important that you know what caused the drives to fail in your array; when the cause(s) is identified, it’d help you to apply preventive measures and take necessary actions to prevent such issues from occurring again. The mdadm codes to help you look up and identify the problems are shown below:

When you run either of the codes above, the failing disk(s) will appear as failing or removed. Thus, the output would appear as shown below:
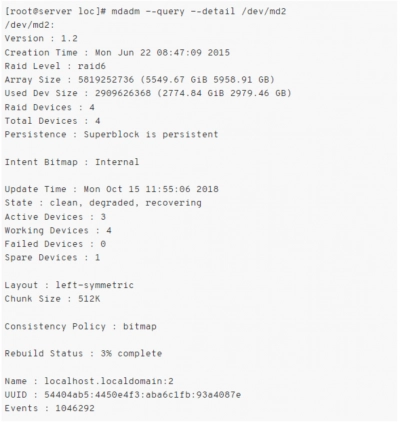

Second Step: Get All Possible Details From The Array
Here’s is the command to look up the state of the RAID array and also identify the state of the disks included in the RAID:
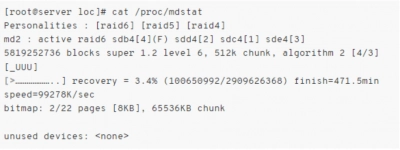
From the image below, you could clearly see that the device /dev/sdb4 is no longer responding in the RAID. With this now, you know the exact failed disk(s) in the array, next is to get the serial number(s) of the disk(s) using the smartctl command as follows:

With the command above, you will know the disk to remove from the server by paying attention to the disk's physical label.
Third Step: Unattach The Problematic Drive From Array
Of course, you need to remove the problematic drive and rebuild the array so everything can get back to normal. To do this, run the following command:

Now, remove the disk, and you’d get a message that looks like what is shown below:

At this point, recheck the state of /proc/mdstat once again:

The result would show you that the identified problematic drive has been removed. Now, you can proceed with the next step.
Fourth Step: Shut Down and Replace the Faulty Disk
Shutdown the system where the RAID array is configured. However, before you shut the system down, comment /dev/md2 out of your /etc/fstab file using the guide below:
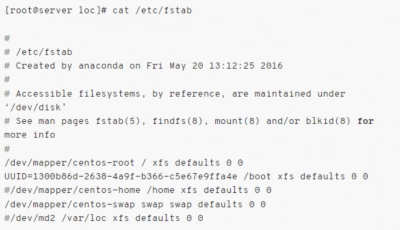
Onto the next step…
Fifth Step: Partition the New Drive
The simplest way to partition the new drive is by copying the partition schema of a working disk in the array, onto the new disk. You can do this using the sgdisk utility provided in the gdisk package.
So, get the gdisk package and install it; the installation process differs based on your distribution:

With gdisk installed, the first thing to do is to pass the -R option (Replicate option). Now, ensure that you’re replicating the partition schema of a working disk - be careful not to replicate that of a failing disk.
Here, the new disk is /dev/sdb and the working disks are /dev/sdc, /dev/sdd, and /dev/sde.
To replicate the partition schema, hereunder is the command:

This command replicates the schema of a working disk, /dev/sdc, to the new disk /dev/sdb. To prevent GUID conflicts with other drives, randomize the GUID of the new drive using:

Next, verify the output of the new disk using the parted utility:

Sixth Step: Add The New Disk to The Array
If you followed the previous steps keenly, here’s the finalizing part of the whole process. Add the new drive to your array using the command:

Last Step: Verify Recovery
Use this command to verify the RAID recovery:
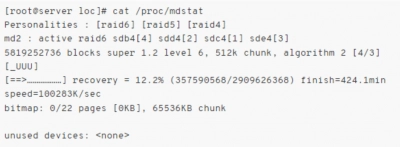
Or:
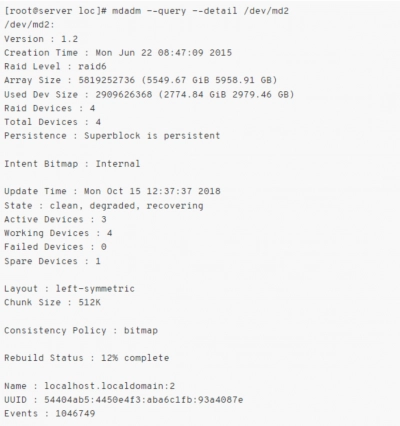
From the output shows, /dev/sdb4 is already rebuilding, and there are four working devices available.
Note: The rebuilding process may take a long time depending on the total disk size and disk type.
Protect Your Data - Make Back UP
It is important to run routine backups, and DiskInternals RAID Recovery software can help you do that for free. DiskInternals RAID Recovery is a premium software that allows users to create “Disk Images” for free; these disk images serve as the backups of the selected hard disk.
Also, DiskInternals RAID Recovery comes with an intuitive built-in "Wizard" that helps the user to recover lost RAID files easily. The software is primarily a professional tool that recovers lost files and partitions from all kinds of RAID arrays.
It is regularly updated and integrates several handy features, as well as support various file systems. RAID Recovery by DiskInternals can recover files from damaged pools that no longer mount and automatically figures out pool and filesystem parameters, including the disk order.
Furthermore, DiskInternals RAID Recovery recovers previous versions of files (if available), verifies checksums to ascertain the file's integrity, and works efficiently on all Windows PCs.
Recovery Process
First Step:
Firstly, you need to turn off your computer/network server and disconnect the RAID drives in the array.
Second Step:
Remove the drives and connect them to a computer system via USB or any other supported means of connectivity.
Third Step:
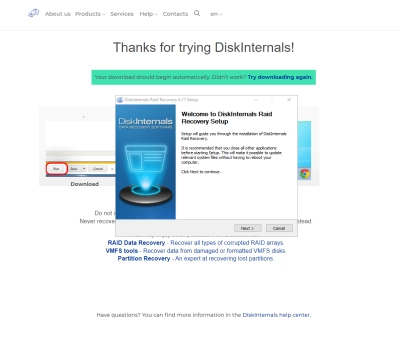
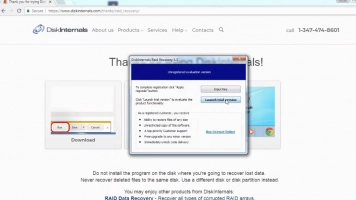
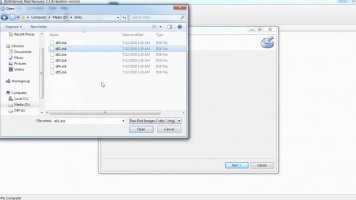
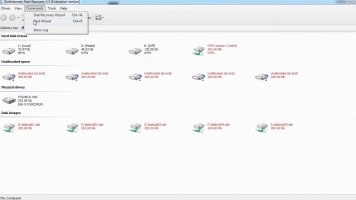
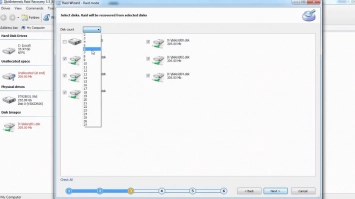
Boot the computer where the hard drives are connected and install DiskInternals RAID Recovery software. After the installation, launch the program and follow the Recovery Wizard prompts to recover your lost files from each of the connected drives, one after another.
Recovery Tips
Consider these tips when attempting to recover files using DiskInternals RAID Recovery.
- Don’t rush the process - allow each step to run completely and successfully before proceeding to the next. Else, you may not recover all your lost files.
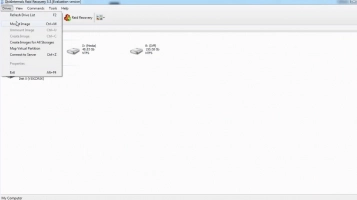
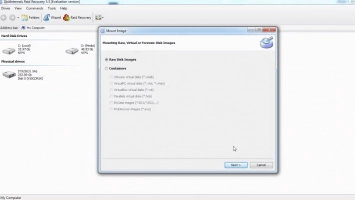
- Verify that you chose the exact disk drive that had the lost files you want to recover. If you select the wrong drive, you won’t get back any of the lost files.
- DiskInternals RAID Recovery comes with a previewing engine, so you can preview the recovered files before saving them back to your local or remote storage.
Important Note: Ensure that you do not save the recovered files on the same drive where they were previously saved - from where they got lost.
Video Guide:
Here is a clear-cut video that visually explains the RAID Partition recovery process using DiskInternals RAID Recovery.
RAID Failure Prevention Tip
RAID failures cannot be entirely avoided, but here are some prevention tips that may be of help.
- Always monitor the RAID disk drives’ critical SMART parameters, health status, and temperature routinely. This will help you identify RAID array failure signs earlier and fix them before it escalates.
- Always back up your data regularly because no one can be too sure when data loss could occur.
- Don’t perform CHKDSK or SFC scans in a bid to fix and repair RAID array errors.
- Don’t ever use the “beta” version of a RAID firmware, OS, or system file. However, ensure to keep your OS and critical software apps updated to their latest stable versions regularly.
Reserve at least two new or empty drives to use in replacing failed drives in an array.
Conclusion:
Summarily, this article details how to replace failed drives in RAID 6; if you’ve got two failed drives, you have to follow the guides provided above to replace the drives one after another. Should you replace two failed disks at the same time in a RAID 6 array? No, you shouldn’t, you have to replace them one after another, and if you’re running Software RAID, the mdadm command would help you. This article explains the steps to replace failed disks in a RAID 6 array.
