Recover RAID Partition
Here you will find out:
- what is RAID Partition
- how to restore RAID partition
- how DiskInternals can help you
Are you ready? Let's read!
Everything has an easy way of doing it; to recover RAID partitions the easy way, this article explains how you can go about it. But before that, what is a RAID partition?
What is RAID Partition?
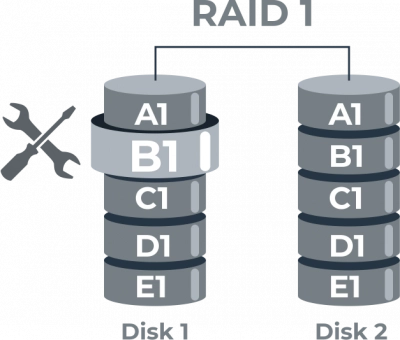
What is a RAID? RAID, the acronym for Redundant Array of Independent Disks, is a type of storage technology that provides more security against hard disk failure and sudden data loss. There are many types of RAID storage, and for you to achieve a RAID, you need at least two (2) hard drives (HDD or SSD).
Over to RAID partitions, this simply refers to the sections (“Partitions”) in each of the disks used in a RAID array configuration. So to say, RAID partitions are available in the disks in a RAID array; each disk has its own partitions. A disk can have as many partitions as it can contain.
Literally, RAID partitions are the same as normal hard drive partitions you know fully well.
Reasons for RAID Partition Loss
Essentially, the same issues that lead to the loss of partitions on standard HDD/SSD drives can also result in the disappearance of a RAID partition. These issues range from human mistakes to technical malfunctions. Below is a summary of the most frequent causes of RAID partition loss:
- Accidental deletion by users
- Attacks by malware or viruses targeting the hard drive
- Power fluctuations that lead to unexpected power loss, potentially harming the drive's partitions
- Improper configuration settings
- Sudden system shutdowns
- Crashes of the server
- The presence of bad sectors on the hard disk
- Incorrectly replacing a drive within the array that has failed or is damaged
While other scenarios could cause RAID partition loss, the reasons listed above are among the most typical. It's crucial to remember that all hard drives, whether HDDs or SSDs, can eventually fail or become corrupted.
Often, reformatting the RAID drive is the go-to solution for addressing corruption, which unfortunately results in the loss of all data on the drive.
Naturally, you'll want to avoid losing your precious data stored on the compromised RAID drive. Therefore, exploring alternative methods to repair the drive or employing a dependable RAID recovery tool to retrieve your files before considering reformatting is advisable.
Furthermore, various methods exist for formatting a RAID partition, but it is essential to start by backing up your data to prevent total loss.
Note: more about repair software RAID!Ways to Perform RAID Partition Recovery

You can rebuild a corrupt RAID partition and recover the files saved inside following some specific RAID partition recovery methods. But before proceeding further, you need to check the disk’s health and SMART status, as well as observe if the disk makes any clicking or screeching noise.
If the disk makes a clicking noise and the disk health result is poor, the best thing to do is to clone the disk or back up its content from RAID volumes/partitions. You'd need a spare drive to save the files recovered from the problematic drive. Having these in mind, let's discuss the recovery methods.
1. Using the Disk Management Tool
The Disk Management Tool is available on all Windows OS computers - it allows you to access all the volumes and partitions on all hard drives connected to the computer.
Now, since a RAID partition would be inaccessible if it does not carry a drive letter, the Disk Management tool can help you to access the partition and assign a drive letter to it - so it can be accessible in the RAID array. So, how do you go about this?
Note: If you can't find your hard drive's partitions via the Disk Management Tool, most apparently, the partition(s) were deleted.
- Open Disk Management (right-click on the Start/Windows icon at the bottom-left of your screen desktop/monitor screen and select Disk Management).
- In the Disk Management window, look out for the RAID partition without a drive letter, right-click on it and select “Change Drive Letter…”
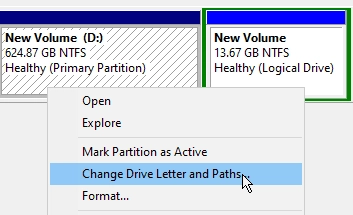
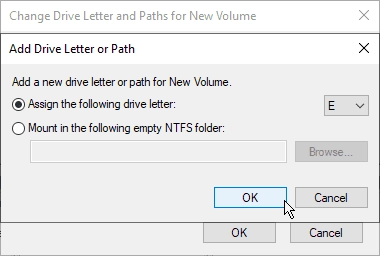
- On the next screen, assign a drive letter to the partition and click “OK.”
- Go back to File Explorer and check if you can access the disk’s partitions and volumes; if you can, create a backup immediately, but if you can’t, the next solution is to format the disk, but don’t do that immediately, check the next method.
2. Repair Corrupt RAID Partition via CHKDSK Scan
It is not always advisable to run the CHKDSK (Check Disk) command on a disk used in a RAID array; this is because the CHKDSK tool can cause automatic file loss if the disk has too many bad sectors.
Basically, the CHKDSK tool is meant to check your hard drive for errors and fix them automatically; it helps in most cases to fix most hard disk issues, but for RAID disks, it's quite risky. Notwithstanding, you can still try it as a means of fixing your corrupted drive.
However, it is advisable to back up the disk before proceeding to fix it through the Check Disk command-line tool. Also, it is important to note that you need to have admin access on the computer you’re using to run the CHKDSK tool; else, you won’t be able to launch the tool.
- Right-click on the Start/Windows icon at the bottom-left of your screen desktop/monitor screen and select Command Prompt (Admin).
- When the CMD utility launches, enter the following command and hit the Enter button on your keyboard: chkdsk /f X:
- Wait for the scanning and repair to run completely; close the CMD utility and reboot the PC.
3. Use a RAID Partition Recovery Tool
With a professional Use a RAID Partition Recovery software, you would be able to get back all your files from the problematic drive and then format it. A decent RAID partition recovery software to consider is DiskInternals RAID repair utility.
How DiskInternals RAID Recovery Can Help?
DiskInternals RAID Recovery comes with an intuitive built-in "Wizard" that helps the user through the software or hardware RAID recovery process. It is a professional tool that recovers lost files and partitions from all kinds of RAID arrays.
The software is regularly updated and integrates a suite of useful features, as well as support various file systems. RAID Recovery by DiskInternals can recover files from damaged pools that no longer mount and automatically figures out pool and filesystem parameters, including the disk order.
Furthermore, DiskInternals RAID Recovery recovers previous versions of files (if available), verifies checksums to ascertain the file's integrity, and works efficiently on all Windows PCs.
Recovery Process
First Step:
Firstly, you need to turn off your computer/network server and disconnect the RAID drives in the array.
Second Step:
Remove the drives and connect them to a computer system via USB or any other supported means of connectivity.
Third Step:
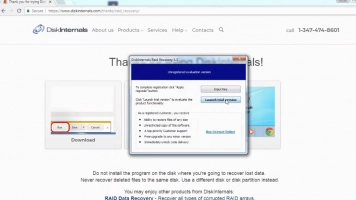
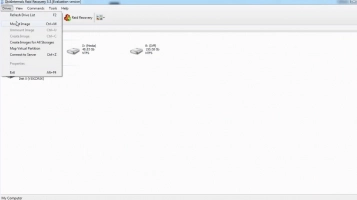
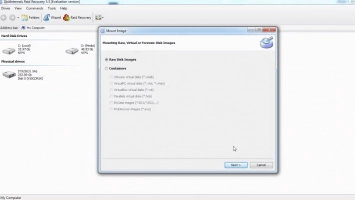
Boot the computer where the hard drives are connected and install DiskInternals RAID Recovery software. After the installation, launch the program and follow the Recovery Wizard prompts to recover your lost files from each of the connected drives, one after another.
Recovery Tips
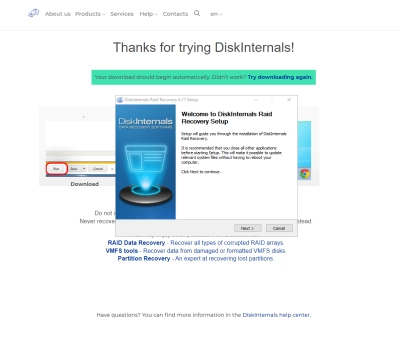
Consider these tips when attempting to recover files using DiskInternals RAID Recovery.
- Don’t rush the process - allow each step to run completely and successfully before proceeding to the next. Else, you may not recover all your lost files.
- Verify that you chose the exact disk drive that had the lost files you want to recover. If you select the wrong drive, you won’t get back any of the lost files.
- DiskInternals RAID Recovery comes with a previewing engine, so you can preview the recovered files before saving them back to your local or remote storage.
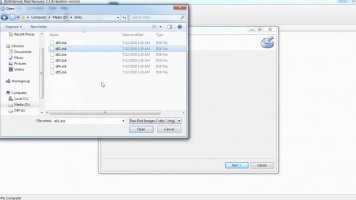
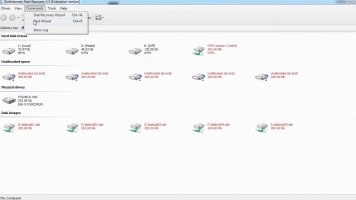
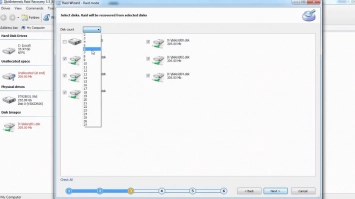
Important Note: Ensure that you do not save the recovered files on the same drive where they were previously saved - from where they got lost.
Video Guide:
Here is a clear-cut video that visually explains the RAID Partition recovery process using DiskInternals RAID Recovery.
RAID Failure Prevention Tip

RAID failures cannot be entirely avoided, but here are some prevention tips that may be of help.
- Always monitor the RAID disk drives’ critical SMART parameters, health status, and temperature routinely. This will help you identify RAID array failure signs earlier and fix them before it escalates.
- Always back up your data regularly because no one can be too sure when data loss could occur.
- Don’t perform CHKDSK or SFC scans in a bid to fix and repair RAID array errors.
- Don’t ever use the “beta” version of a RAID firmware, OS, or system file. However, ensure to keep your OS and critical software apps updated to their latest stable versions regularly.
Retain at least two new or empty drives, which would be used to replace failed drives in the array.
Conclusion
Summarily, this article explains how you can get back your files from a faulty drive in a RAID array. It also details how to recover lost files from a problematic RAID array drive using a premium software application.
Recovering files from a RAID array drive is pretty simple and easy when you use a software that comes with all needed features and tools. RAID partitions can disappear due to several reasons, which are explained in this article.

