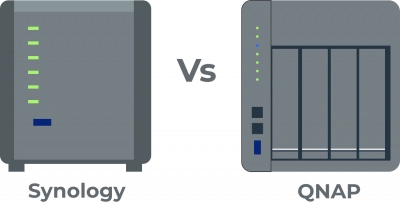
Synology vs QNAP comparison
In this article you will find out:
- Synology vs QNAP comparison
- how to protect your data
Are you ready? Let's read!
NAS (Network Attached Storage) stores data at the file level, it is usually connected to a TCP / IP network and allows you to retrieve data from a centralized storage space.

NAS devices can be used as home backup servers. You can use servers from different manufacturers. The most commonly used devices are QNAP and Synology, both of which are well known and can be difficult to choose between. To clarify the situation somehow, this article provides detailed information about QNAP and Synology.
About QNAP
A QNAP NAS is a device consisting of multiple hard drives that are permanently connected to the Internet. QNAP can be used as a backup, as well as storage for all important files and media (photos, videos, etc.). This device can be in your home, office, and your family or colleagues can use it at any time of the day.
About Synology
Synology NAS also centralized data storage and backup. It simplifies collaboration and file management, provides secure network deployment to facilitate data management. This device is also suitable for everyday use.
Comparison
Now let's try to compare QNAP VS Synology on the main parameters so that it would be easier for you to choose between the two storage devices.
Operating System
Both variants have their own desktop user interfaces enclosed in a proprietary operating system.
Priority QNAP operating system - QNAP Turbo Station (QTS). This operating system allows for customization of QNAP and provides more third-party applications, which means you can easily install NAS applications such as Netflix, Kodi, etc.
Synology NAS's priority operating system is Diskstation Manager (DSM). This is a fairly powerful operating system that has almost the same capabilities as the Windows or Mac operating system
Compatible with hard drives and solid-state drives.
NAS server devices are known to require hard disk drives (HDDs) and solid-state drives (SSDs) connected to SATA. In this regard, both QNAP and Synology options are equal, as they are equally compatible with HDD and SSD.
SHR and RAID configuration options.
Synology supports traditional RAID and SHR systems, however, in terms of RAID configuration, Synology NAS is better.
QNAP only supports all legacy RAID systems, which must be the same.
NAS file system.
QNAP and Synology use EXT 4 as their primary file system. However, Synology NAS can also use BTRFS as the default file system, which supports background data consistency checks to speed up RAID creation and recovery.
As for the QNAP, it does not use Btfrs as the file system but offers ZFS on its advanced equipment, rack-mounted.
Access To the files.
Synology is convenient for accessing traditional files (DOCX, PDF, AVI, MP3, etc.). If you are using rare, unconventional files (MKV, GIF, and RAR), then QNAP will be your preference. In addition, QNAP offers more third-party applications and integrates them into its file manager.
Access to DLNA certified equipment.
This equipment is necessary to play and watch multimedia. Synology NAS supports this option, while QNAP NAS only supports HDMI out, remote control, audio in / out.
USB access.
The USB port on your Synology NAS is used to connect any storage devices (external hard drives, etc.).
QNAPs also use this method from a standpoint, whereby some QNAP devices are allowed direct access to NAS content via USB.
Price.
QNAP is generally more expensive than Synology, while QNAP offers more models in terms of performance and multiple bays.
So, which option is better to choose?
1. Synology is more flexible, Synology's software quality assurance system is much better and usually has more features and options than QNAP.
2. If you are not a regular user, but a technician, then use the QNAP NAS. If your focus is on user accessibility, you can choose Synology products.
Make sure your data is safe!
DiskInternals RAID Recovery helps to restore raids of any level, so you can recover all missing (deleted, damaged, etc.) information. This application is leading in its segment, and for good reason: it has been improved by leading IT professionals and has been constantly updated year after year for the past 15 years. It should be mentioned that the application has the popular free disk imaging feature and is good at restoring all common arrays in a few clicks. The application automatically detects the original type of your RAID, and also provides full manual control to control the recovery process. The free preview is a great bonus in addition to the main features of the app. You do not need to purchase a license here. Of course, if you want to export the recovered data, then a license is still required.
Recovery algorithm using DiskInternals RAID Recovery:
1. Install this product on your computer from the DiskInternals website.
2. Open the application and launch the Recovery Wizard after connecting each RAID drive separately to your computer.
3. The program automatically detects the available arrays - select the one you need.
4. Next, select the recovery mode and, after scanning, view the results for free.
5. Then complete the whole process by exporting the data (remember, you need a license for this).
Follow these guidelines and you will succeed. Good luck!
