4 Practical Ways for File Recovery
Data loss is inevitable, and anyone can be a victim. Have you ever lost some important files after a sudden hardware failure or unintentional deletion? It’s pretty easy to accidentally delete files, and often you won’t even know you’ve done it until it’s too late. All the years of family photos, irreplaceable videos and important documents can be gone with a single accidental click.
Thankfully, you might be able to get them back using the previous version of Windows deleted file recovery or the best file recovery software.
If you’re wondering about how to go about retrieving deleted files, there are many different methods, and it depends on the severity of the deleted file. File recovery in Windows 7, 8, 10 and 11 is super-easy and if you want to unerase your files, and there are many quick and easy methods to do file restore. This can be sub-surface level data recovery using the software, a quick Recycle Bin recovery, or deep software recovery.
How to not erase deleted files fully
Accidentally deleting documents is simple to do and you may not even recognize you've done it until you need the file again. And that can happen to anyone! The hardest thing is when you don’t know anything about recovering files, or how to bring your essential files back. Well, that’s no longer an issue, since retrieving deleted files and recovering lost files has become super-easy nowadays.
Even though home Windows may not be able to see documents you delete, they may be still there and are able to be retrieved. The faster you act, the greater the chance you'll have of recovering them. And if you've already got recovery software hooked up, it's better still.
Remember that you need to be cautious. Don’t install recovery software on the hard drive where you lost your files, because you might overwrite the very documents you are trying to get back. Try to use the computer on which you deleted your files as little as possible to increase the odds of actually recovering files.
Can files be recovered from a failed SSD or hard drive?
Accidental deletion, hard drive/SSD failure, viruses, and data corruption are some of the ways you can lose vital data. It does not always matter how did you lost files, what matters is that there are ways of recovering your files, and often this process is easier than you expect.
Why do hard drives and SSDs fail?
When you find your SSD not performing like it should, or suddenly going silent, it’s often due to a critical hardware failure. Since SSDs don’t have any spinning disks or any moving parts, the semiconductor components can fail due to shorting, melted solder points, worn out controllers & capacitors, etc. Recovering deleted files depends on the severity of the hardware failure. Often, you can recover deleted files for user-based hardware failures with recovery software.
Hard drive failure is pretty well-documented and the reasons behind it can range from things like physical trauma, platter misalignment, bad sectors, bearing and motor failure, head crash, mechanical failures, and so on.
When it comes to recovering file, SSDs are much less likely to fail compared to hard drives but hard drive data recovery is considerably easier when it comes to both physical repairs and software recovery.
The difference between hard drives and SSDs in the file recovery process
It is a myth that files can't be recovered from corrupted hard drives or SSDs and it was dispelled a long time ago. You should know that it’s possible to recover files from both failed SSDs and hard drives using recovery software. While physically damaged SSDs and hard drives will need professional recovery companies to get data out, the software approach is still viable for user-grade hardware failure.
The main difference between the software recovery processes is that there are more mainstream software packs available for software-based hard drive data recovery, whereas only powerful and specifically designed solutions will work for physically damaged drives.
To recover files on an SSD or hard drive, here are a few things that you need to know. If you’re looking at recently deleted files, it’s easier to recover them. However, if you’re looking to recover deleted files that are caused by a hardware failure, it can be a bit trickier. In that case, you need to turn off your PC as soon as you suspect a hardware failure and contact a local repair shop to deal with that. No software can heal physical damage.
Recovering deleted files on an SSD or hard drive can range from simply pulling them back from the Recycle Bin to running recovery software. For the most part, you’re going to be looking at a relatively simple process with modern-day recovery packs. It’s possible to recover deleted files from a failed SSD or hard drive. The process has been simplified with file recovery software. Since powerful recovery software allows for recovering deleted files from both SSDs and hard drives under the same package, data recovery has been made easier.
Ways to recover deleted files
In case if you’ve been suffering from data loss and are wondering about recovering files, don’t worry: here are the ways to recover data. The process of doing so ranges in complexity, but the process is never hard. There are four ways to restore deleted files:
- Check your Windows Recycle Bin
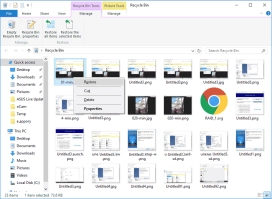
When you cannot find deleted files, you start to panic and you might totally forget about checking the Recycle Bin. If you just deleted your files on the laptop by moving them to the Recycle Bin and did not click Empty Recycle Bin, you may retrieve them comfortably. Just open the Recycle Bin, then locate and right-click on the documents you need and select Repair. The erased files will be recovered to their respective locations.
To recover previous versions of deleted or lost files
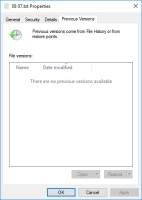
If you have emptied the Recycle Bin, you can try to recover all deleted files using previous versions of the deleted or lost files using Windows’ built-in free backup and restore lost data feature. It’s a simple process to recover files in Windows. Pay attention, though: If you’re not sure that the previous Windows version contains your files, then don’t use that version. Using the previous version may lead to your data being overwritten.
- In Windows 7
Click the Start button and click on Computer. Navigate to the folder that used to contain the file or folder, right-click it, and then click on Restore Previous Versions. Here, you'll see a list of available previous versions of the deleted files or folders with different times and dates. Choose the version you like and click Restore to recover your deleted files.
- In Windows 11, 10, 8 and 8.1
Open the folder that used to contain the deleted file and click the History button. File History will display all the files contained in the most recent backup of that folder. Click the Previous button to locate and select the file you want to retrieve and then click the green Restore button to get it back.
- Restore a file from backup
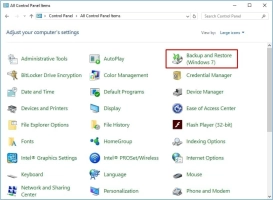
To perform file restore from a backup, ensure the media or drive that your backup is saved on is to be had, and then take the following steps:
- 1. To open “Backup and Repair”, click the Start button
- 2. Select “Manipulate Panel”
- 3. Choose “Machine and Preservation”
- 4. Select “Backup and Repair”
- 5. Click “Restore my files” and then agree with the steps in the Wizard for recovering deleted files.
Data recovery software
You can always download a file recovery program and use it to look for and get your deleted files back. If you checked every place your file could be and are not able to recover it with Windows backup, or you are not sure that you are able to do it, file recovery software can be helpful. To retrieve deleted files DiskInternals Uneraser™ is the best file recovery software.
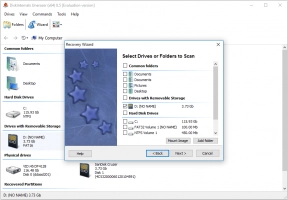
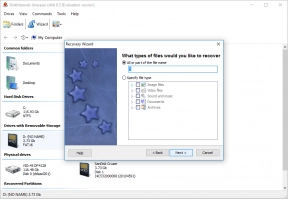
DiskInternal Uneraser™ is easy-to-use, efficient software that includes a recovery wizard that guides you step-by-step through the recovery process.
Uneraser™, just like the name suggests, is a deleted file finder and a simple but powerful recovery software tool that provides restoration file recovery and is created for the not-so-tech-savvy user who wants to get their files back.
DiskInternal Uneraser™ does a great job to recover your lost data.
Supported file systems: FAT12/16/32, APFS(reader), ExFAT, RomFS(reader), HFS+(Mac), Ext2, 3, and 4 (Linux), ReFS, NTFS, NTFS5, UFS, XFS and ZFS.
The tool helps you with all steps of the file recovery process, even those that can't be involved in every step, to recover wide variety (photos, music tracks, videos, documents, etc.) of deleted files. With so many data recovery software tools in web stores, it has gotten impossible to get the complete range of different file types in one recovery software tool for a reasonable price. But DiskInternal Uneraser™ is an all-in-one software solution that recovers up to 95% of lost data in very little time.
DiskInternals Uneraser™ Guide
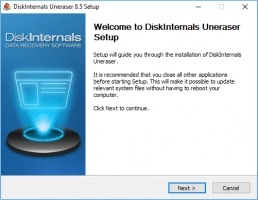
To start the lost file recovery process, download DiskInternals Uneraser™ and launch the executable file.
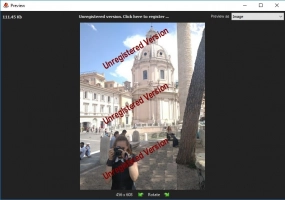
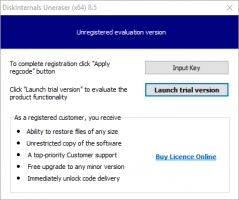
If you don’t want to buy the software right off the bat, there is a trial version available that provides all the options as the licensed version, including file scanning and preview of deleted files, but you cannot actually restore the files on your computer until you get the license.
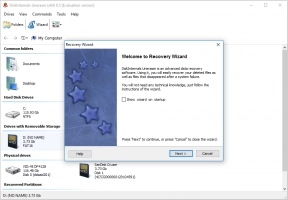
- Open the program and click on the Wizard icon; a new window will open and the drivers and folders for scanning will be launched. Pick a folder or disk you would like to recover and click on the Next button.
- Select the type of file you would like to restore. There are quite a lot of restorable files, including videos, documents, audio files, etc. Of course, you can choose everything.
- There are a few different types of scanning options. One option does a quick search and looks at recently deleted files; this process is much faster, but it will not bring forward the files that have been deleted some time ago. The other option is a deep scan, which will do a deep scan of the hard drive and find much older deleted files. This process is slower but more comprehensive.
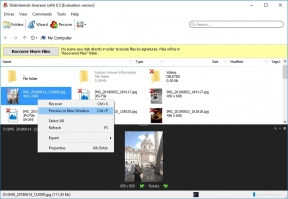
- The program will find deleted files and they will be marked with a red cross in the upper left-hand corner.
- You will be able to preview found files’ content with their original name before exporting them. Just choose the file, click the right mouse button and select “Preview in New Window” or use the keyboard command “Ctrl+P”.
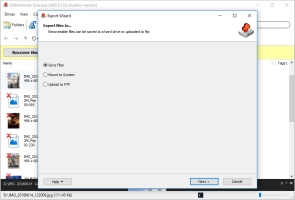
- After choosing the files you want, click on the red cross named “Recover” and the software will recover lost files after you choose an output location for the selected files.
In this day and age, file recovery is more important than ever, and DiskInternal Uneraser™ is the software to help you do just that. Not only is this tool the greatest in terms of quality, but it’s also the fastest, sleekest and the most easy-to-use data recovery software on the market. DiskInternals Research has over 15 years of experience in recovering deleted files when it comes to recovering data on an enterprise-level or a user level. DiskInternals Research is the team of professionals that the market trusts.
Stop chasing around other brands, and choose DiskInternal Uneraser™ to be your future recovery partner for life.
Frequently Asked Questions
- 🔶 What kind of files I can recover with DiskInternals Uneraser?You can restore any files, including photos, video, text, and music.
- 🔷 Can I use DiskInternals Uneraser to recover my files on a USB drive?Sure! DiskInternals Uneraser is able to restore files from USB drive either from SD card, SSD or internals/external HDD.
- 🔶 Do I need to reinstall DiskInternals Uneraser Recovery software, if I want to buy it?No. After you installed a trial version and made sure that your files are recoverable, you just need to purchase a license and enter the license key. Since that moment, you can save found files.
- 🔷 Is DiskInternal Uneraser Recovery able to create a disk image?Yes. To create a disk image, run DiskInternal Uneraser™. Skip the Recovery Wizard. Click on the desired drive and press Ctrl + C. Specify the name for the disk image. Click Save.
Related articles
FREE DOWNLOADVer 8.24, WinBUY NOWFrom $29.95 39.95
Glossary
NTFS is a file system developed in 1993 by Microsoft. It is still the most advanced Windows file system.
ReFS is a newer Windows file system that replaces to some extent NTFS. The main feature is fault tolerance and increased productivity.
Ext2/3/4 is a Linux file system with several versions: Ext2 is not a journal file system, Ext3/4 lacks this drawback. Therefore, Ext2 is still used in flashcards.
HFS is a common file system from Apple Computer for computers running Mac OS.
ReiserFS is a regular journaling file system developed specifically for Linux by Namesys in 2001.
Reiser4 is the 4th version of the file system Reiser, created in 2004 by Namesys, with high performance and encryption options.
XFS is a modern 64-bit file system created in 1994. It has high performance and scalability.
ZFS is a 128-bit file system integrated with the logical volume manager.
RomFS is a primitive file system for reading data on Linux systems.
APFS is the latest file system created by Apple for Mac computers with macOS 10.13 and higher.
Forensic Disk Images (EnCase, ProDiscover) is an application for creating evidence files that help you to create a report on forensic operations at the end of work and provide reliable information to investigators.


