Gimp eraser is not working? Fix it now!

Here you will find out:
- how to deal with this issue
- how DiskInternals can help you
Are you ready? Let's read!
About this issue
GIMP is a free photo and image editing tool. Although it is inferior to Photoshop as it lacks specific features, it is still one of the best and most requested image editors out there. One of the most common problems in a GIMP application is the eraser not working. Since this tool is key in image editing, the problem of “gimp eraser not working” is critical. In today's article I will describe how to correct this situation and to take advantage of the eraser freely.
Let's fix it
1. Make sure your digital photographs and graphics are safe!
DiskInternals Uneraser is hardly comparable to any other application. This software has been on the market for over 15 years and has established itself as the best in graphic data recovery. This professional tool can recover various types of image formats, including: ARW, BMP, CRW, ERF, GIF, INDD, CR2, DCR, DNG, DCR, JPG, JPEG, K25, KDC, MRW, MEF, MOS, NEF, NRW, ORF, PSD, RAW, SR2, SWF, SVG, SRF, PEF, PNG, RAF, TIFF, TIF, TGA, WMF, X3F and more!
DiskInternals Uneraser retrieves deleted images and photos not only from classic computer hard drives, but also from SSD and eMMC, SD memory cards, an digital cameras, among others. Another good and essential feature is the built-in recovery wizard to help you recover deleted images, even if this is your first time.
You can preview deleted photos after scanning and you can be sure that they will be recovered correctly. Thanks to a special search technology, you can not only preview your files, but also find photos by their original / previous name, and the metadata of the files is used to recover not only images, but also their file names. A user-friendly and intuitive simple interface makes it easy to recover deleted photos and images without leaving home.
The following guide for DiskInternals Uneraser software will help you recover deleted or corrupted images from any drive.
Step 1. Download the DiskInternals product, run the program and click the "Next" button until the installation is complete.
Step 2. Open and left-click the wizard icon.
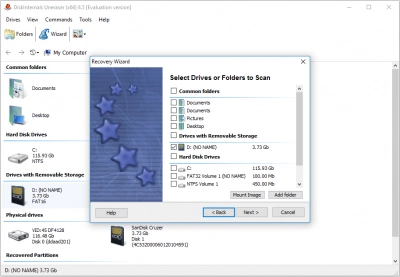
Step 3. On the screen, you will see all the storage devices that you have on your computer (hard disk, USB, SD card, etc.), left click the disk with the deleted photo.

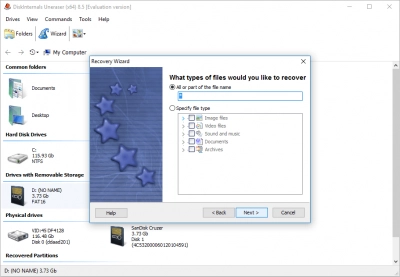
Step 4. Select the type of file you want to recover (BMP, GIF, CRW, CR2, NEF, JPEG, TIFF / TIF, PNG, ORF, RAF and others).

Step 5. Scan the disk: select the desired scan option with the left mouse button.
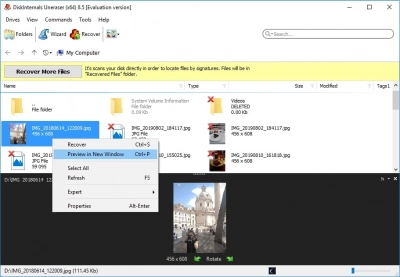
Step 6. Files that can be recovered will be marked with a red cross in the upper left corner.
Step 7. Preview these files for free and start exporting data. It is available after purchasing a license for this application for a small amount of money.

Enjoy the results and your work done.
2. Use alpha channel
Add an alpha channel so that the GIMP eraser erases to transparency.
So, select the layer with the content you want to erase and right-click on it. Select Add Alpha Channel and try erasing the content again.
3. Adjust preferences
Check some layer and eraser settings if the previous solution didn't help.
So, make sure that the selected layer is not locked; you need to deselect all three icons. The wireframe eraser is not working.
Next, make sure that no area is selected on your layer: press Shift + Ctrl + A to deselect everything.
Also check options such as the opacity, size and hardness of the eraser. The parameter "Erasure protection" must be disabled.
Otherwise, return the eraser to its defaults:
Select the eraser in GIMP and just click the Restore Defaults icon.
If the problem of "gimp eraser not erasing" is not associated with the eraser settings, go to the next solution.
4. Reload the app
Usually, after restarting the GIMP software, the problem with the eraser will be permanently resolved.
To do this, close GIMP completely and wait a couple of minutes.
Now, start GIMP again, it should work.
