Recover Hidden Files in USB Drive - 4 Great Methods!
After you have read this article, you will find out:
- how to make hidden files visible using File Explorer
- how to make a recovery of hidden files in usb using cmd attrib command
- what do you need to recover hidden files in usb drive
Are you ready to get back hidden files? Let's read!
Method 1. Show hidden items in Windows 10 (File Explorer #1)
Before you start the recovery of hidden files in your USB drive, you can try to make them visible with File Explorer. This is a built-in tool in any version of Windows.
To do this, follow these steps:

Insert your USB Drive into a special slot of your computer. The File Explorer will start automatically; or you can click on This PC (My Computer) and find and open the USB drive. Click the View tab. Now you need to click on the check box to show hidden items in the File Explorer ribbon and previously hidden files should be visible.
Doesn’t help? Try the other method!
Method 2. Show hidden items with the File Explorer #2
This method for recovery of hidden files in a USB drive is also via the File Explorer, but differs a little from the previous one.
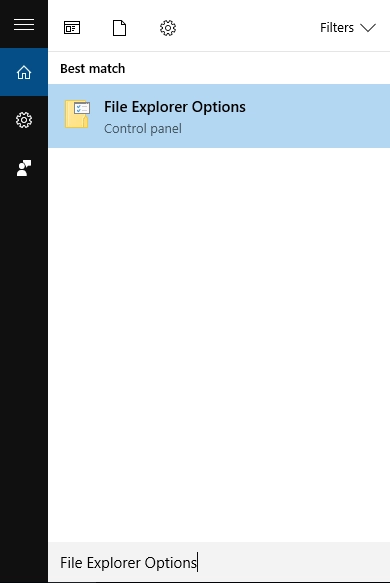
In the search box, type “File Explorer Options”. Hit Enter. The folder should open. In the File Explorer options, select View. From the list, select “Hidden files and folders” and click on “Show hidden files, folders and drives”. Click Apply, then OK.
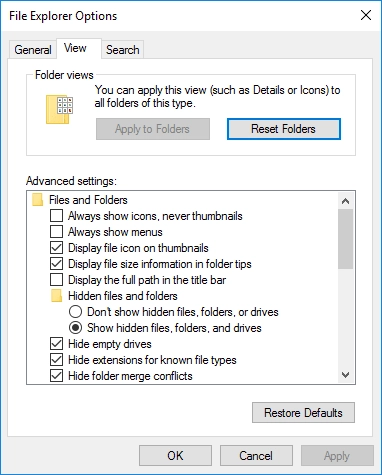
All hidden files will become visible.
But if this is not the case, do not be discouraged. There are still great options.
Method 3. Attrib command
This method is based on recovering hidden files in a USB drive using the command line. You need to be extremely careful here, so as not to make any mistakes.
First, connect the USB drive to the PC and then follow these instructions:
Click Start and type “cmd”. Click on the window and click on “Run as administrator”. You will see a black box where you must enter the drive letter and colon “:” (for example, D:). Now type the command attrib -s -h *.* /S /D.
To understand where to use white space, check it:
attrib[white space]-s[white space]-h[white space]*.*[white space]/S[white space]/D.
Hit Enter.
After that, it is better to safely eject the USB drive than re-attach and re-open it. The attrib command should solve your problem.
Method 4. Recover hidden files on USB drive that were deleted
But, what do you do if hidden files were deleted for some reason? How do you view hidden files in USB after deletion?
Here is a good way to solve these issues.
DiskInternals Uneraser is an excellent professional software tool for recovering files (including hidden files) after deletion. You do not need to worry that your data is too voluminous or heterogeneous. In this regard, there are no restrictions!
This software supports the following file systems: UFS, exFAT, HFS, HFS+, FAT 12/16/32, NTFS, NTFS 5, XFS, Ext2/3/4, ReFS, Reiser4, and ZFS.
The program has a beautiful interface, understandable even to technically non-advanced users and users who are performing recovery of hidden files in a USB drive for the first time.
You can also use the free trial version of DiskInternals Uneraser and you will find that the recommended software is very easy to use, and also quickly and correctly recovers hidden and deleted files. The preview of recoverable files is also free. As you can see, you only need to acquire a license for this product after you are fully convinced that your data will be 100% restored.
Guide: how to recover hidden files
Follow the step-by-step instructions and very soon all your files will be restored.
Step 1. Connect the USB drive to the computer via a card reader.
Step 2. Install and run the DiskInternals Uneraser software.
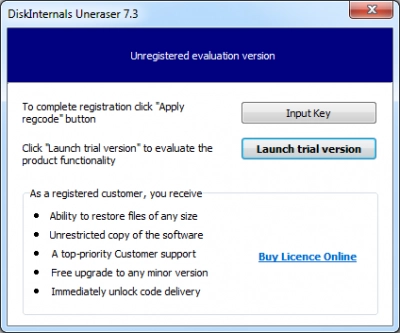
The USB drive will be detected automatically among the other disks. The recovery wizard will ask you to select the disk; select your USB drive.
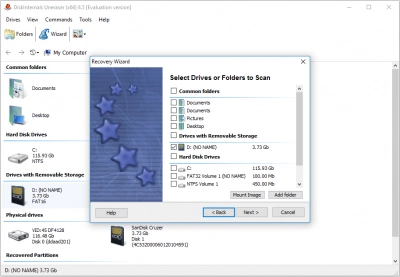
Step 3. The recovery wizard will also ask you to select the type of files you want to restore. You can skip that step.
Step 4. Scan. This may take some time, so, please be patient.
Step 5. Preview the lost data. View deleted files by right-clicking on them and selecting “Preview in a new window”.
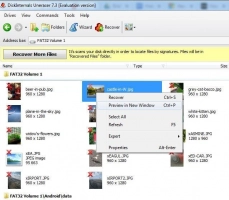
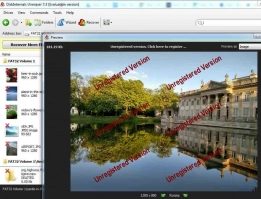
Step 6. Recovery. Click the Recovery button and the software will automatically ask you where to save the recovered files.
Step 7. Save the files. To save the files, you need to purchase a license for the DiskInternals Uneraser software. You will receive a license key and enter it. Then you will be able to save the files.
Save the recovered documents in a different place, not to the USB drive where you have just recovered files.
Learn how to fix a flash drive that is corrupted here!
Good luck!
