How to Repair DNG Files?
Digital photography has undeniably revolutionized the way we capture and store memories. Among the various file formats used to store these digital photos, the Digital Negative (DNG) stands out. Developed by Adobe, DNG is a raw image format that is publicly available and offers numerous benefits including archival advantages and universal compatibility.
However, like all digital files, DNG files are not immune to corruption or damage. Whether it's a result of a faulty memory card, software glitches, or any inadvertent human errors, a damaged DNG file can become a photographer's nightmare.
But fear not! This article aims to shed light on the techniques and tools you can employ to repair corrupted or damaged DNG files, ensuring that you can retrieve your precious memories and continue your photographic journey with minimal hiccups. Let's dive in and explore the steps to restore your images to their original glory.
What Are DNG Files?
No file format is formidable to data corruption. To an extent, data corruption is paramount and the best way to be on the safe side is to make regular backups and have a data recovery solution handy. DNG is Adobe’s proprietary format for storing RAW image data; it is widely compatible with various digital camera models from different manufacturers.
DNG files can be opened using Windows’ default image viewer – Microsoft Photos; it is also compatible with many image-viewing applications out there, including Adobe’s programs: Lightroom and Photoshop. However, when a DNG file is corrupted, it cannot be accessed until it is repaired. This article explains how you can repair damaged and corrupted DNG files.
Guide to Repair Corrupted DNG Files
Interestingly, there are a number of easy ways to fix corrupt DNG image files. You can try them out one after another and see which works for you.
Method 1: Execute a System File Check Command
System File Check (SFC) is a Windows OS utility that runs through the command line; it is an admin-level command, so you need to have admin access on any PC you attempt to run this utility.
What the System File Check utility does is quite simple – it launches a deep scan into the selected storage drive and attempts to fix the drive’s file system, while also repairing corrupt files on the disk. Here’s how to run the SFC utility on Windows OS.
- Step One: You must be logged in to the admin account on the computer, then launch PowerShell (Admin) or Command Prompt (Admin). You’ll see these options when you right-click on the Windows/Start icon on your taskbar.
- In the PowerShell or Command Prompt window, enter the following command: sfc/scannow
- This scan might take a longer time, wait until it completes, then close the command prompt window and go back to try accessing the file.
Method 2: Update Driver Software
Another possible reason why you can’t access your DNG image files may be due to outdated software drivers. When your PC drivers are too outdated, they cause most programs not to function properly. So, it is important to always keep your system’s drivers updated regularly.
- Press CTRL + R to launch the Run dialogue, then enter the command: devmgmt.msc
- This command will launch the Device Management box, where you can view and access all drivers installed on your PC.
- Right-click on drivers related to the programs or hardware you’re using to access the DNG files, then select “Update Driver.”
- Choose the “Update Automatically…” option and ensure you’re connected to the internet.
- Wait for the driver to be updated, then close the device manager box.
Method 3: Restore the System to the Previous Version
There’s a hidden recovery feature built into Windows OS that allows PC users to roll back their systems to a previous “Restore Point” in terms of critical disasters or data conflicts. However, in most cases, you need to first enable your system to save restore points, but even if you don’t, Windows automatically creates one for you. Here’s how to roll back your PC to a previous version.
- Press CTRL + R to launch the Run dialogue, then enter the command: Control
- Click on the dropdown button beside “View By” and select “Small Icons” to display all the features of the Control Panel.
- Select “Recovery” and click on “Open System Restore”
- Follow the prompts and select the “Restore Point” to roll back your PC.
- During the restoration, all third-party programs installed recently on the PC will be uninstalled and your custom configurations will be undone, however, no saved document or file will be deleted.
Method 4: Use DiskInternals Uneraser to Repair Corrupted DNG files
DiskInternals Uneraser is a tried and proven data recovery solution that works for repairing most corrupt data files. It is an intuitive program designed to be used by everyone who owns a computer. Uneraser can run on any Windows OS version and edition – it also requires minimal system specs.
With DiskInternals Uneraser, you can recover deleted DNG files from any storage device, and at the same time, the program can attempt to repair most corrupt files during the recovery procedure. Aside from the DNG format, DiskInternals Uneraser supports over 100 file formats and all known file system formats.
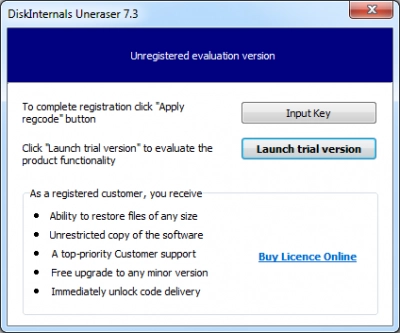
- Step One: Download and install DiskInternals Uneraser on your Windows OS computer and launch it after the installation.
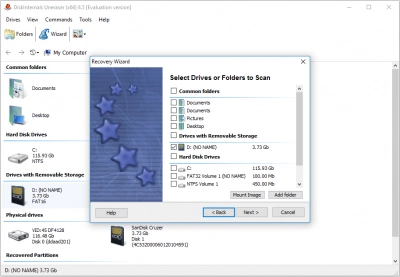
- Step Two: Select the storage device where the corrupt DNG files are saved, then select a scanning mode. It is important to select “Full Scan” mode.
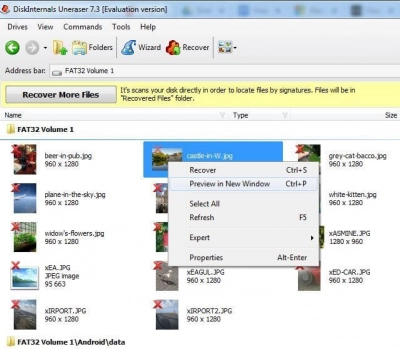
- Step Three: Identify the file format(s) you want to restore (repair) and launch the scan.
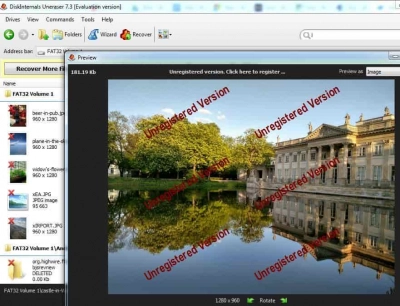
- Step Four: Wait for the scan to run completely and you’ll be able to view your DNG files again – preview them to confirm they are now accessible, before proceeding to save them back.


Common Causes of DNG File Corruption and Possible Solutions
There are a couple of reasons why your DNG files get corrupted most of the time. So, here, we’ll offer suggestions on how to mitigate such issues.
1. “Unsupported file format” Error or Image Doesn't Open At All
Trying to open your DNG file and then it keeps throwing you a “File not supported error?” Well, that could be because the program you’re using to open the file does not support the DNG format, so you should consider using another RAW image viewer application.
On the other hand, if the image doesn’t open at all, it can also be linked to using a program that doesn’t support the file format, or just maybe, the file is already corrupted and can’t be opened until it is repaired.
Possible Solution: Try using the Microsoft Photos app to open the DNG file or an Adobe program like Photoshop or Lightroom.
2. DNG Files Printing Errors When Opening in Compatible Adobe Photoshop
Trying to open DNG files and it keeps throwing error messages like “Could not complete Camera RAW command…”? That is one of the common errors to face when using Photoshop CC 2018. But then, there’s a fix for this.
Possible Solution: Download the Camera Raw plug-in installer, unzip it, and add it to your Photoshop software.
Conclusion
This article explains how to repair a corrupt DNG file in detail and what you can do if you keep getting error messages trying to open a DNG file. If you’re running RAID array storage, it is advisable to use RAID 1 since it can be easily rebuilt when one of the hard drives fails. This will help to mitigate fatality when you experience a data loss scenario.
More so, you should always make a backup of your important files, so you can have a failsafe to fall back on in terms of critical data loss scenarios. DiskInternals Uneraser remains a go-to solution for recovering and repairing DNG files for Windows PC users.
