How to See What is Taking Up Space on My Hard Drive Windows 7
Here you will find out:
- how to get more space on Windows 7
- how DiskInternals can help you
Are you ready? Let's read!
Something taking up too much space on Windows 7
There are situations when a hard drive with lots of space becomes slow, loads programs and files poorly, and sometimes stops responding at all for no reason.
Most likely, something is silently stealing your free space, as a result of which the disk is working poorly. To see what is taking up space on your hard drive in Windows 7, read this article and follow its instructions.
Step 1. Disable Hibernate mode
This mode is not bad in itself, but it eats up a lot of free space, meaning your computer gradually starts to work badly. You can solve this problem simply by deactivating Hibernate mode.
First, right-click on Start and select “Command Prompt” (as administrator). In the new window, type “powercfg -h off” and press Enter. This simple command is needed to disable the option. Restart the computer and see if the PC still freezes, or if it is working properly.
Step 2. Check what is taking up space on HDD
Some files may be hidden, leading you to think erroneously that there is a lot of free space. Therefore, display all the hidden files; maybe some of them are huge.
To find out what is taking up so much space on your hard drive in Windows 7, take into account all the files on the disk. Click Start, and then select Settings. Next, in the System section, select Storage. In the new window, find the hard drive and select it.
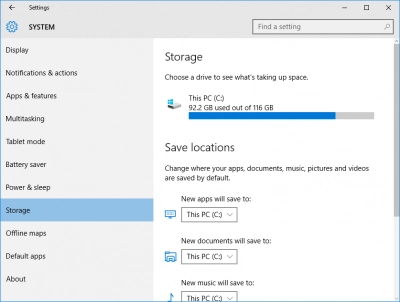
You will see everything that is on this disk; pay attention in particular to what unnecessary applications and files take up the most space.
Step 3. Delete useless apps
Now remove these forgotten and unused applications. This will clean the computer of unnecessary debris and give the hard drive a new lease on life.
Click Start with the right mouse button and select Control Panel. Now click on the Programs and Features section. You will see the whole list of programs installed on the computer. Delete the applications selected in the second step with the right mouse button.
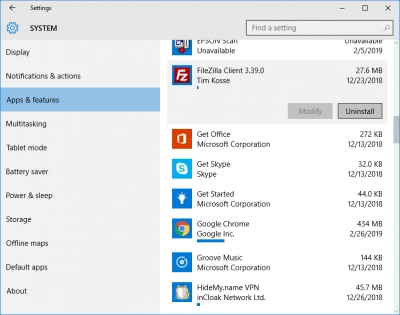
To confirm the actions taken, restart the computer; now it should work more efficiently and cause you less strain.
Step 4. Clear out the drive with Disk Cleanup
Now take care of the accumulated garbage on your drive.
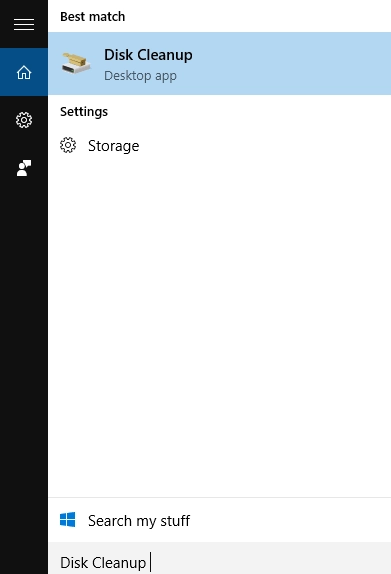
Removing it is simple; use the pre-installed utility to clean the disk. Click Start and, in the search bar, type “Disk Cleanup” and click OK. The utility will load; carefully examine the proposed options for cleaning and select the one that is right for you.
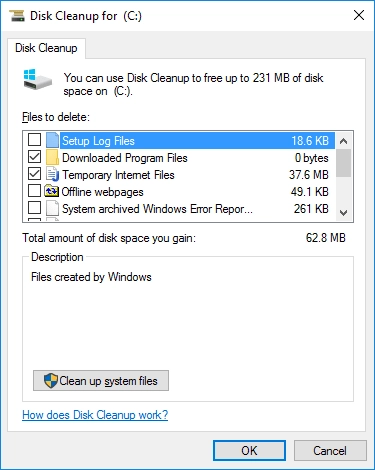
Now click OK and wait as long as necessary. Usually, disposing of garbage files significantly affects the performance of the computer.
Step 5. Clear TEMP files
The previous tool does its job perfectly, except for the TEMP folder.
Therefore, to be sure, simply delete it. This can be done through the command line. The desired command is as follows: “cd /d %TEMP%”, then the “cd ..” command, and finally the “rd /s temp” command. After each of them, press Enter.
As an alternative, you can enter TEMP in the Search box and empty the TEMP folder.
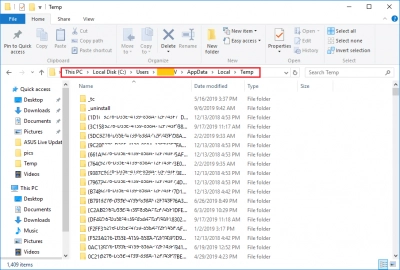
However, think before you do this: if you are not sure or if the computer is already working well after the previous steps, it is best to skip this step.
Step 6. Clear browser cache
What else may be taking up all the space on your hard drive in Windows 7?
Your browser (no matter which one) may be bloated with data; clean it or, if the temporary files are needed, move them to another (removable) drive.
If you accidentally lost files
This can happen both while searching for unnecessary files, or during their removal, and of course by accident. Even if you formatted the disk or it was damaged, you can return inaccessible files of any type and size thanks to DiskInternals Uneraser.
The program is so easy to use that someone with minimal computer knowledge can use it. You just need to press the buttons that the Recovery Wizard prompts you to, as well as have a little patience to wait for stunning results. You may be surprised, but before restoring, you can preview each found file for free. You won’t be forced to pay; a license is required only for exporting viewed files. The quality and accuracy of the recovered files are identical to the originals.
DiskInternals Uneraser guarantees a good result and technical support if necessary for each client.
