All about Hyper-V Nested Virtualization
Here you will find out:
- main Uses of Hyper-V Nested Virtualization
- how to Set Up Nested Virtualization to Operate a Nested VM
- how DiskInternals software can help you
Are you ready? Let's read!
Windows Server 2016 is the most recent version of the popular Windows Server operating system family. The 2016 edition adds a number of helpful new capabilities, including several that are tailored to the Hyper-V virtualization technology.
As a result of these enhancements, the application area for the newest version of Hyper-V has been increased. Nested virtualization is a new feature in Hyper-V 2016, which was launched with Windows Server 2016 and Windows 10; it may thus be used on both desktops and servers.
This blog article discusses what layered virtualization is, as well as its applications, needs, and restrictions.
What Is Nested Virtualization?

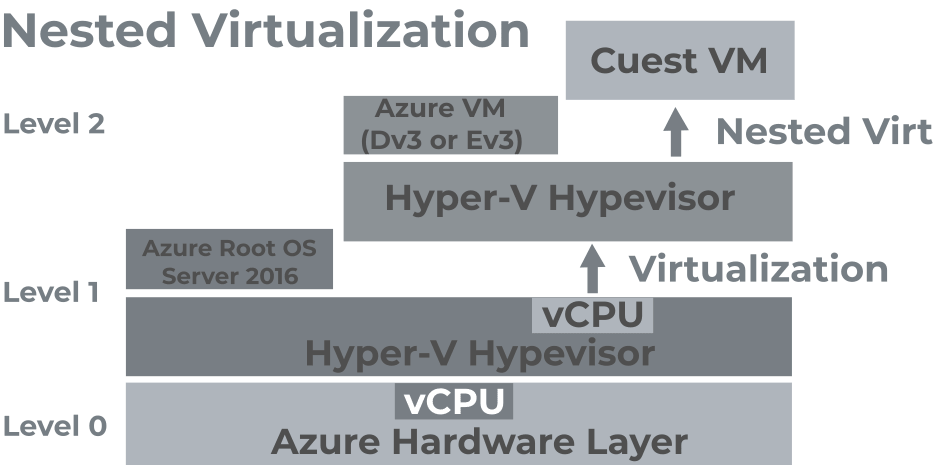
Nested virtualization is a Hyper-V feature that allows you to create Hyper-V virtual machines within another Hyper-V virtual machine (VM) on the same Hyper-V host. Nested VMs are virtual machines that run inside virtual machines.
The following are some examples of layered virtualization use cases
- Isolated situations. You can establish layered virtual machines that are connected by a virtual network that is insulated from the rest of the world. As a result, you may establish a completely isolated environment that has no effect on your existing virtual machines or network.
- Training/testing/development. Training is beneficial for new users or administrators who are unfamiliar with the product (or to familiarize existing users or administrators with new software). Training in a production setting, on the other hand, might lead to instability or even failure. You may imitate the production environment on nested virtual machines without affecting the real production environment with nested virtualization. QA professionals and developers may require this sort of environment for testing or development purposes, in addition to administrator training. The advantage is that you may employ nested virtual machines in current virtual environments to accomplish these goals without having to purchase extra specialized hardware.
- Constructing a private cloud Deploying a true private cloud with a user self-service portal may be costly and time-consuming. You may create a pseudo–private cloud with equal capabilities using stacked virtualization. You could, for example, construct a virtual machine with Hyper-V Server loaded and 256 GB of RAM. Users can use Hyper-V to construct and customize nested VMs within a VM to meet their specific needs, but they cannot utilize more than 256 GB of RAM. With the hot-add capability, you may add RAM and virtual network adapters to VMs on which Hyper-V is installed. In this situation, there is no downtime.
Requirements and Limitations
The following requirements must be met to implement nested virtualization in Hyper-V:
- The host operating system must be Windows Server 2016 or Windows 10 (Anniversary update or later). Older Windows versions don’t support nested virtualization.
- The Hyper-V VM must be of version 8 or higher.
- The physical server must have a compatible CPU that supports the appropriate virtualization features. Only Intel processors with VT-x and EPT technology support nested virtualization. AMD processors do not currently support nested virtualization.
- There must be enough physical memory to run the VMs.
- The VM cannot use Dynamic Memory.
SSD disks are suggested over HDD disks, even though they are not essential, because disk speed has a substantial impact on VM performance.
There are various restrictions that apply to VMs that host nested VMs (also known as "innermost guests"):
- Checkpoints cannot be applied to a running VM.
- Live migration fails for the VM.
- Runtime memory resize does not function.
Note that the features associated with the three limitations listed above can be used for the innermost guests.
Tip: learn how to clone VM in Hyper-V!How to Enable Hyper-V Nested Virtualization and Create a Nested VM
Configuring a Hyper-V Host
The first step is to set up a Hyper-V host. Prepare a physical server with a suitable CPU, sufficient memory, and sufficient storage. In the BIOS, make sure that CPU virtualization technologies like Intel VT-x are enabled. Install Hyper-V Server 2016, Windows Server 2016, or Windows 10 if you don't already have it. If you're running a full-featured Windows operating system, add a Hyper-V server role (there is a walkthrough for adding a Hyper-V role with PowerShell in an earlier blog post). GUI and Server Manager are other options.
Deploying a Guest VM
Make a guest virtual machine. The process of creating a guest VM is easy and is described here. On the guest VM, install an operating system that supports nested virtualization for Hyper-V. (Windows 10 Anniversary Update or later, Windows Server 2016, or Hyper-V Server 2016). For the purposes of this tour, Windows Server 2016 is utilized.
Configuring a Guest VM
By default, support of hardware virtualization is disabled for a guest VM. The operating system displays an error if you try to add a Hyper-V role.
Only PowerShell can enable hardware virtualization for a guest hypervisor. To use the following instructions, the guest VM must be turned off.
You can use the first command to see if hardware virtualization is enabled for the guest VM. On the host OS, run the command below (which is installed on a physical machine).
Get-VMProcessor -VMName vm_name | fl *
Replace vm name with the name of your virtual machine. In this case, the VM's name is Server2016. The computer name is WIN2018, and it refers to a physical system on which Windows and the Hyper-V role are installed.
The second command enables hardware virtualization inside a guest VM. Stop the VM before applying the following command:
Set-VMProcessor -VMName vm_name -ExposeVirtualizationExtensions $true
There is no message displayed after entering the command if everything is okay. If the VM is running, the following error message is displayed:
VM network connection
You must now setup the network settings for your virtual machine. MAC spoofing and NAT are the two methods for connecting nested VMs to the network. If you set up a network for nested VMs by giving them access to a real Local Area Network (LAN), one network adapter on the host system would have numerous MAC addresses, which might cause network problems. As a result, the MAC address spoofing feature must be enabled (this option is disabled by default). In the case of a private pseudo-cloud, however, MAC address spoofing cannot be employed for VM networking. In these cases, you should configure NAT.
Configuring MAC address spoofing
MAC address spoofing must be enabled on the network adapter of the virtual Hyper-V host.
On the physical machine with Hyper-V Server, enter the following command in order to enable MAC address spoofing:
Get-VMNetworkAdapter -VMname vm_name | Set-VMNetworkAdapter -MacAddressSpoofing On
Where vm_name appears, substitute your VM name (in our case, Server2016, as mentioned above).
If you prefer a GUI, go to VM Settings > Network adapter > Advanced features and tick the Enable MAC address spoofing checkbox, then click OK (see the screenshot below).
Configuring NAT
NAT can be enabled only by using PowerShell. If you want to use NAT for VM network connection, follow the instructions below.
First, create a new virtual switch.
Note: While the previous commands were executed on the host OS, the following commands must be executed on the guest OS.
New-VMSwitch -Name "SwitchName" -SwitchType Internal
Where SwitchName appears, substitute your own switch name. For the purposes of this walktrough, NAT-Switch is used.
Define the subnet behind NAT and enable NAT. The network address must not coincide with IP addresses in your existing network. In this example the network name is NAT-net and the network address is 192.168.2.0/24.
New-NetNat -Name "network_name" –InternalIPInterfaceAddressPrefix 'ip-address/netmask'
After that, you should assign the IP address for the interface on which NAT is enabled.
Generate a list of the available adapters to check their names with the following command:
Get-NetAdapter | ft -Autosize
In this example, the name of the virtual network adapter that is connected to the virtual switch created earlier is vEthernet (NAT-Switch).
You should now define the IP address for this virtual network adapter, which must belong to a created network. Nested VMs will use the IP address of this network interface as a gateway. In our example, this IP address is 192.168.2.1. It belongs to the network 192.168.2.0/24.
Get-NetAdapter "adapter_name" | New-NetIPAddress -IPAddress ip_address -AddressFamily IPv4 -PrefixLength mask_number
Configuring a Nested VM
A nested VM may now be created and configured (a VM that runs inside a VM). The nested VM in this tour is a VM running Windows Server 2016.
In Hyper-V Manager, choose the virtual switch (which you recently constructed) in the VM's network settings.
Configure the TCP/IP settings in the nested VM's Network Adapter Properties. If the virtual network does not have any DHCP servers, manually assign the IP address, subnet mask, default gateway, and DNS server.
Note: Check your firewall settings, since firewalls might prevent network connections from being established.
Your nested VM now has a network configured and is ready to use.
Protect your data with VMFS Recovery
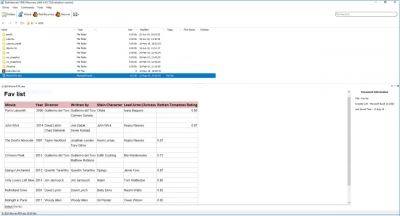
DiskInternals VMFS Recovery is a professional dedicated tool for VMware® data recovery, VMFS file system recovery, or VMDK file read and recovery. If you have deleted disk images created on the VMware ESX / ESXi server, you can also restore them with this application. Any virtual disks can be mounted on a local device for easy viewing of files. You will be guided by a smart and intuitive Recovery Wizard, so you don't need any technical skills in this area.
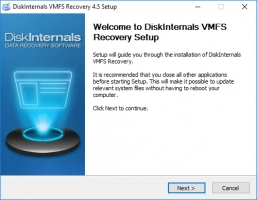
Be sure to carefully read this guide before downloading and installing DiskInternals VMFS Recovery:
1. If necessary, connect via SSH and open a drive (local drive or SSH).
2. Click on the "Scan" button, then find the files you need and mount the VMDK file.
3. Open this VMDK file in order to view the files (for free).

4. Then purchase a license on the company's website and complete the entire process by exporting data using the obtained license key.
Export is available to the storage device of your choice. Technical support by the company's specialists will be available to you throughout the year from the date of purchase of the license.
Conclusion
Nested virtualization is a new Hyper-V feature that lets you deploy virtual machines inside virtual machines. As a consequence, you may create labs on a single machine that comprise virtualized infrastructures. Training, testing, and development may all benefit from nested virtualization. The capability is especially handy in situations when running conventional virtual machines on actual servers is not an option - typically due to security or cost concerns.


