Mounting ESX/ESXi Server Disks or VMDK files
With Diskinternals VMFS Recovery, you can mount any VMDK file that belongs to any given virtual machine on a server. In order to use the available file access and data recovery tools, you will need to connect to the ESX/ESXi server and mount its disks, partitions and VMDK files. You will be able to repair and open VMDK files and no need in VMDK viewer tool.
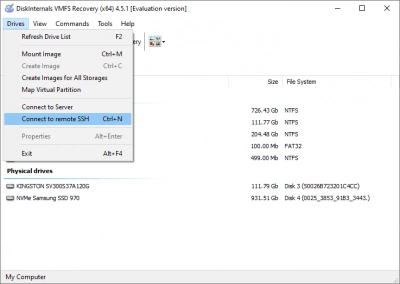
Make sure that SSH connectivity is enabled on your ESX/ESXi server. Configure connection settings by entering the IP address of your server, login and password information, and click “Connect”.
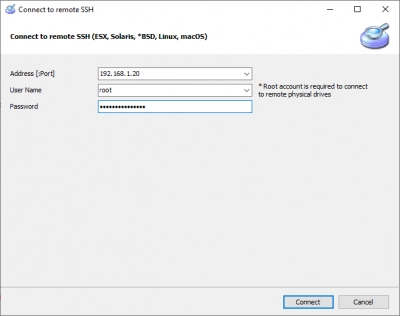
How to open VMDK file? There are three different ways to access files after connecting to an ESX (ESXi) server.
Method 1: mounting a *.vmdk disk from a certain Datastore.
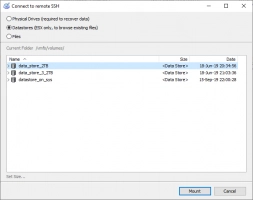
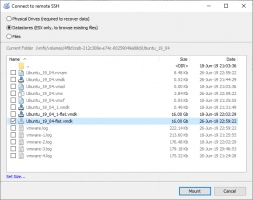
Select a folder with the virtual machine being recovered. There, select *.vmdk (or other type) files to mount.
Note: the ESX server does not normally permit low-level disk access to a running virtual machine. With VMFS Recovery, you can still mount the working disk by following the steps described in the how-to guide: Mounting Hard Drives (VMDK files) of a Running Virtual Machine
Method 2: mounting a physical hard drive hosting the ESX (ESXi) server
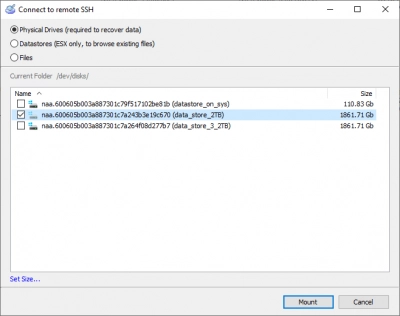
In this mode, the actual physical hard drive will be mounted, allowing you to access all partitions and unpartitioned areas of the drive. By mounting the physical drive, you’re essentially replicating physical access to the actual hard disk as if it’s been removed from the server and connected directly to your PC.
Method 3: mounting any file from an ESX (ESXi) server
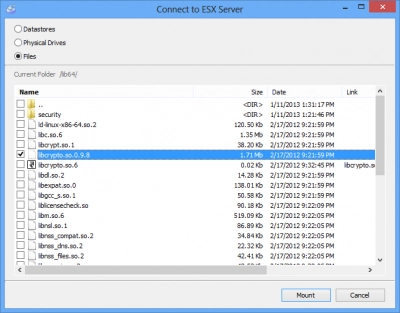
With this method, you can mount any file from an ESX (ESXi) server. This method includes both methods #1 and #2. You can look up Datastore at /vmfs/volumes/. The hard drives are located at /dev/disks/
After selecting the files or drive images to mount, click Mount to add newly mounted disks into the main window.
Diskinternals VMFS Recovery is a tool which makes easy for a user to mount VMDK file on Windows.
Method 4. Mount VMDK disk with 7-Zip
"Unpacking" or mounting VMDK disk is possible with the help of the well-known 7-Zip archiver. This method is quite fast compared to the others and, at the same time, is fairly simple. You just need to right-click on the VMDK file and select “Open Archive”.
You can also try the following method, if this does not suit you.
Method 5. Use Windows Explorer to mount VMDK disk
You can try to mount VMDK on Windows using built-in tools; Windows Explorer should help you with this.
Here's how to do it: right-click Start and select “Explore”. Now you need to open the folder with the VMDK file using the right mouse button. From the list, select "Virtual Disk Map". Next you need to select the drive letter where you intend to mount the VMDK disk. Then click on “OK”.
Method 6. Use VMware Workstation for VMDK disk mounting
VMware Workstation is a desktop program to mount VMDK on Windows. Just open it, and on the taskbar, select the File tab. Then from the list, select "Map Virtual Disks ...". Next, you need to select the drive letter where you want to mount the VMDK file and click OK. Again, this is a simple and efficient method for mounting VMDK on Windows.
Method 7. Try vSphere Disk Development Kit for VMDK disk mounting
You can use vSphere Disk Development Kit to mount VMDK on Windows. This program must be downloaded and installed before use.
Depending on what you want to do, you need to enter certain commands; for example:
- to mount a read-only disk — vmware-mount.exe X: “C:\Temp\TestVM.vmdk”
- to mount several volumes — vmware -mount.exe /v:2 X: "C:\Temp\TestVM.vmdk"
- to mount the disks for recording - vmware-mount.exe /m:w X: "C:\Temp\TestVM.vmdk"
- to list all the mounted VMDK disks: vmware-mount.exe /L
A – A physical hard drive of an ESX (ESXi) server connected via method #2. A new partition labeled “data_store_2TB” with VMFS file system appears immediately after mounting the drive. B – A *.vmdk disk from a virtual machine mounted via method #1. Partitions “/” and "Linux Swap Volume 1” are available immediately after mounting. C – This is just a file connected via method #3. All *.vmdk disks and physical drives of ESX servers can be scanned with any tool included with VMFS Recovery: Recovery mode: NTFS, FAT, Ext2/3/4, VMFS Uneraser and Reader modes: NTFS, FAT, Ext2/3/4, VMFS, Reiser4, ReiserFS, HFS, UFS2, exFAT, ReFS In addition, the mounted *.vmdk disks can be assembled into a RAID array (LDM, Linux RAID).
