Repair-VHD PowerShell: A Complete Guide to Repairing Corrupt VHD Files
In today's digital landscape, virtualization plays a pivotal role in optimizing resources and enhancing scalability for both enterprises and individual users.
Introduction to VHD Files and Common Issues
What is VHD file? Virtual Hard Disk (VHD) technology is at the forefront of this virtualization revolution. A VHD is a disk image file format that encapsulates the complete contents and structure of a physical hard disk. This includes disk partitions and file systems, allowing it to mimic a traditional hard drive's functionality within a virtual environment. VHDs are commonly used with virtualization platforms like Microsoft Hyper-V and Virtual PC, enabling users to run multiple operating systems on a single physical machine seamlessly.
However, despite their versatility and convenience, VHD files are susceptible to corruption and data loss, much like physical hard drives. Several factors can contribute to VHD corruption:
- Improper Shutdowns: Abruptly shutting down the host or guest operating system can lead to incomplete write operations, causing data inconsistency.
- Hardware Failures: Faulty storage devices, power surges, or bad sectors on the physical hard drive can corrupt the VHD stored on it.
- Software Glitches: Bugs within the virtualization software or conflicts with other applications can damage VHD files.
- Malware Attacks: Viruses and malicious software can infect and corrupt VHD files, rendering them inaccessible.
- Human Error: Accidental deletion, incorrect configuration, or improper detachment of VHD files can also lead to issues.
When a VHD file becomes corrupted, it can result in the virtual machine failing to start, applications crashing, or complete data inaccessibility. This poses significant challenges, especially when critical applications and data are involved.
This is where Windows PowerShell comes into play as a powerful ally in VHD repair. PowerShell is a task automation and configuration management framework from Microsoft, consisting of a command-line shell and associated scripting language. It provides a suite of cmdlets specifically designed for managing virtual environments, including the ability to restore VHD files. The Repair-VHD cmdlet is particularly useful as it can scan and fix errors within a VHD file, helping to restore functionality without the need for third-party tools.
In this comprehensive guide, we will walk you through the three essential steps to fix a corrupted VHD using PowerShell. Whether you're an IT professional managing a complex virtual infrastructure or a user running virtual machines for testing and development, these steps will equip you with the knowledge to address VHD corruption effectively. By leveraging PowerShell's capabilities, you can minimize downtime, prevent data loss, and ensure the smooth operation of your virtualized
Why Use PowerShell to Repair VHD Files?
When it comes to fixing corrupted Virtual Hard Disk (VHD) files, Windows PowerShell stands out as a robust and versatile tool for both IT professionals and casual users. The reason for its popularity in VHD repair lies in its automation capabilities, ease of use, and the range of features it offers specifically designed to handle virtual environments. Here are some of the key advantages of using PowerShell for VHD repair:
Advantages of Using PowerShell for VHD Repair
- Built-in Solution: PowerShell comes pre-installed on most modern versions of Windows, eliminating the need to download and install third-party recovery tools. This makes it a quick, accessible solution for handling VHD corruption.
- Command-Line Efficiency: With PowerShell, VHD repair can be executed directly from the command line, allowing for precise control over the repair process. This is especially useful in server environments where a graphical interface may not be available or practical.
- Automated and Scriptable: PowerShell's scripting capabilities enable users to automate the VHD repair process. You can create scripts to monitor VHD files, detect corruption, and automatically repair them, saving time and reducing the risk of human error.
- Granular Control: PowerShell allows for highly specific operations on VHD files, from basic repairs to more advanced tasks like mounting, detaching, or converting VHD files. This flexibility means users can tailor the repair process to meet their exact needs.
- Integration with Virtualization Platforms: PowerShell integrates seamlessly with Microsoft’s Hyper-V, one of the most widely used virtualization platforms. This integration ensures that you can manage your virtual environment and handle VHD repairs within the same toolset, streamlining the process.
Key PowerShell Features That Make It an Effective Solution
- Repair-VHD Cmdlet: At the heart of PowerShell's VHD repair capabilities is the
Repair-VHDcmdlet. This feature is designed specifically for scanning VHD files and fixing common issues like corrupted file systems and bad sectors. The cmdlet can perform quick scans or in-depth repairs depending on the level of damage to the file. - Error Handling and Logging: PowerShell provides extensive error handling and logging capabilities. When repairing a VHD file, you can capture error messages and event logs, allowing for detailed troubleshooting and analysis. This makes PowerShell a transparent and accountable solution when dealing with critical virtual environments.
- Cross-Platform Versatility: Although PowerShell is primarily associated with Windows, it is also compatible with other platforms like Linux and macOS. This means users managing cross-platform virtual environments can rely on PowerShell as a consistent tool for VHD repair, regardless of the operating system.
- Remote Management: PowerShell allows for remote management of virtual environments, meaning you can repair VHD files on remote servers without needing physical access. This is particularly valuable in large-scale IT infrastructures, where multiple servers may need to be managed from a central location.
- Performance Optimization: PowerShell's ability to run lightweight commands and scripts without consuming significant system resources makes it an efficient solution for VHD repair, even on systems with limited computational power. It can handle multiple tasks simultaneously, ensuring minimal impact on system performance during repairs.
Prerequisites for VHD File Repair Using PowerShell
Before diving into the step-by-step process of repairing a Virtual Hard Disk (VHD) file using PowerShell, it's important to ensure that your system meets the necessary requirements and that you're prepared for the repair process. This section outlines the software and system requirements, the necessary PowerShell modules and commands, and the critical step of backing up your data before proceeding.
Software and System Requirements
- 1. Windows Operating System: To repair VHD files using PowerShell, your system should be running a version of Windows that includes PowerShell (Windows 10, 11, or Windows Server versions). The VHD repair functionality is also closely tied to Hyper-V, so if you're using VHD files in a Hyper-V environment, ensure that Hyper-V is properly configured.
- 2. Windows PowerShell Version: While PowerShell comes pre-installed on most Windows systems, it’s essential to use the correct version. PowerShell 5.0 or higher is recommended to ensure full functionality and compatibility with the necessary cmdlets, including
Repair-VHD. If you’re unsure of your PowerShell version, you can check it by running the following command:
$PSVersionTable.PSVersion
- 3. Administrative Privileges: Repairing VHD files may involve modifying system-level resources. As such, you will need to run PowerShell with administrator privileges. To do this, search for PowerShell in the Start menu, right-click it, and select "Run as Administrator."
- 4. Sufficient Storage Space: Ensure that your system has sufficient storage space for the VHD repair process. This is particularly important if you’re dealing with large VHD files or if temporary storage is needed during the repair.
Necessary PowerShell Modules and Commands
To repair a VHD file, certain PowerShell cmdlets and modules are essential. Here's what you'll need:
- 1. Hyper-V Module for PowerShell: The
Repair-VHDcmdlet is part of the Hyper-V PowerShell module. If Hyper-V is installed on your system, the module is typically included. However, you can manually install the Hyper-V module if necessary using the following command:
Enable-WindowsOptionalFeature -Online -FeatureName Microsoft-Hyper-V-Management-PowerShell
- 2. Repair-VHD Cmdlet: This cmdlet is the core tool for scanning and repairing VHD files. You can run it with either the
-Scanparameter to check for errors or the-Repairparameter to attempt fixing them. The basic syntax for scanning and repairing a VHD is:
Repair-VHD -Path "C:\Path\To\Your\VHD.vhd" -Scan Repair-VHD -Path "C:\Path\To\Your\VHD.vhd" -Repair
- 3. Mount-VHD and Dismount-VHD: In some cases, you may need to manually mount or dismount the VHD file before or after the repair process. These cmdlets allow you to manage VHDs as if they were physical disks:
Mount-VHD -Path "C:\Path\To\Your\VHD.vhd" Dismount-VHD -Path "C:\Path\To\Your\VHD.vhd"
- 4. Get-Help for Additional Guidance: PowerShell’s
Get-Helpcommand provides documentation for each cmdlet, which can be useful if you need further clarification on syntax or usage:
Get-Help Repair-VHD -Detailed
Backing Up Data Before Starting the Repair
Before proceeding with any repair operation, it's critical to back up your VHD file and any associated data. This precaution ensures that, in the event of a failed repair or further corruption, you have a recoverable version of your data. Here are some key steps for ensuring data protection:
- 1. Create a Copy of the VHD File: Before running the repair cmdlet, make a duplicate of the VHD file on a separate storage device. You can use traditional copy-paste methods or PowerShell’s
Copy-Itemcmdlet:
Copy-Item "C:\Path\To\Your\VHD.vhd" -Destination "D:\Backup\YourVHD_Backup.vhd"
- 2. Export Virtual Machines: If your VHD is associated with a Hyper-V virtual machine, consider exporting the VM. This process creates a full backup of the virtual machine, including its VHDs, configuration, and snapshots. You can do this via Hyper-V Manager or by using PowerShell:
Export-VM -Name "YourVMName" -Path "D:\Backup\VM_Backups"
- 3. Verify Backup Integrity: After creating the backup, verify that the backup file or export is functional. You can test the VHD copy by mounting it in Windows or attaching it to another virtual machine to confirm its integrity.
Step-by-Step Guide: Repairing a VHD File Using PowerShell
In this section, we'll walk through the process of repairing a corrupted VHD file using PowerShell. Follow these steps to resolve common issues with VHD files, restoring access and functionality to your virtualized environments.
Step 1: Mount the Corrupt VHD
Before you can inspect or repair the VHD, it needs to be mounted so that it can be accessed by the system. Here’s how to mount the corrupted VHD using PowerShell.
- 1. Command to Attach the VHD Using Mount-VHD
Use theMount-VHDcmdlet to attach the VHD file. This will make the VHD available as a virtual disk, and you can work with it as if it were a physical drive.
Mount-VHD -Path "C:\Path\To\Your\VHD.vhd"
Replace "C:\Path\To\Your\VHD.vhd" with the actual path of your VHD file.
- 2. Verifying the VHD Mount Status with Get-VHD
After mounting the VHD, verify its status using theGet-VHDcmdlet. This command provides details about the VHD, such as its operational status and size.
Get-VHD -Path "C:\Path\To\Your\VHD.vhd"
If the VHD is successfully mounted, the output will show details like the VHD’s size, format, and whether it is attached. If it's not mounted, troubleshoot the mounting process before proceeding.
Step 2: Inspect the VHD for Errors
Once the VHD is mounted, the next step is to inspect it for errors. You’ll need to check the volume and disk status and use diagnostic tools to identify any file system or disk errors.
- 1. Running Get-Volume and Get-Disk to Identify the Issue
TheGet-VolumeandGet-Diskcmdlets provide a detailed overview of the mounted VHD’s volumes and disks. These commands can help identify whether the volume is in a healthy state or has file system errors.
Get-Volume Get-Disk
Look for any warnings or errors in the output, such as volumes being flagged as "RAW" (which indicates file system corruption) or disks that show issues.
- 2. Use of CheckDisk (chkdsk) to Detect Errors
Next, run theCheckDisktool to scan for and detect errors on the VHD. AlthoughCheckDiskisn’t a PowerShell cmdlet, it’s a valuable tool for diagnosing problems at the file system level.
Open Command Prompt as an administrator and run:
chkdsk X: /f
Replace X: with the drive letter assigned to the mounted VHD. The /f flag instructs chkdsk to fix errors on the disk.
Step 3: Repair the VHD
Once you’ve identified the issue, it’s time to repair the VHD using PowerShell.
- 1. Commands to Perform Repairs: Using Repair-Volume
TheRepair-Volumecmdlet is a powerful tool for fixing file system errors on the VHD. Run the following command to repair the volume:
Repair-Volume -DriveLetter X
Replace X with the drive letter of the mounted VHD. PowerShell will attempt to repair any errors found on the volume.
- 2. When to Use /f and /r Options in Repair Commands
In cases where theRepair-Volumecmdlet doesn’t fully resolve the issue, or if more extensive repairs are needed, you can usechkdskwith additional flags. The/foption fixes errors, and the/roption locates bad sectors and recovers readable information.
To use these options, run the following command from Command Prompt:
chkdsk X: /f /r
The /r flag performs a more thorough check, but it may take longer, especially for larger VHDs. This step can help recover data from damaged sectors of the virtual disk.
Automating the Repair Process with PowerShell Scripts
While manually repairing VHD files with PowerShell is effective, automating the process can save significant time, especially when managing multiple VHDs or running large-scale virtual environments. Automation not only reduces the risk of human error but also ensures consistent maintenance of virtual disks. This section will guide you through writing a PowerShell script for repetitive VHD repairs and scheduling these repairs using Task Scheduler for long-term maintenance.
Writing a PowerShell Script for Repetitive VHD Repairs
To automate the repair process, you can create a PowerShell script that mounts a VHD, checks for errors, and performs repairs automatically. Here’s an example script that you can modify to suit your specific needs:
This script performs the following steps:
- 1. Mounts the VHD: The script attaches the VHD file to the system.
- 2. Identifies the Drive Letter: It retrieves the drive letter assigned to the mounted VHD.
- 3. Runs CheckDisk: The script automatically runs
chkdskto check and repair the volume for errors. - 4. Performs Optional Repairs: It uses the
Repair-Volumecmdlet if more extensive repairs are necessary. - 5. Dismounts the VHD: Once the repair is complete, the script detaches the VHD.
- 6. Provides Feedback: The script prints a success message upon completion.
Save this script as VHDRepair.ps1 on your system. To run it, open PowerShell as an administrator and execute:
Scheduling Repairs Using Task Scheduler for Long-Term Maintenance
For long-term VHD maintenance, you can schedule the repair script to run automatically at specific intervals using Task Scheduler. This ensures that your VHDs are regularly inspected and repaired without manual intervention.
Here’s how to set up Task Scheduler to automate VHD repairs:
- 1. Open Task Scheduler: In the Windows search bar, type "Task Scheduler" and open the application.
- 2. Create a New Task:
- Click on Create Task in the right panel.
- In the General tab, provide a name for the task (e.g., "Automated VHD Repair").
- Check the option Run with highest privileges to ensure the task runs with administrator rights.
- 3. Set the Trigger:
- In the Triggers tab, click New to set a schedule for the task.
- Choose how often you want the script to run (daily, weekly, or monthly) and set the time.
- 4. Add the Action:
- In the Actions tab, click New.
- Under Action, choose Start a program.
- In the Program/script field, type
powershell.exe. - In the Add arguments field, enter the path to your script with the
-ExecutionPolicy Bypassoption to avoid script execution policy restrictions:
- 5. Set Additional Conditions (Optional):
- In the Conditions tab, you can set the task to run only if the computer is idle or powered on, depending on your preferences.
- 6. Save and Exit: Click OK to save the task.
Now, Task Scheduler will automatically run the PowerShell script at your defined intervals, ensuring that your VHD files are regularly checked and repaired.
Additional Troubleshooting: When PowerShell Repair Fails
In some cases, despite following all the steps to repair a VHD file using PowerShell, the issue may persist due to severe corruption or deeper file system errors. When PowerShell’s built-in tools like Repair-VHD or chkdsk are unable to resolve the problem, you may need to turn to manual methods or specialized third-party software. This section covers how to manually approach VHD repair using Disk Management and introduces a powerful tool called DiskInternals VMFS Recovery that can handle severe VHD corruption.
Manual Methods: Disk Management
Windows Disk Management is a graphical utility that allows you to manage disks and volumes on your system. While it’s not specifically designed to repair VHD files, it can help in some cases by mounting, checking, or formatting the volume. Here's how to use it for VHD troubleshooting:
- 1. Open Disk Management:
PressWin + Xand select Disk Management from the menu. - 2. Attach the VHD:
In Disk Management, click Action > Attach VHD and browse for the corrupted VHD file. Once attached, the VHD should appear as a drive in the list of disks. - 3. Check the VHD Status:
If the VHD shows up as "RAW" or "Unallocated," it indicates severe file system corruption. In some cases, you may be able to initialize or format the disk to regain functionality, but this will lead to data loss unless you first recover the data using a tool like DiskInternals. - 4. Attempt Basic Repairs:
Right-click the volume and select Properties > Tools > Error Checking. While this is a simplified version ofchkdsk, it may be able to correct minor file system errors.
If these manual methods do not work, more advanced solutions like DiskInternals VMFS Recovery are recommended.
Overview of DiskInternals VMFS Recovery for VHD
DiskInternals VMFS Recovery is a professional-grade data recovery tool designed for virtual environments, including VHD files. While it’s primarily known for its ability to recover data from VMware Broadcom VMFS file systems, it can also scan and repair damaged VHD files. DiskInternals excels in situations where native PowerShell cmdlets are insufficient, particularly when dealing with severe corruption or unreadable volumes.
DiskInternals VMFS Recovery offers several advantages:
- Deep Scanning Algorithms: It can perform thorough scans of corrupted files to recover VHDX, even when the file system is heavily damaged.
- File Preview: Before initiating the recovery, you can preview the files found during the scan, ensuring that the right data is being recovered.
- Support for Multiple Formats: In addition to VHD, DiskInternals can handle other virtual disk formats such as VMDK and VHDX, making it a versatile tool for virtualization environments.
How to Use DiskInternals to Scan and Repair VHD Files
Download and install DiskInternals VMFS Recovery on your Windows OS system. This software can run on virtually any Windows OS computer.
Step One

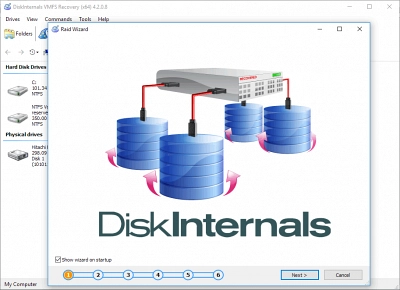
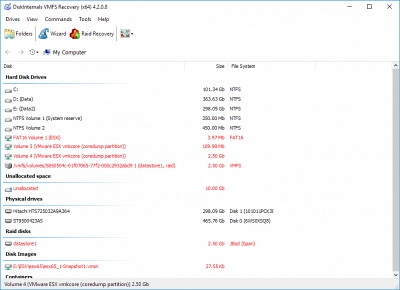
Launch the DiskInternals VMFS Recovery software – the Recovery Wizard will launch automatically, too – select the disk where the VMFS partition is saved and launch a scan on the drive.
Step Two

There are three recovery modes available to use; you may try out the Fast Recovery mode at first if you’re in a hurry. But, if you want to repair VHDX file (every single file that has been lost from the selected drive), choose the Full Recovery mode. While the recovery scan is ongoing, DiskInternals VMFS Recovery will automatically examine and structure/fix bad sectors on the disk.
Step Three

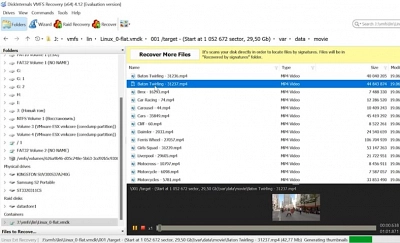
When the scan runs completely, you’d be provided with all the files, partitions, and data that have been lost from the scanned drive. The deleted files are indicated with a red asterisk – search carefully and find the VMDK file(s) you want to recover and preview. Previewing recovered VMDK files is 100 percent free.

If the VMFS partition is inaccessible, use Reader Mode on DiskInternals VMFS Recovery to preview the VMDF files for free. The preview is read-only; if you want to edit or work on the recovered files, you will need to upgrade to the DiskInternals VMFS Recovery Pro version – and you’d also be able to save/export the recovered files to remote storage directories via FTP.
Technical Specifications
Supported VMFS Partitions | VMFS partitions created in VMware vSphere v3.5 - v6.5 and ESX/ESXi servers |
Maximum File Size | 64TB |
Unicode File Names | VMFS5 and VMFS6 |
RAID Arrays | including RAID JBOD, 0, 1, 1E, 0+1, 1+0, RAID 4, RAID 5, 50, 5EE, 5R, RAID 6, 60 |
File Systems | Virtual Disk Images (VMware, VirtualBox, Microsoft VirtualPC, Parallels), RAIDZ, ZFS, Dynamic Disks, APFS (reader), FAT16/32, EXT2/3/4, NTFS, NTFS4/5, EFS, Forensic Disk Images (EnCase, ProDiscover), Storage Spaces, ReFS, XFS, Hikvision, HFS, HFS+, exFAT, and Mac |
Conclusion
In conclusion, PowerShell provides a highly effective, built-in solution for repairing corrupted Virtual Hard Disk (VHD) files. Its powerful cmdlets like Repair-VHD and Repair-Volume offer flexible and efficient methods to tackle common file system errors without the need for third-party tools. By leveraging PowerShell’s capabilities, you can restore functionality to your virtualized environments with minimal downtime, all while maintaining control over the repair process through scripting and automation.
However, for cases of severe corruption where PowerShell may not succeed, more advanced tools like DiskInternals VMFS Recovery can be invaluable to fix VMDK corruption.
Key Takeaways:
- PowerShell offers an accessible, efficient, and scriptable solution for VHD repair.
- Cmdlets like
Mount-VHD,Repair-VHD, andRepair-Volumeallow for granular control and thorough error resolution. - Automation with PowerShell scripts and Task Scheduler ensures long-term maintenance and reduces manual intervention.
- For more severe corruption, third-party tools like DiskInternals VMFS Recovery provide a deeper level of data recovery and repair.
Final Recommendations for Maintaining VHD Health:
- Regular Backups: Always maintain up-to-date backups of your VHD files. Automating regular backup tasks can save you from data loss in the event of corruption.
- Scheduled Maintenance: Set up automated scripts or use Task Scheduler to regularly scan and repair VHD files to catch issues early.
- Safe Shutdown Practices: Ensure proper shutdowns of virtual machines and hosts to prevent VHD corruption caused by abrupt power loss or system crashes.
- Monitor Disk Health: Regularly monitor the physical drives hosting your VHDs, as hardware issues can lead to VHD corruption.
By following these practices and using the right tools when necessary, you can keep your VHDs healthy, ensuring the stability and reliability of your virtual infrastructure.
FAQ
- How do I repair a corrupt VHD file?
To repair a corrupt VHD file, start by using PowerShell to mount the VHD with the
Mount-VHDcmdlet. Once mounted, check for errors usingGet-Volumeandchkdskto diagnose file system issues. If errors are found, use theRepair-VHDorRepair-Volumecmdlets in PowerShell to attempt fixing the corruption. For severe cases, consider using a third-party tool like DiskInternals VMFS Recovery to recover lost data. Always ensure you have a backup of the VHD before performing any repair operations. - How to convert VHD to VHDX using PowerShell?
To convert a VHD to VHDX using PowerShell, first ensure that the VHD is not attached to any virtual machine. Use the
Convert-VHDcmdlet, specifying the source VHD file path and the destination VHDX file path. For example, run:Convert-VHD -Path "C:\Path\To\Your\VHD.vhd" -DestinationPath "C:\Path\To\Your\VHDX.vhdx". TheConvert-VHDcmdlet will handle the conversion process, converting the VHD to the newer, more efficient VHDX format. Once complete, you can attach the newly converted VHDX file to your virtual machines. - How to mount VHD using PowerShell?
To mount a VHD using PowerShell, use the
Mount-VHDcmdlet. Specify the path to the VHD file with the-Pathparameter, like this:Mount-VHD -Path "C:\Path\To\Your\VHD.vhd". Once the command runs, the VHD will be mounted and treated like a physical drive. You can verify the mount status by usingGet-DiskorGet-Volumeto check if the VHD has been successfully attached. After you're done, you can dismount the VHD using theDismount-VHDcmdlet.
