How to Restore VHDX File: Step-by-Step Guide for Restoring to HDD, Disk, and More
VHDX files play a crucial role in storing the data that powers virtual hard drives. As the primary file format used by Microsoft Hyper-V, VHDX offers several advantages over its predecessor, VHD, including larger storage capacity, enhanced data protection from corruption, and improved performance. These features make VHDX files an essential component of virtualized systems, ensuring efficient storage management and reliable data operations. However, when these files become corrupted or inaccessible, it can severely impact the operation of virtual machines. Understanding the importance of VHDX and knowing how to repair-VHD (VHDX) files is key to maintaining seamless virtual machine environments.
Methods to Restore VHDX to a Physical Disk
Restoring a VHDX file to a physical disk is a crucial task when moving virtualized environments back to physical hardware. Below are detailed methods to achieve this using Hyper-V Manager and PowerShell, covering key considerations such as partition alignment, drive capacity, and integrity checks to ensure a smooth process.
1. Recover VHDX File to Physical Disk Using Hyper-V Manager
Hyper-V Manager provides a graphical interface that allows for the export and restoration of virtual hard drives like VHDX. Follow these steps to repair VHDX file to a physical disk:
Steps:
- 1. Prepare the Physical Disk: Ensure that the physical disk has enough capacity to hold the data from the VHDX file. It’s crucial to check for proper partition alignment to avoid performance issues after the restoration.
- 2. Convert VHDX to VHD (Optional):
- If the target system or disk does not support VHDX, convert the VHDX to VHD using Hyper-V Manager or PowerShell.
- In Hyper-V Manager, right-click on the virtual machine using the VHDX file, go to Edit Disk, select the VHDX file, and choose the Convert option.
- 3. Attach the VHDX to a Virtual Machine:
- Attach the VHDX file to an existing or new virtual machine in Hyper-V Manager.
- Start the virtual machine and verify that the VHDX file operates properly.
- 4. Clone the VHDX to the Physical Disk: Use a disk cloning tool to clone the VHDX file's contents to the physical disk. Third-party tools like Disk2vhd or Acronis can be used for this purpose.
- 5. Validate and Complete the Restoration:
- Once the cloning process is complete, safely eject the physical disk and connect it to the physical machine.
- Perform integrity checks to ensure that the data has been transferred correctly and the partitions are properly aligned for optimal performance.
2. Restoring VHDX to Physical Disk Using PowerShell
PowerShell offers a more direct and scriptable method for restoring a VHDX to a physical disk, making it ideal for automation and bulk operations.
Steps:
- 1. Prepare the Physical Disk:
- Connect the physical disk to the system and ensure that it has sufficient space to accommodate the VHDX file.
- Make sure the disk is unformatted or has been wiped clean before starting the process.
- 2. Mount the VHDX File:
- Open PowerShell with administrative privileges.
- Use the
Mount-VHDcmdlet to mount the VHDX file:
Mount-VHD -Path "C:\Path\To\Your\VHDXfile.vhdx"
- This will mount the VHDX file as a virtual disk, and you will see it in Disk Management.
- 3. Copy Data to the Physical Disk:
- Once mounted, the VHDX file will appear as a virtual disk. You can now use PowerShell to copy the partitions and data to the physical disk using the
ddutility or a disk cloning tool. - Alternatively, use the
DiskPartcommand to manually format and partition the physical disk if needed.
- 4. Use the
ddCommand (for Unix-based environments):
- If you’re running a Unix-based system, use the
ddcommand to copy data from the VHDX file to the physical disk:
sudo ddif=/dev/virtualdisk of=/dev/physicaldisk bs=64K conv=noerror,sync- This will ensure that the entire VHDX file contents are transferred to the physical disk.
- 5. Check Partition Alignment:
- After the data has been transferred, check partition alignment to avoid performance degradation. This can be done using Disk Management or PowerShell:
Get-Partition -DiskNumber X | Format-Table
- 6. Finalize and Eject the Disk:
- After the restoration process, safely eject the disk:
Dismount-VHD -Path "C:\Path\To\Your\VHDXfile.vhdx"
- The physical disk can now be connected to a physical machine.
Restore VHD to HDD: Step-by-Step Guide
Restoring a VHDX file to a physical HDD is a common task when transitioning from a virtualized environment to a physical one. This step-by-step guide outlines the process using native Windows utilities like Hyper-V Manager and Disk Management. Additionally, practical tips are provided to ensure compatibility between the VHDX format and the physical hardware to avoid common pitfalls.
Step 1: Prepare the Physical HDD
- Check Disk Capacity: Ensure that the HDD has enough space to accommodate the entire VHDX file. The physical HDD must have equal or greater capacity than the virtual hard disk.
- Partitioning and Formatting: Use Disk Management to format the physical HDD if it has not been formatted already. Ensure it uses the correct file system (NTFS or exFAT for most cases).
Step 2: Mount the VHDX File Using Disk Management
- 1. Open Disk Management by typing
diskmgmt.mscin the Start menu and pressing Enter. - 2. In the Action menu, click on Attach VHD.
- 3. Browse and select your VHDX file.
- 4. The VHDX will now appear as a new virtual disk in Disk Management.
Step 3: Copy Data from the VHDX to the HDD
- 1. Once the VHDX file is mounted, it will appear as a virtual disk with its partitions visible in Disk Management.
- 2. Use File Explorer to access the contents of the mounted VHDX.
- 3. Copy all the data from the VHDX virtual disk to the physical HDD using standard copy-paste or a disk cloning tool.
- Tip: For large VHDX files, consider using a specialized disk imaging or backup tool to streamline the transfer and minimize file corruption risk.
Step 4: Ensure Partition Alignment on the HDD
- After copying the data, it’s essential to ensure proper partition alignment to maintain optimal performance, especially for SSDs or advanced format drives (AFDs). You can use Disk Management or a tool like MiniTool Partition Wizard to verify and correct alignment if necessary.
Step 5: Finalize the VHDX Restoration
- Once the data transfer is complete, safely eject the virtual VHDX disk from Disk Management by selecting Detach VHD.
- Test the physical HDD by connecting it to a machine and verifying that the data is accessible and functioning as expected.
Practical Tips for Ensuring Compatibility:
- 1. VHDX vs. VHD Compatibility: Ensure the target system supports the VHDX format. Some older systems or tools may require the VHD format. If necessary, convert the VHDX to VHD using PowerShell or Hyper-V Manager.
- 2. File System Compatibility: Confirm that the file system on the physical HDD is compatible with the target machine’s operating system (e.g., NTFS for Windows, exFAT for cross-platform).
- 3. Integrity Check: After transferring the data, run an integrity check using chkdsk or similar tools to ensure that the restoration is error-free and the files are intact.
Restoring VHDX Files to Disks of Different Formats
When restoring VHDX files to various disk formats, such as SSDs, RAID arrays, and other storage architectures, it's essential to understand the specific requirements and nuances of each type of storage. This guide explores the process of restoring VHDX files to different disk formats and highlights the considerations necessary to ensure compatibility and performance in diverse storage environments.
Step 1: Preparing for Restoration
Before restoring a VHDX file, it’s important to assess the target storage architecture:
- SSD: SSDs offer faster read/write speeds and improved performance for virtual machine workloads, but require proper alignment of partitions for optimal performance.
- RAID Arrays: RAID setups provide varying levels of redundancy and performance, depending on the RAID level. Ensure that the RAID array is properly configured and the available capacity matches the size of the VHDX file.
- External Storage (USB, NAS, etc.): For external drives, ensure they are formatted with compatible file systems (NTFS, exFAT, etc.) and have sufficient capacity to store the VHDX file.
Step 2: Restoring VHDX to an SSD
Restoring a VHDX file to an SSD is typically straightforward, but performance optimization requires careful partition alignment and formatting.
Steps:
- 1. Attach the VHDX: Use Disk Management to attach the VHDX file.
- Open Disk Management and click Action → Attach VHD, then select your VHDX file.
- 2. Copy Data to SSD: Use standard methods, such as file copy or a disk imaging tool, to copy the VHDX file contents to the SSD.
- For best results, ensure the SSD is formatted with NTFS and that the partitions are aligned using Disk Management or third-party tools.
- 3. Check Partition Alignment: SSDs require properly aligned partitions to avoid performance degradation. Use a tool like MiniTool Partition Wizard or PowerShell to verify alignment.
- powershell
Get-Partition -DiskNumber X | Format-TableStep 3: Restoring VHDX to a RAID Array
Restoring to a RAID array introduces additional complexity due to the variety of RAID configurations (RAID 0, RAID 1, RAID 5, RAID 10, etc.). Each RAID type offers different levels of performance, redundancy, and capacity.
Steps:
- 1. Verify RAID Configuration: Ensure that your RAID array is set up correctly and has enough capacity for the VHDX file. RAID arrays may require more disk space due to redundancy configurations.
- 2. Attach the VHDX File: Use Disk Management or PowerShell to mount the VHDX.
- powershell
Mount-VHD -Path "C:\Path\To\Your\VHDXfile.vhdx"
- 3. Transfer Data to RAID Array: Use a disk cloning tool or manually copy the data from the VHDX file to the RAID array. Ensure the RAID controller supports the VHDX format and is optimized for the workload.
- 4. Monitor RAID Performance: After the restoration, monitor the performance of the RAID array to ensure that there are no bottlenecks and the array is functioning properly.
Step 4: Restoring VHDX to External Storage (USB, NAS)
When restoring to external storage such as USB drives or NAS systems, there are additional considerations, including connection speed and file system compatibility.
Steps:
- 1. Connect the External Storage: Ensure the external storage device is connected properly and has sufficient capacity.
- 2. File System Compatibility: Ensure the external storage is formatted with a file system compatible with the target machine (NTFS, exFAT, etc.). NAS systems may require SMB or NFS file-sharing protocols.
- 3. Copy the VHDX Data: Transfer the VHDX file to the external storage using the file copy method or a disk imaging tool. For NAS systems, use network-based transfer tools to avoid speed bottlenecks.
- 4. Test Accessibility: After the data transfer, ensure that the data is accessible and the external drive or NAS is functioning as expected.
Key Considerations for Different Storage Formats
- 1. Performance and Compatibility:
- SSDs: For SSDs, partition alignment and TRIM support are essential for optimal performance. Misaligned partitions can result in slower read/write speeds.
- RAID Arrays: Different RAID configurations offer varying performance and redundancy. RAID 0 provides performance but no redundancy, while RAID 5 or RAID 10 balances performance with data protection.
- External Storage: When using external storage like NAS or USB drives, the speed of the connection (USB 3.0, network bandwidth) can significantly impact the restoration process.
- 2. Partition Alignment: Especially important for SSDs, but also relevant for high-performance RAID arrays, ensuring that partitions are properly aligned during restoration will prevent performance bottlenecks.
- 3. Capacity and File System Compatibility: Ensure that the target disk or array has enough capacity to store the VHDX file and that the file system on the target disk is compatible with the intended operating system.
- 4. Integrity and Verification: After the restoration process, always run integrity checks (e.g.,
chkdskin Windows) to verify that the VHDX file has been restored correctly and that there are no file system errors or corruption.
How to Recover Data from a Corrupt VHDX File
VHDX file corruption can occur due to several factors, including power failures, malware attacks, or unexpected system crashes. When a VHDX file becomes corrupt, it may render the virtual machine or its data inaccessible, which can lead to downtime and potential data loss. Fortunately, tools like VMFS Recovery™ by DiskInternals provide effective solutions forVMware data recovery.
Common Causes of VHDX Corruption
Understanding the causes of VHDX corruption can help prevent future occurrences and assist in identifying the root cause of the issue:
- Power Failure: Abrupt power loss while the virtual machine is running can cause incomplete writes to the VHDX file, leading to corruption.
- Malware and Viruses: Malware or viruses can corrupt VHDX files by modifying the file structure or infecting the host system.
- System Crashes: A sudden system crash while the VHDX file is being accessed or modified can damage the file’s metadata, making it unreadable.
- Hardware Failures: Issues with the underlying storage medium (HDD, SSD) or RAID controller can lead to VHDX file corruption, especially during write operations.
- Software Bugs: Bugs in hypervisors or backup software can also contribute to VHDX corruption if they improperly handle file operations.
Steps to Recover Data from a Corrupt VHDX File Using VMFS Recovery™ by DiskInternals
VMFS Recovery™ by DiskInternals is a powerful tool designed to recover data from corrupt VHDX files, particularly for virtualized environments like Hyper-V. Here’s how you can recover data using this tool:
Step 1: Download and Install VMFS Recovery™ by DiskInternals
- 1. Download the VMFS Recovery™ software.
- 2. Install the software on a Windows machine with administrative rights to ensure full access to the recovery tool’s features.
Step 2: Launch VMFS Recovery™ and Locate the Corrupt VHDX File

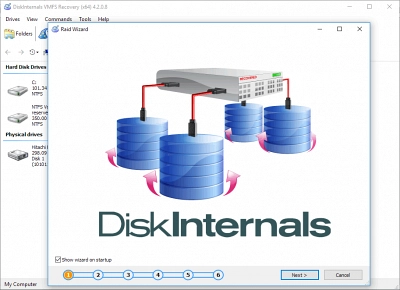
- 3. Open VMFS Recovery™ and select the VHDX Recovery module.
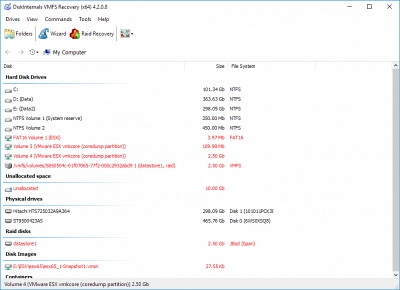
- 4. Browse and locate the corrupt VHDX file on your local storage or network. The software will automatically scan the selected VHDX file for accessible partitions and data.
Step 3: Analyze the Corrupt VHDX File

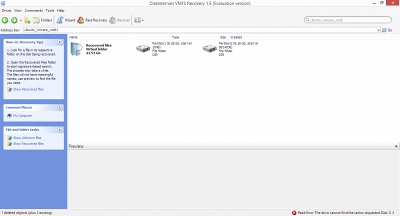
- 5. VMFS Recovery™ will conduct an in-depth scan of the VHDX file, identifying any recoverable files, folders, or virtual machine components.
- 6. The tool offers both quick and full scan options. For severely corrupted files, it is recommended to perform a full scan to maximize recovery potential.

- Tip: Monitor the process and review any system logs generated by the software for insight into the corruption type and severity.
Step 4: Preview Recoverable Files
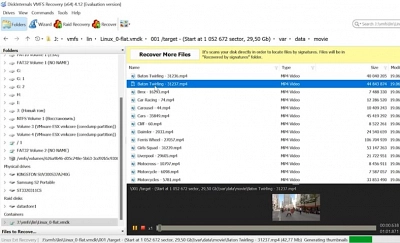
- 7. Once the scan is complete, VMFS Recovery™ displays a list of recoverable files. You can preview the contents of these files to verify their integrity before proceeding with the recovery.
- 8. This feature is especially useful if you need to recover specific files from the VHDX, such as critical documents, database files, or system snapshots.
Step 5: Recover Data from the Corrupt VHDX

- 9. Select the files or virtual machine components you want to recover and choose a safe location for recovery (external drive, network storage, etc.).
- 10. Click Recover to initiate the data extraction process. VMFS Recovery™ will restore the selected files to the chosen location.
Step 6: Verify and Validate Recovered Data
- 11. After recovery, ensure that the restored data is functional by mounting the files or testing the virtual machine.
- 12. It’s crucial to validate the integrity of the restored data by running tests or accessing the recovered files to confirm they are fully usable.
Best Practices for VHDX File Recovery
To mitigate the risk of data loss from VHDX file corruption and ensure quick recovery, implementing proactive measures is essential. These practices, including regular backups, snapshots, and maintaining a robust recovery plan, help ensure data integrity and minimize downtime in the event of corruption or failure.
1. Regular Backups
One of the most effective ways to prevent data loss is by performing regular backups of VHDX files. A proper backup strategy ensures that even if a VHDX file becomes corrupted or lost, a recent copy can be restored quickly.
- Automated Backup Solutions: Use automated backup software to schedule regular backups of VHDX files. This can be done using built-in tools like Windows Server Backup or third-party solutions tailored for virtual environments.
- Offsite and Redundant Backups: Store backups both locally and offsite (e.g., cloud storage) to ensure data availability in case of hardware failure or disaster.
- Versioning: Keep multiple versions of backups to safeguard against accidentally saving over or corrupting the most recent backup.
2. Use of Hyper-V Snapshots
Snapshots in Hyper-V allow you to capture the state of a virtual machine at a specific point in time. If a problem arises, such as corruption or system misconfiguration, you can revert to a known working state using these snapshots.
- Regular Snapshot Creation: Create snapshots of critical virtual machines periodically, especially before significant updates or system changes.
- Snapshot Management: Regularly delete old or unnecessary snapshots to avoid performance degradation and excessive disk space usage.
3. Disk Monitoring and Health Checks
Maintaining the physical disks that store VHDX files is crucial for preventing corruption caused by hardware failure. Regularly monitoring disk health and performance can help you identify potential issues before they result in data loss.
- SMART Monitoring: Enable SMART monitoring for HDDs and SSDs to detect early signs of hardware failure.
- RAID Configurations: For high availability, use RAID configurations that offer redundancy (e.g., RAID 1, RAID 5) to protect VHDX files in case of disk failure.
4. Integrity Checks and File System Maintenance
Running regular file system integrity checks on virtual disks helps identify and repair errors that could lead to VHDX corruption.
- Chkdsk: Use the built-in Windows chkdsk command to scan and fix errors on physical and virtual disks.
- Defragmentation and Optimization: Periodically optimize the file system to prevent fragmentation that can degrade performance and increase the likelihood of errors.
5. Disaster Recovery Planning
Developing a robust disaster recovery plan is critical to ensuring that your virtual environment can be restored quickly in case of a major failure or data loss.
- Tested Recovery Plan: Test the recovery plan regularly to ensure it works as expected under different failure scenarios.
- Documented Procedures: Keep detailed documentation of your recovery steps, including the use of tools like VMFS Recovery™ for recovering corrupt VHDX files.
Case Study: DiskInternals VMFS Recovery™ in Action
A mid-sized IT service provider experienced a major failure in their virtual infrastructure after a power outage corrupted multiple VHDX files. The virtual machines hosted critical applications, including a database server and file server, which were essential to business operations. The IT team was unable to boot the virtual machines or access their data due to the corruption of the VHDX files.
Challenges Faced:
- The VHDX files were too large to restore from available backups, as the backup system had missed the latest snapshots due to storage limitations.
- Traditional file recovery methods were not able to access the corrupted VHDX files, leaving the IT team at risk of significant data loss.
Solution Using DiskInternals VMFS Recovery™:
- 1. Quick Deployment: The IT team quickly installed DiskInternals VMFS Recovery™ on their backup server and scanned the corrupt VHDX files.
- 2. Deep Scanning and Recovery: VMFS Recovery™ performed a full deep scan of the corrupt files, identifying multiple recoverable files and virtual machine components, including the database and critical system files.
- 3. Preview and Selective Recovery: The software allowed the team to preview the recoverable files before initiating the recovery, ensuring that only essential data was restored first to minimize downtime.
- 4. Successful Data Recovery: Within hours, the IT team recovered the entire VHDX file containing the database and bootable system files. The virtual machines were successfully restarted, and business operations resumed with minimal data loss.
Outcome:
- Downtime Reduction: Thanks to the quick deployment and efficient scanning process of DiskInternals VMFS Recovery™, the IT provider was able to minimize downtime to less than one working day.
- Data Preservation: The team recovered nearly 100% of the critical data, preventing potential business disruptions or financial losses.
Lessons Learned:
- The incident highlighted the importance of maintaining redundant backups and regularly testing recovery procedures. The use of DiskInternals VMFS Recovery™ proved invaluable for handling VHDX corruption and restoring critical systems quickly.
Conclusion: Ensuring Smooth VHDX Restorations
Successfully recovering and restoring VHDX files requires a combination of proactive measures, careful execution, and the right tools. By following best practices such as maintaining regular backups, utilizing Hyper-V snapshots, and monitoring disk health, you can prevent many causes of VHDX corruption. In the event of a corrupt VHDX file, solutions like DiskInternals VMFS Recovery™ provide a reliable method for recovering critical data, minimizing downtime, and ensuring business continuity.
Key steps for ensuring smooth VHDX restoration include:
- Performing regular backups to safeguard against unexpected failures.
- Creating and managing snapshots to enable quick rollbacks in virtual environments.
- Running health checks and optimizing storage systems to prevent disk and file corruption.
- Using advanced recovery tools, like VMFS Recovery™, for efficient and thorough data recovery from damaged VHDX files.
By implementing these practices and using trusted recovery solutions, you can ensure your virtual environments remain resilient and recoverable, even in the face of VHDX file corruption.
